
There is a specific kind of dread that comes with opening a portrait file and seeing blotchy, uneven skin tones staring back at you. Early in my retouching work, I used to just grab the Spot Healing Brush and start clicking, hoping for the best. The results looked like someone had ironed a face. A client once told me my edits looked “a little plastic,” and that was the politest way she could have put it. That comment sent me down a long road of learning frequency separation properly, and I have never gone back to winging it.
In this Jessica Kobeissi tutorial, she walks through a full portrait retouch using frequency separation as her foundation. Watch the full tutorial on YouTube before or alongside this breakdown. What I love about her approach is how restrained it is. She is not chasing perfection. She is chasing believability. That distinction is everything in beauty retouching, and it took me an embarrassingly long time to understand the difference.
What she demonstrates in this video maps almost exactly onto the workflow I use for beauty brand work today. I want to break it down into concrete steps so you can follow along in Photoshop without needing to pause and rewind every thirty seconds.
Step 1: Set Up Your Frequency Separation Layers with an Action
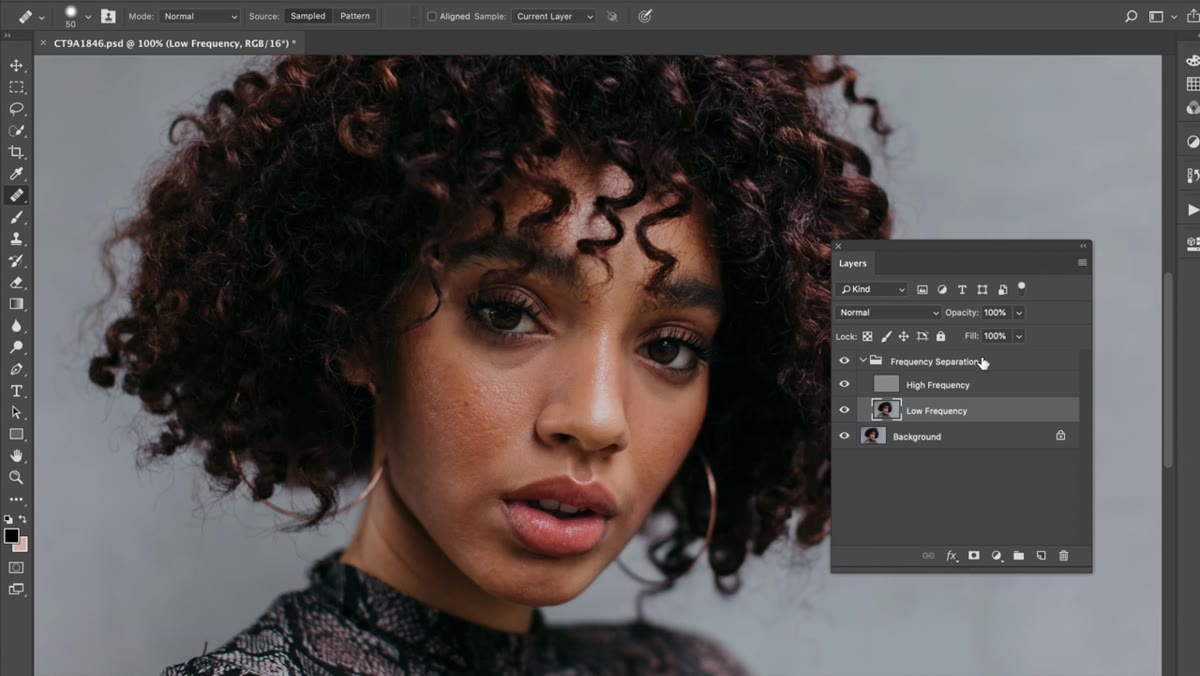 Frequency separation folder and layers already organized in Photoshop
Jessica mentions she uses a pre-built action to generate her frequency separation folder structure automatically. If you have not built one yet, this is worth doing before you do anything else. A basic frequency separation setup involves two layers: a low frequency layer (color and tone information) and a high frequency layer (texture and fine detail). The action just automates the steps of creating and blending those layers correctly so you are not rebuilding the setup from scratch on every file.
Frequency separation folder and layers already organized in Photoshop
Jessica mentions she uses a pre-built action to generate her frequency separation folder structure automatically. If you have not built one yet, this is worth doing before you do anything else. A basic frequency separation setup involves two layers: a low frequency layer (color and tone information) and a high frequency layer (texture and fine detail). The action just automates the steps of creating and blending those layers correctly so you are not rebuilding the setup from scratch on every file.
Once the action runs, you have a clean, organized starting point. Keeping your workspace consistent like this is not just about speed. It means you make fewer mistakes because you always know exactly where you are in the layer stack.
Step 2: Duplicate the Low Frequency Layer Before You Touch Anything
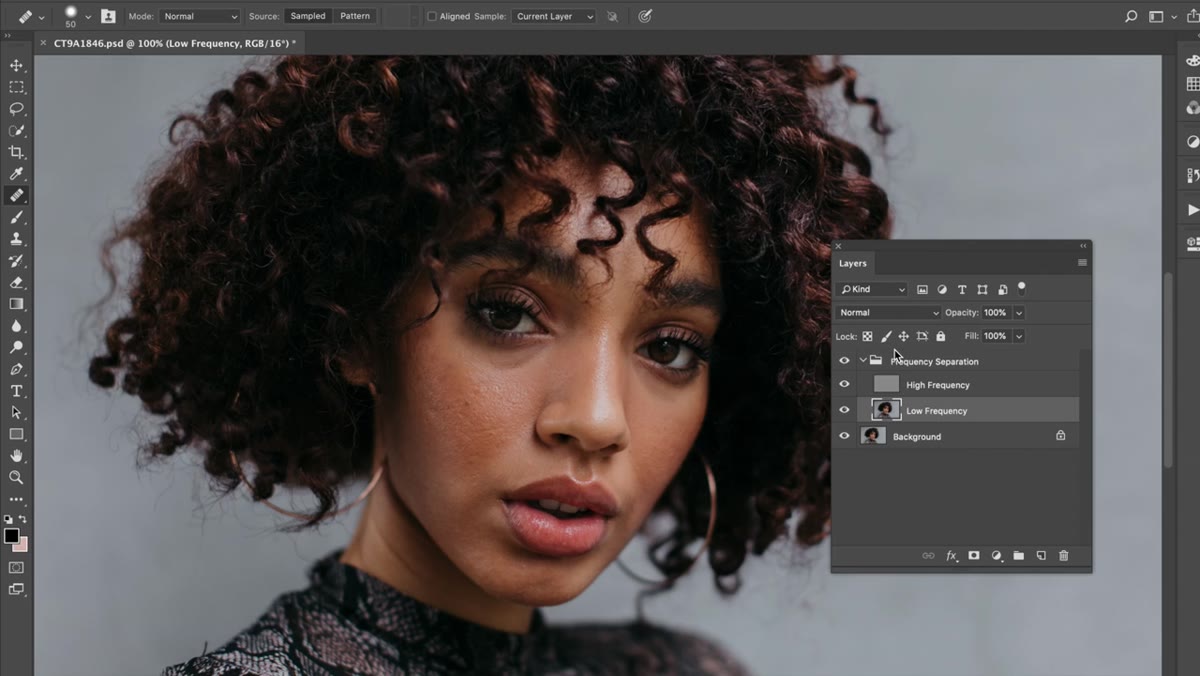 Duplicating the low frequency layer in the layers panel
Before making a single edit, Jessica duplicates her low frequency layer. This is her safety net. If a section of blending goes sideways, she can mask it out or delete it and start that section fresh without losing her entire base.
Duplicating the low frequency layer in the layers panel
Before making a single edit, Jessica duplicates her low frequency layer. This is her safety net. If a section of blending goes sideways, she can mask it out or delete it and start that section fresh without losing her entire base.
I do the same thing, and I name my duplicate something obvious like “LF - working copy” so I never accidentally paint on the original. It takes five seconds and has saved me from some genuinely bad situations. Think of it like saving a version of your document before a big round of edits.
Step 3: Hide the High Frequency Layer to Work on Color and Tone
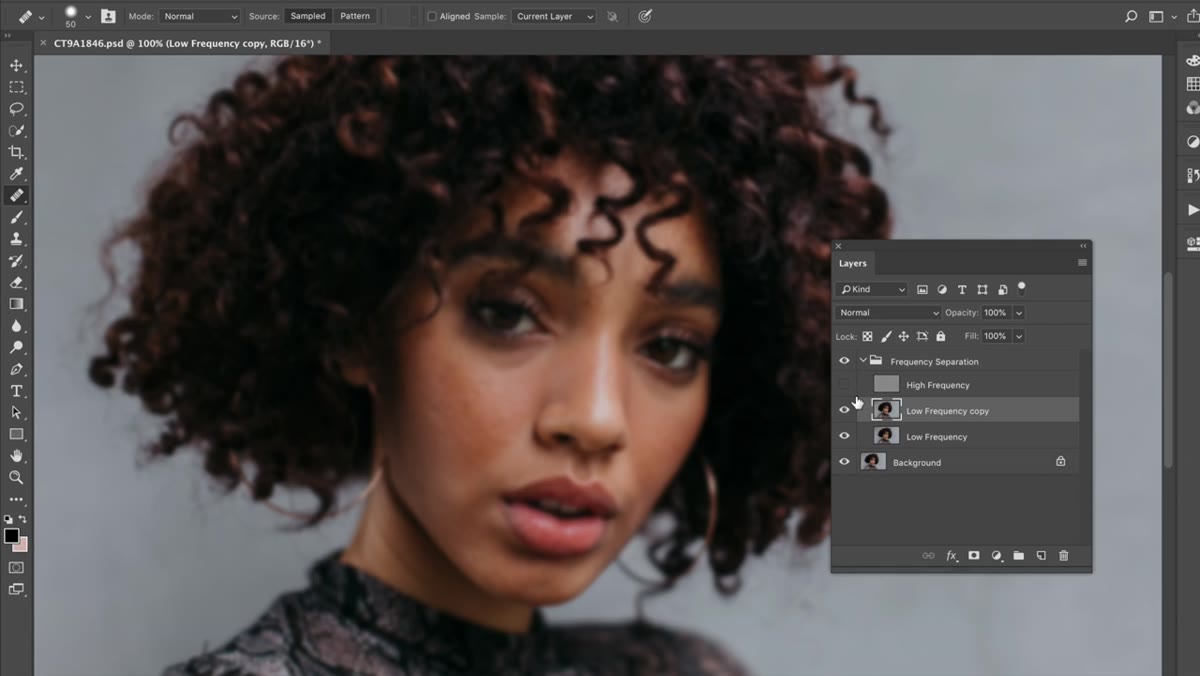 High frequency layer toggled off, showing only color and tone information
With the high frequency layer turned off, you are looking at a soft, blurry version of the portrait. This is intentional. Without the texture information competing for your attention, you can see the actual color transitions in the skin much more clearly.
High frequency layer toggled off, showing only color and tone information
With the high frequency layer turned off, you are looking at a soft, blurry version of the portrait. This is intentional. Without the texture information competing for your attention, you can see the actual color transitions in the skin much more clearly.
This is where you will spot the problem areas: patches where the skin tone shifts abruptly, shadows that are too dense, or highlights that feel disconnected from the surrounding skin. Working on the low frequency layer in this view means you are fixing color and tone without accidentally destroying the natural texture of the skin.
Step 4: Use the Healing Brush (Set to Legacy Mode) to Blend Skin Tones
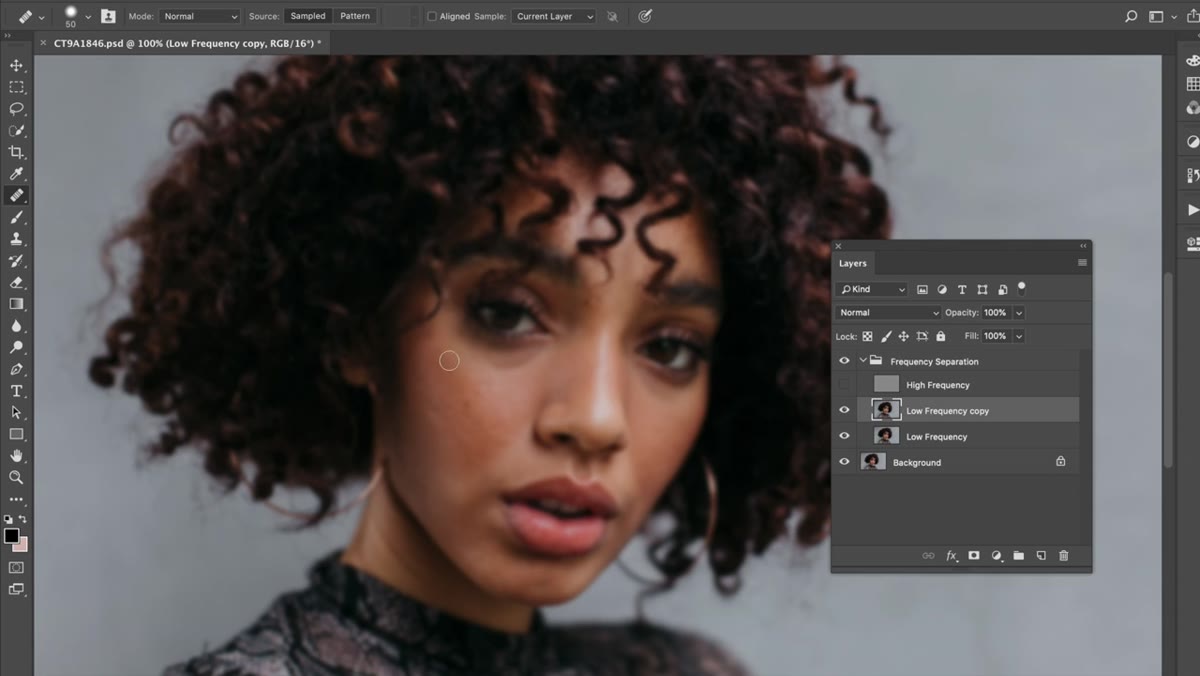 Healing Brush tool active, blending skin tones on the low frequency layer
This is the core of the retouching work. Jessica uses the Healing Brush tool to sample nearby skin tones and paint them into problem areas, smoothing out the transitions without erasing the natural variation of real skin.
Healing Brush tool active, blending skin tones on the low frequency layer
This is the core of the retouching work. Jessica uses the Healing Brush tool to sample nearby skin tones and paint them into problem areas, smoothing out the transitions without erasing the natural variation of real skin.
One important note she raises: if you are on a newer version of Photoshop CC, the default Healing Brush behavior may have changed in a way that makes blending feel unpredictable. You can restore the older behavior by going to Edit, then Preferences, then Tools, and enabling Legacy Healing. It is not a perfect recreation of older Photoshop versions, but it is significantly closer to the behavior most retouchers were trained on and expect. Do not skip this if your Healing Brush feels like it is fighting you.
Step 5: Sample Colors Close to the Area You Are Working On
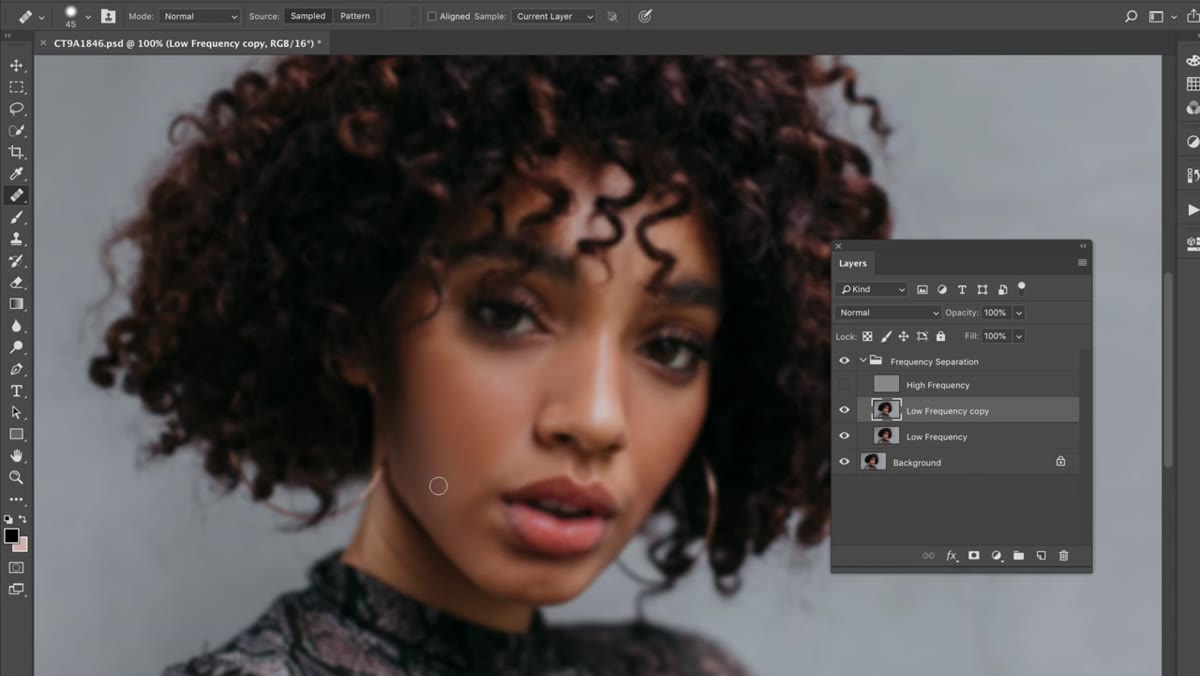 Healing Brush sampling nearby skin tone, not pulling from a distant area
Jessica is specific about this, and it is one of the most important habits in skin retouching. When you option-click to set your sample point with the Healing Brush, always sample from a part of the skin that is already close in tone and light to where you are painting. Sampling from the highlight on the cheek to fix a shadow under the jaw will create a muddy, mismatched result.
Healing Brush sampling nearby skin tone, not pulling from a distant area
Jessica is specific about this, and it is one of the most important habits in skin retouching. When you option-click to set your sample point with the Healing Brush, always sample from a part of the skin that is already close in tone and light to where you are painting. Sampling from the highlight on the cheek to fix a shadow under the jaw will create a muddy, mismatched result.
Think of the skin as a gradient map. Your job is to make the transitions between zones feel continuous, not to flatten them into one uniform tone. Keeping your sample point within the same tonal neighborhood is what separates retouching that reads as natural from retouching that reads as edited.
Step 6: Turn the High Frequency Layer Back On and Assess
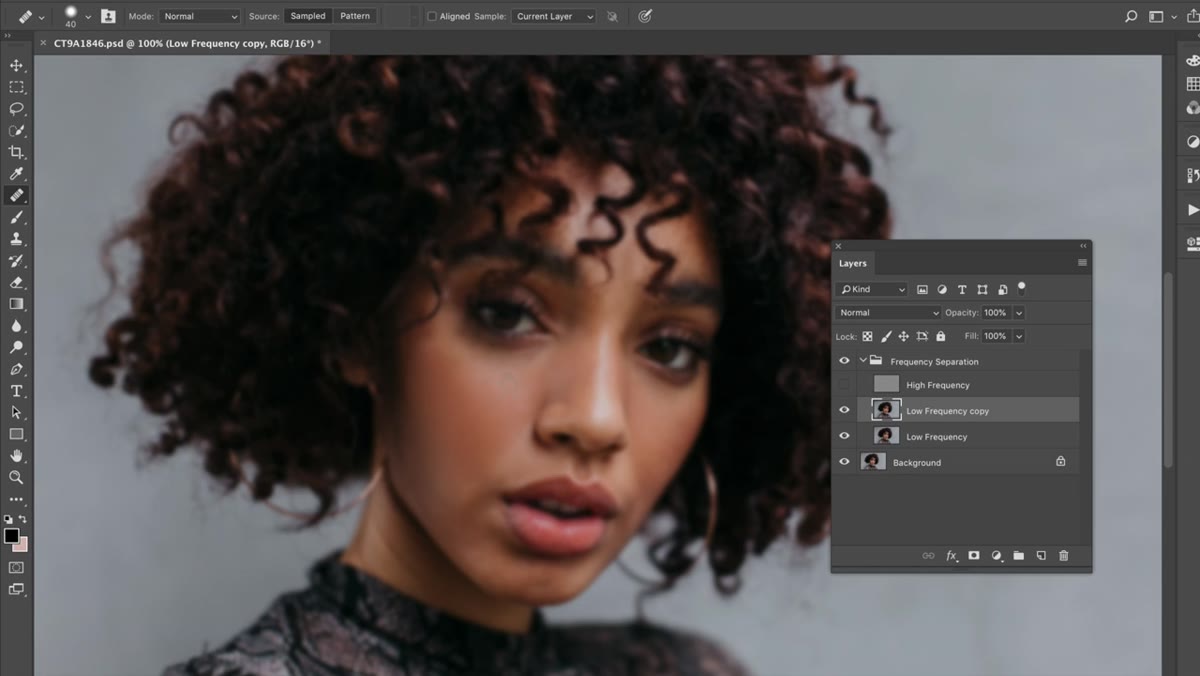 High frequency layer toggled back on, revealing texture over corrected tones
Once you have done a round of blending on the low frequency layer, toggle the high frequency layer back on. The skin texture that layer holds will sit on top of your color corrections, and this is where you can see whether your work is holding up. Lines and pores that read as natural features will still show through. That is the goal.
High frequency layer toggled back on, revealing texture over corrected tones
Once you have done a round of blending on the low frequency layer, toggle the high frequency layer back on. The skin texture that layer holds will sit on top of your color corrections, and this is where you can see whether your work is holding up. Lines and pores that read as natural features will still show through. That is the goal.
Jessica is intentional about leaving certain shadows and lines in place, specifically the natural shadow under the eye. She softens it rather than eliminating it. Over-blending that area is one of the most common mistakes that produces the “plastic” look. If a feature exists for a structural reason, preserve it and refine it rather than erasing it.
A Note from My Own Retouching Work
Frequency separation only stays invisible when you work slowly. I know that sounds obvious, but the temptation to rush through skin cleanup is real, especially on client deadlines. What I do now on beauty brand work is set a layer opacity rule: after any healing work on the low frequency layer, I temporarily drop the layer opacity to around 60 percent and look at the blend. If something looks wrong at 60 percent, it is going to look wrong in the final delivery too. This quick opacity check has caught more problem areas for me than any other habit I have built.
I also keep a before-and-after toggle shortcut set up so I can flip between the original and my working file at any point. Staring at a retouched image for too long makes you lose your reference point for what natural skin actually looks like. Flipping back resets your eye.
The single most important idea in this whole workflow is one Jessica returns to throughout the video: you are not removing the skin, you are refining it. Blending tones, smoothing color transitions, and softening harsh shadows should all serve the goal of making the portrait look like the best version of what was actually there, not a different face entirely.
Watch the full tutorial on YouTube to see Jessica work through the full retouch in real time. Her pacing and her instincts for when to stop are worth studying on their own.
Comments
Leave a Comment