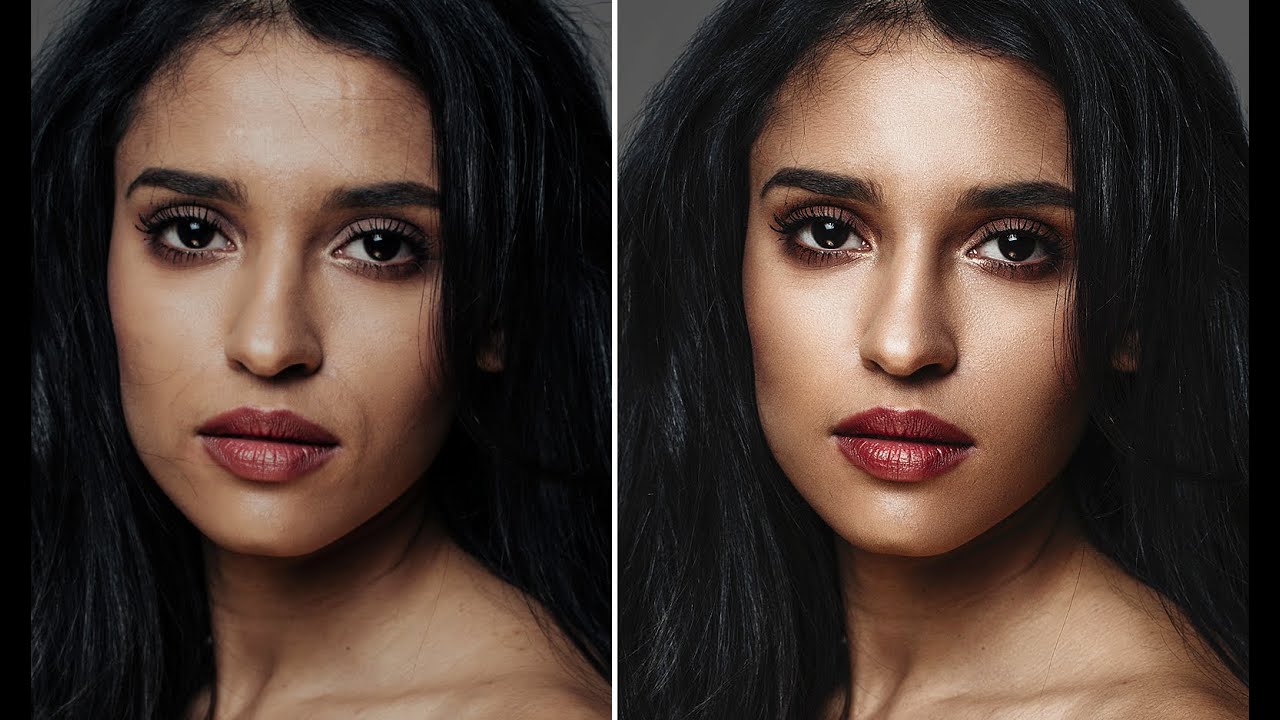
There is a particular kind of dread that comes from zooming into a portrait at 100% and seeing a patchwork of mismatched skin tones staring back at you. Early in my retouching work, I overcorrected for that by smoothing everything into oblivion, and I paid for it when a client told me the finished image looked “like a wax figure.” That note stung, and it sent me back to the drawing board to figure out how to clean up uneven color without erasing the proof that a real human was photographed. Frequency separation was the answer, but knowing the technique exists and actually knowing how to use it with restraint are two very different things.
That’s why I keep returning to tutorials from photographers who work this way professionally, people for whom retouching is not a weekend hobby but a deliverable with a deadline. In this Jessica Kobeissi tutorial on fashion portrait retouching and color editing, she walks through her full process from a softbox-lit portrait to a finished edit, and the approach is refreshingly restrained. No plastic skin, no over-smoothed faces, just clean, natural-looking work. Here is how she does it, broken down into steps you can follow in your own Photoshop workflow.
Step 1: Crop First, Then Commit
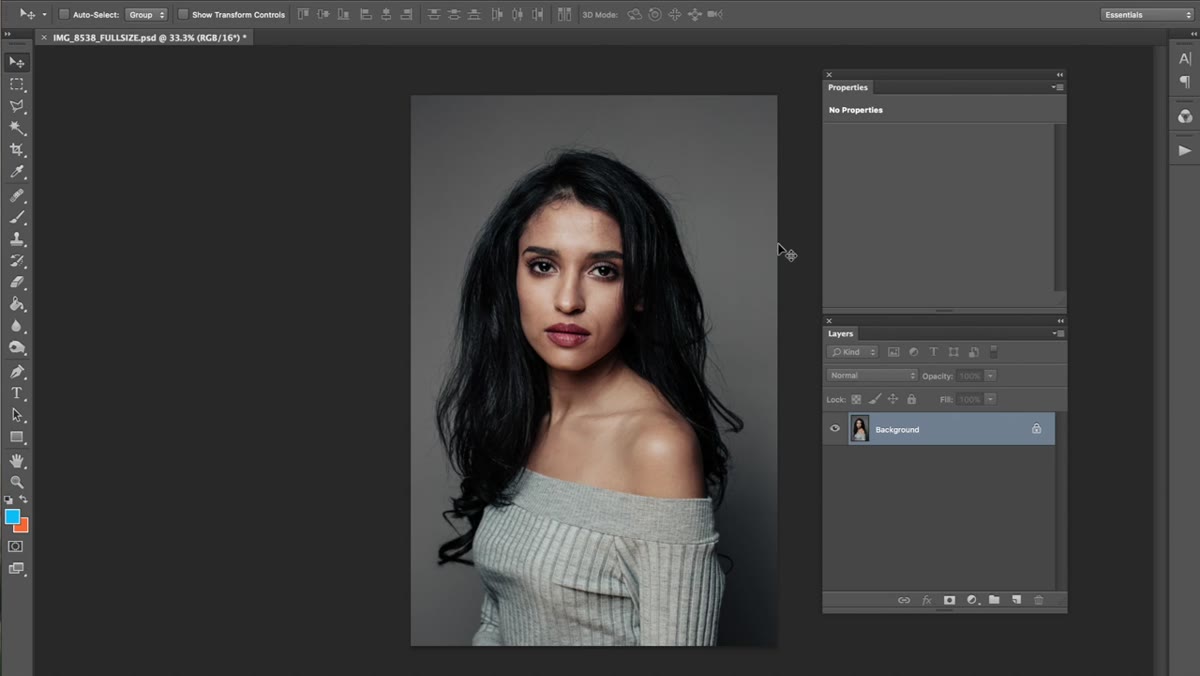 Crop tool active on a softbox-lit portrait
Before any retouching begins, Jessica crops the image to its final composition. This matters more than it sounds. Retouching takes time, and working on pixels that will never appear in the final image is wasted effort. She uses the crop tool with Shift and Alt held down to constrain the aspect ratio while adjusting from the center outward, which keeps the composition balanced as she tightens the frame.
Crop tool active on a softbox-lit portrait
Before any retouching begins, Jessica crops the image to its final composition. This matters more than it sounds. Retouching takes time, and working on pixels that will never appear in the final image is wasted effort. She uses the crop tool with Shift and Alt held down to constrain the aspect ratio while adjusting from the center outward, which keeps the composition balanced as she tightens the frame.
If you shoot loosely the way she does, building in breathing room to make decisions in post, get comfortable doing this step before you open a single adjustment layer. Locking in your crop means every retouching decision you make after this point is purposeful.
Step 2: Run Your Frequency Separation Action
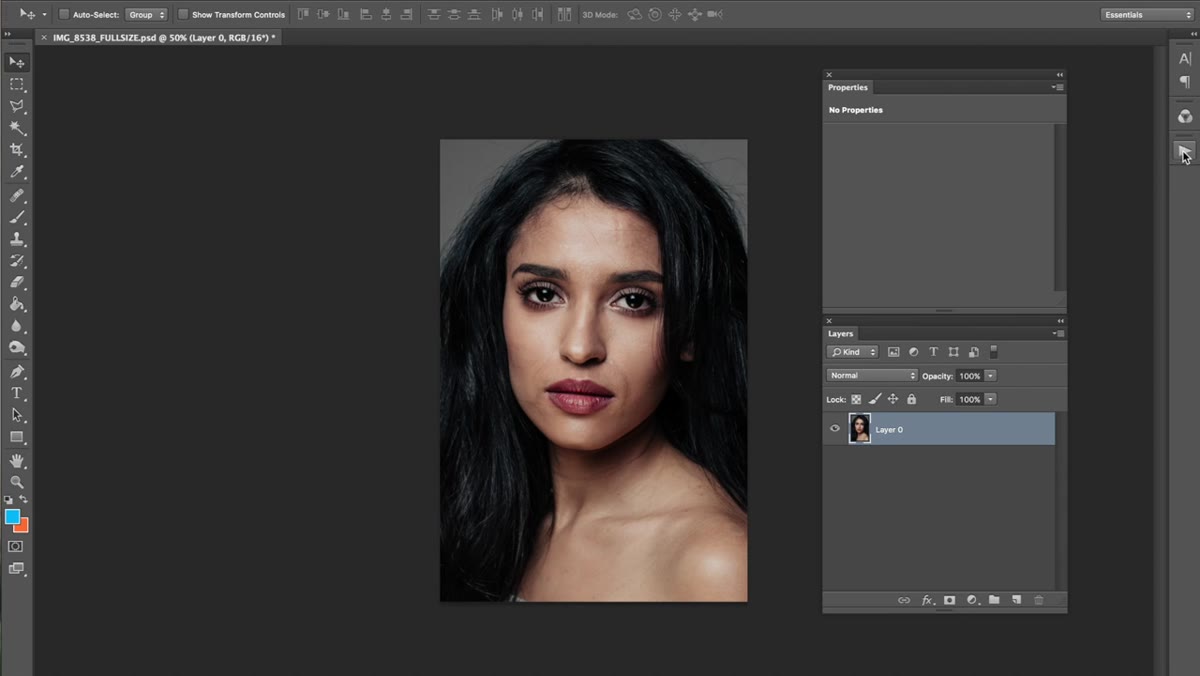 Frequency separation layers appearing in the Layers panel
Jessica uses a custom Photoshop action to set up her frequency separation layers automatically. Frequency separation works by splitting a photo into two layers: a low-frequency layer that holds color and tone, and a high-frequency layer that holds texture and fine detail. Editing them independently means you can smooth out blotchy skin tones on the low-frequency layer without touching the pores and texture living on the high-frequency layer above it.
Frequency separation layers appearing in the Layers panel
Jessica uses a custom Photoshop action to set up her frequency separation layers automatically. Frequency separation works by splitting a photo into two layers: a low-frequency layer that holds color and tone, and a high-frequency layer that holds texture and fine detail. Editing them independently means you can smooth out blotchy skin tones on the low-frequency layer without touching the pores and texture living on the high-frequency layer above it.
She built her own action for this and mentions it is available for download. If you have never set one up yourself, I named mine after a Nora Ephron film (as I do with all my actions), and honestly, recording your own is worth the 10 minutes it takes once. The point is to get those two layers separated and ready to work on without going through the setup steps manually every time.
Step 3: Duplicate the Low-Frequency Layer
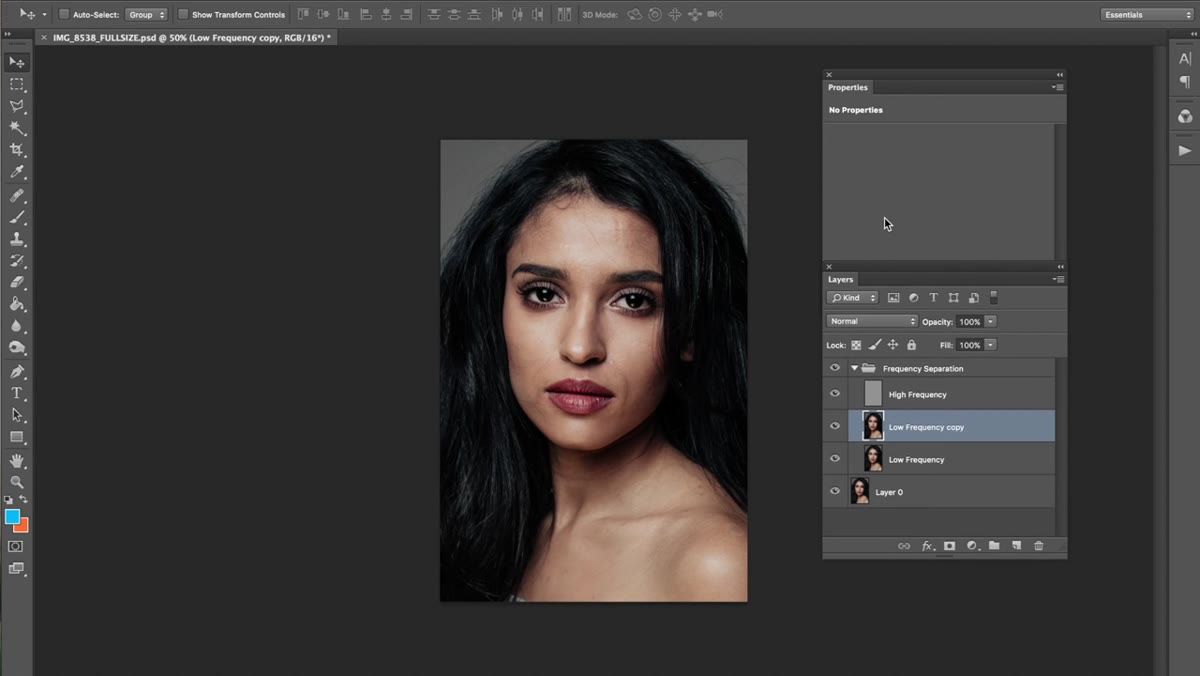 Duplicating the low frequency layer in the Layers panel
Once the frequency separation layers exist, Jessica duplicates the low-frequency layer before painting on it. This is good practice and worth making a habit. Keeping the original low-frequency layer intact underneath gives you a safety net. If a section of your color work goes sideways, you can mask it out or simply compare it against the untouched version below.
Duplicating the low frequency layer in the Layers panel
Once the frequency separation layers exist, Jessica duplicates the low-frequency layer before painting on it. This is good practice and worth making a habit. Keeping the original low-frequency layer intact underneath gives you a safety net. If a section of your color work goes sideways, you can mask it out or simply compare it against the untouched version below.
Working on a copy also means you can lower the opacity of your painted layer if the blending starts to look too smooth. That one slider has saved more of my edits than I can count.
Step 4: Paint Colors Gently on the Low-Frequency Layer
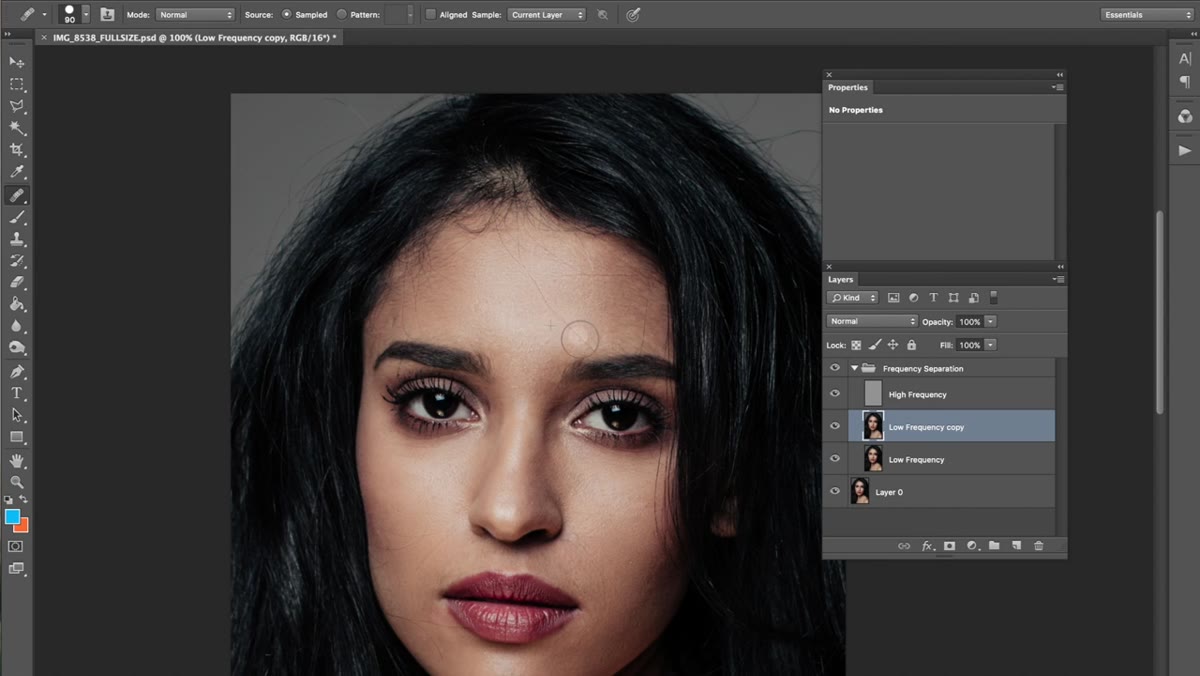 Painting over patchy skin tones on the low frequency layer
This is the core of her retouching pass. With the high-frequency (texture) layer turned off momentarily, she can see exactly where the skin color is uneven and patchy. Her goal is not to create a flat, uniform surface. She is just helping colors transition more smoothly from one area to the next, the way a very subtle gradient would connect two zones.
Painting over patchy skin tones on the low frequency layer
This is the core of her retouching pass. With the high-frequency (texture) layer turned off momentarily, she can see exactly where the skin color is uneven and patchy. Her goal is not to create a flat, uniform surface. She is just helping colors transition more smoothly from one area to the next, the way a very subtle gradient would connect two zones.
She uses a soft brush, samples nearby colors, and paints at a low opacity to blend those patches together without flattening the overall skin tone. The key restraint here is avoiding any strong lines in the image, especially around the nose, eyes, and mouth contours. Softening those lines is where retouching crosses from “cleaned up” into “cartoony,” and once you see it you cannot unsee it.
Step 5: Leave Shadows Where They Belong
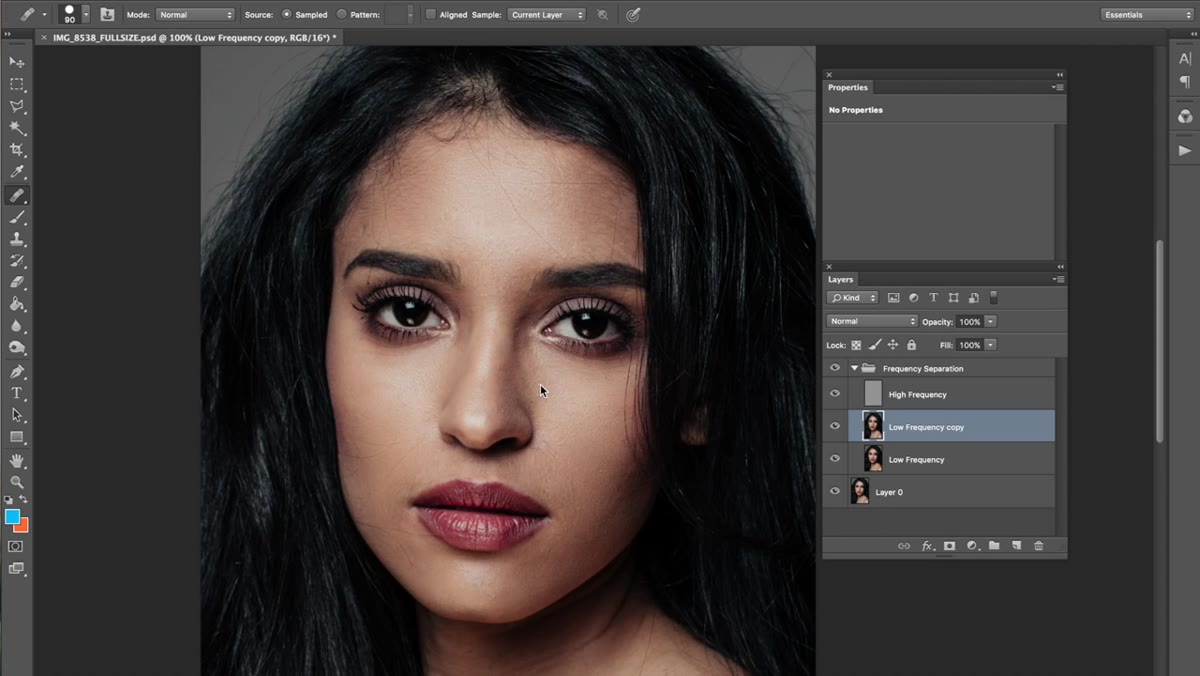 Low-frequency layer with subtle under-eye shadows retained
Jessica makes a point of not aggressively removing under-eye shadows. She keeps a natural amount of depth there, and it is a philosophy I have fully adopted in my own work. Shadows give a face its three-dimensional quality. When they are blasted out entirely, the face starts to look flat and unmistakably retouched.
Low-frequency layer with subtle under-eye shadows retained
Jessica makes a point of not aggressively removing under-eye shadows. She keeps a natural amount of depth there, and it is a philosophy I have fully adopted in my own work. Shadows give a face its three-dimensional quality. When they are blasted out entirely, the face starts to look flat and unmistakably retouched.
The practical rule I follow now: if the shadow reads as part of the person’s bone structure or natural lighting, leave it. If it reads as fatigue or a color imbalance, lighten it slightly. There is a real difference between the two, and training your eye to see it is most of the job.
Step 6: Evaluate With the High-Frequency Layer Back On
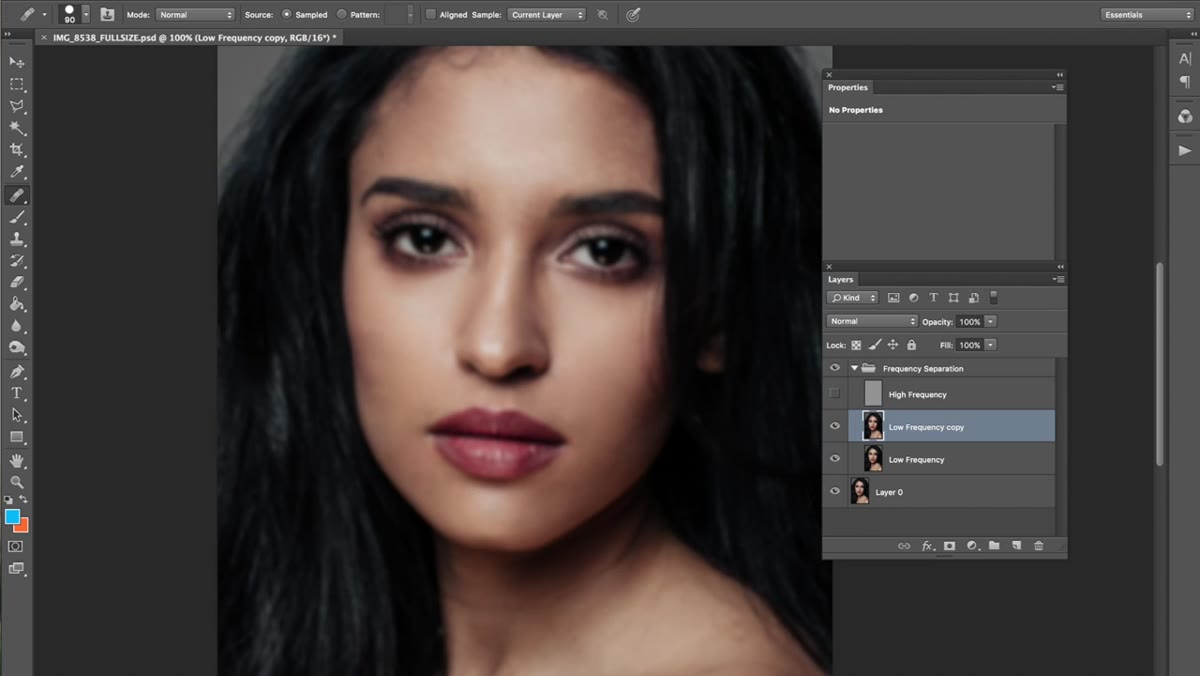 High frequency texture layer toggled back on over smoothed skin
After the color pass is complete, Jessica turns the high-frequency layer back on to see the full image. This is where you find out whether the work holds up. Because the texture layer is untouched, all the pore detail and fine skin structure that was there in the original is still there now. What has changed is only the color and tone underneath it.
High frequency texture layer toggled back on over smoothed skin
After the color pass is complete, Jessica turns the high-frequency layer back on to see the full image. This is where you find out whether the work holds up. Because the texture layer is untouched, all the pore detail and fine skin structure that was there in the original is still there now. What has changed is only the color and tone underneath it.
If something looks over-blended at this stage, the answer is almost never to add more texture back. It usually means the low-frequency painting was too aggressive, and a quick opacity reduction or a painted mask will dial it back to where it should be.
What I Do Differently (and Why)
Jessica works from a softbox setup where the lighting is relatively controlled, which makes frequency separation very manageable. In my work for beauty brands, I sometimes receive images shot with harder, more directional light, and that changes the equation. Harsh light carves out texture and shadows in ways that require a slower, more zone-by-zone approach on the low-frequency layer.
My addition to this workflow: I break the face into loose zones (forehead, cheeks, chin, under eyes) and work each one separately with its own layer. It is slower, but it gives me independent control over each area without risking a change in one zone bleeding into another. For anyone doing high-end beauty work where skin consistency matters across a full campaign, that extra layer of control is worth building into your action sequence from the start.
The single most important thing Jessica models in this tutorial is restraint. The goal of retouching skin is not to make it look perfect. It is to make it look like healthy, natural skin that simply photographs well. Once that shift in intention clicks, the technical steps start to feel much more intuitive.
Watch the full tutorial on YouTube to see her complete process, including the color editing pass that follows the retouch work.
Comments
Leave a Comment