
There’s a version of portrait retouching that feels like following a recipe. Same steps, same order, same result every time. For a long time, that was me. I built elaborate action sets (I still name them after movies – my frequency separation stack is called “The Prestige”) and ran every portrait through the same pipeline. It was efficient. It was also making my work look a little lifeless, like I was manufacturing faces rather than finishing photographs.
What snapped me out of it was watching editors who work more intuitively, people who start with a general direction and let the image tell them what it needs. In this Jessica Kobeissi tutorial on portrait retouching and editing, she does exactly that. She opens the video by saying she has nothing planned and she’s going to freestyle the whole thing. And the result is genuinely instructive, not because she’s teaching a formula, but because you get to watch a working photographer think out loud while she makes real decisions. Let me walk you through what she does and why each choice matters.
Step 1: Start in Camera Raw with Camera Calibration
 Jessica opening portrait file in Camera Raw panel
Before the image even touches Photoshop, Jessica makes her first creative move inside Adobe Camera Raw – and she starts somewhere most people skip entirely. Instead of going straight to the Basic panel, she opens Camera Calibration. This panel lets you shift the hue and saturation of the red, green, and blue primaries independently. It’s a foundational color move, not a corrective one. Pushing the red primary toward orange, for example, can warm skin tones in a way that feels more organic than simply dragging the Temperature slider.
Jessica opening portrait file in Camera Raw panel
Before the image even touches Photoshop, Jessica makes her first creative move inside Adobe Camera Raw – and she starts somewhere most people skip entirely. Instead of going straight to the Basic panel, she opens Camera Calibration. This panel lets you shift the hue and saturation of the red, green, and blue primaries independently. It’s a foundational color move, not a corrective one. Pushing the red primary toward orange, for example, can warm skin tones in a way that feels more organic than simply dragging the Temperature slider.
The reason to do this first is that Camera Calibration affects the raw data before any other adjustments stack on top. Think of it as setting the color personality of the image before you start fine-tuning. Jessica toggles between the primary channels and watches how the overall palette shifts. It’s worth spending a few minutes here even if you only make subtle moves – a small hue shift in the blue primary can clean up muddy shadows without touching your Tone Curve.
Step 2: Dial In Highlights and Shadows in the Basic Panel
 Basic panel sliders with highlights pulled down, shadows lifted
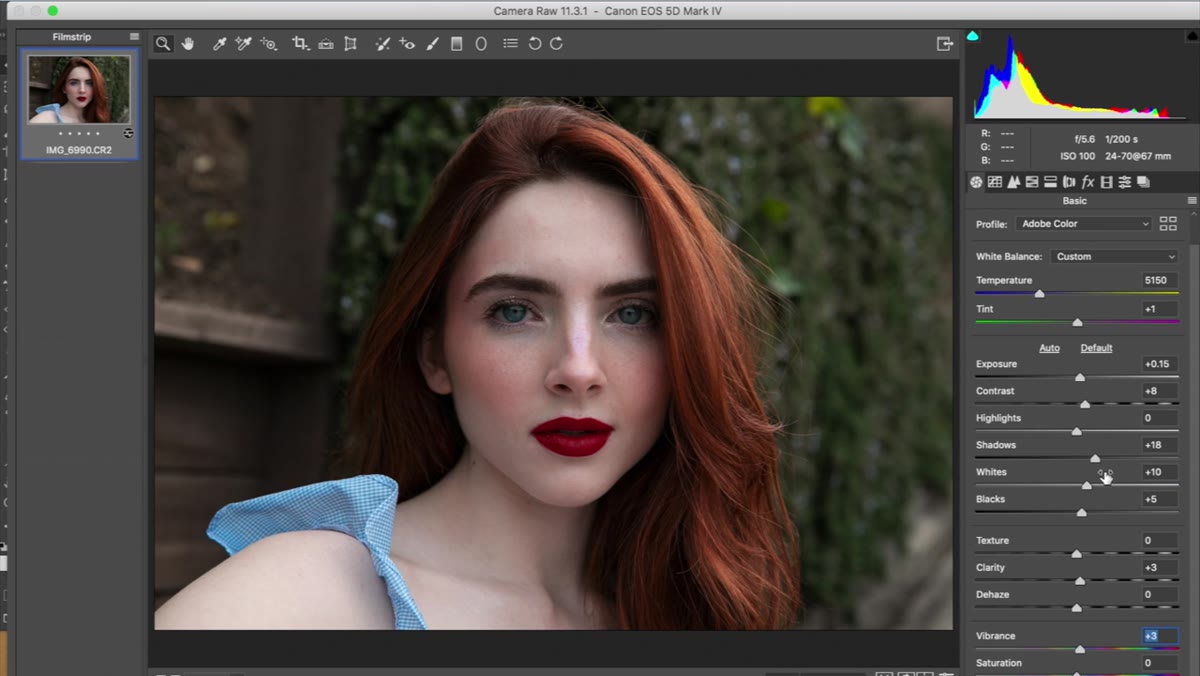
Once her color calibration feels right, Jessica makes two targeted tonal adjustments: she pulls the Highlights down slightly and nudges the Shadows up. This is a classic portrait move for a specific reason. Highlight recovery brings back detail in bright skin areas that can otherwise blow out to flat white, especially on lighter complexions under strong light. Lifting the shadows opens up the darker mid-tones – under the chin, in the hair, along the jaw line – without making the whole image look flat.
Basic panel sliders with highlights pulled down, shadows lifted
Once her color calibration feels right, Jessica makes two targeted tonal adjustments: she pulls the Highlights down slightly and nudges the Shadows up. This is a classic portrait move for a specific reason. Highlight recovery brings back detail in bright skin areas that can otherwise blow out to flat white, especially on lighter complexions under strong light. Lifting the shadows opens up the darker mid-tones – under the chin, in the hair, along the jaw line – without making the whole image look flat.
These are intentionally modest adjustments. We’re not trying to fix a badly exposed image here; we’re refining a well-exposed one. A good rule of thumb is to move these sliders until you see the detail you want, then pull back about 20 percent. The before-and-after difference should feel like better light, not like Photoshop.
Step 3: Open as Smart Object and Set Up Frequency Separation
 Photoshop workspace with frequency separation layers visible in Layers panel
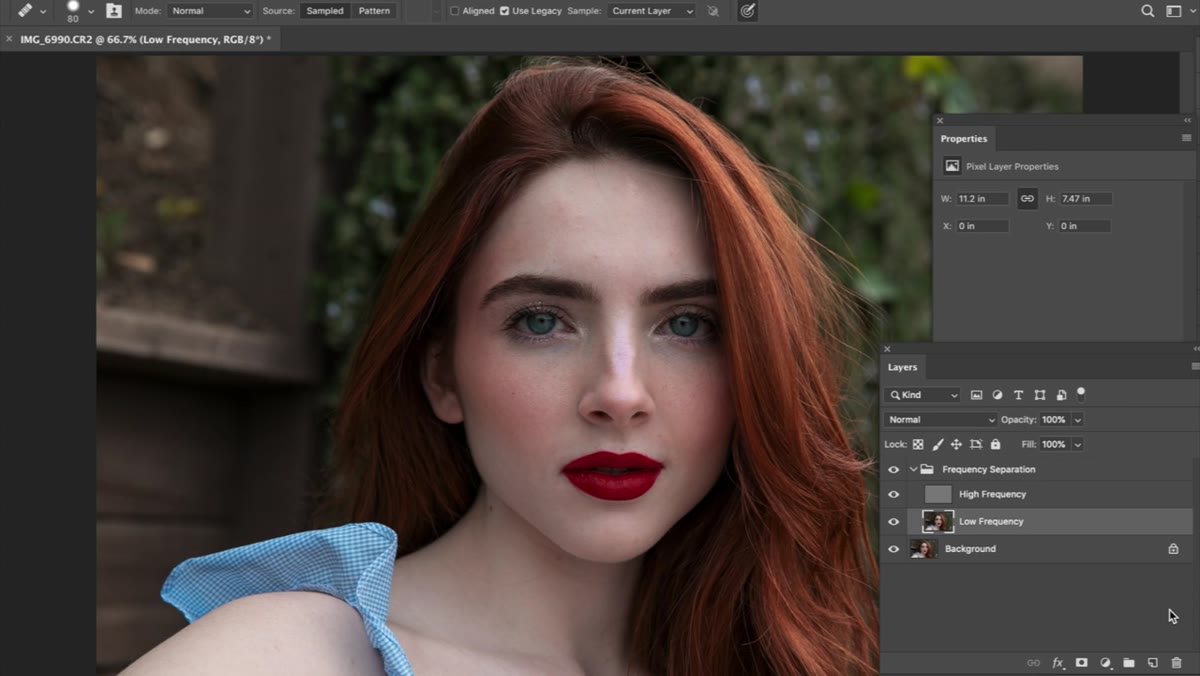
Jessica opens the file into Photoshop and reveals that she’s already applied a frequency separation setup using a saved action. If you don’t have one, this is worth building. Frequency separation splits your image into two layers: a low-frequency layer that holds color and tone information, and a high-frequency layer that holds texture and fine detail. The key settings for a portrait at standard resolution are generally a Gaussian Blur of 3-4 pixels on the low-frequency layer, with the high-frequency layer set to Linear Light blending mode.
Photoshop workspace with frequency separation layers visible in Layers panel
Jessica opens the file into Photoshop and reveals that she’s already applied a frequency separation setup using a saved action. If you don’t have one, this is worth building. Frequency separation splits your image into two layers: a low-frequency layer that holds color and tone information, and a high-frequency layer that holds texture and fine detail. The key settings for a portrait at standard resolution are generally a Gaussian Blur of 3-4 pixels on the low-frequency layer, with the high-frequency layer set to Linear Light blending mode.
Having this as an action means you run it once and get clean, consistent layers every time. You can name it after whatever movie you like. The important thing is that it frees you from having to rebuild the structure from scratch on every file, which means you spend your mental energy on the actual retouching decisions rather than setup.
Step 4: Retouch Skin on the Low-Frequency Layer
 Healing Brush tool active, working on skin tone layer
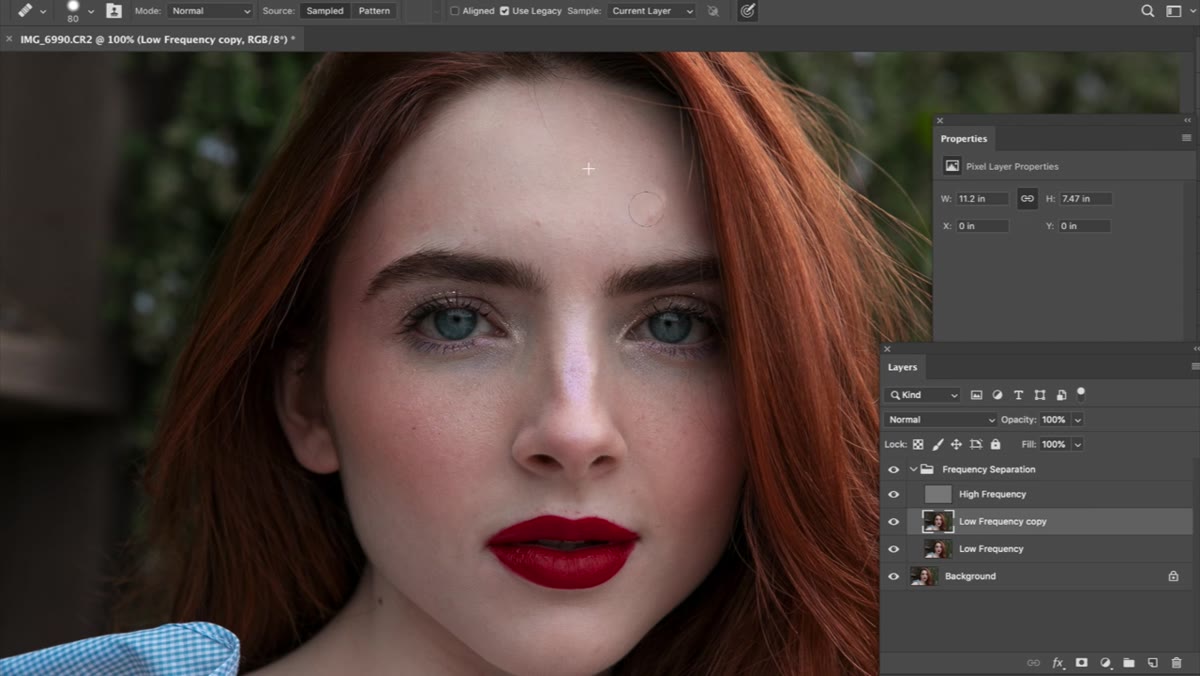
With frequency separation in place, skin retouching becomes much more controlled. On the low-frequency layer, you work only on color and tone – blemishes, uneven skin patches, redness, discoloration. The Healing Brush is the workhorse here. Sample from a nearby area of clean skin with similar tone and light direction, then paint over the problem area. Because you’re on the low-frequency layer, you’re not disturbing the skin texture that lives on the high-frequency layer above it.
Healing Brush tool active, working on skin tone layer
With frequency separation in place, skin retouching becomes much more controlled. On the low-frequency layer, you work only on color and tone – blemishes, uneven skin patches, redness, discoloration. The Healing Brush is the workhorse here. Sample from a nearby area of clean skin with similar tone and light direction, then paint over the problem area. Because you’re on the low-frequency layer, you’re not disturbing the skin texture that lives on the high-frequency layer above it.
Jessica describes this kind of retouching as therapeutic, and I know exactly what she means. There’s a meditative quality to working through a face this way, solving small problems one at a time. The key is patience – zoom in to at least 100 percent, work in small strokes, and keep re-sampling so you’re always pulling from the cleanest nearby skin. Working with a too-large brush and a far-away sample point is how retouching ends up looking plastic.
Step 5: Preserve Texture on the High-Frequency Layer
 Clone Stamp tool active on high-frequency texture layer
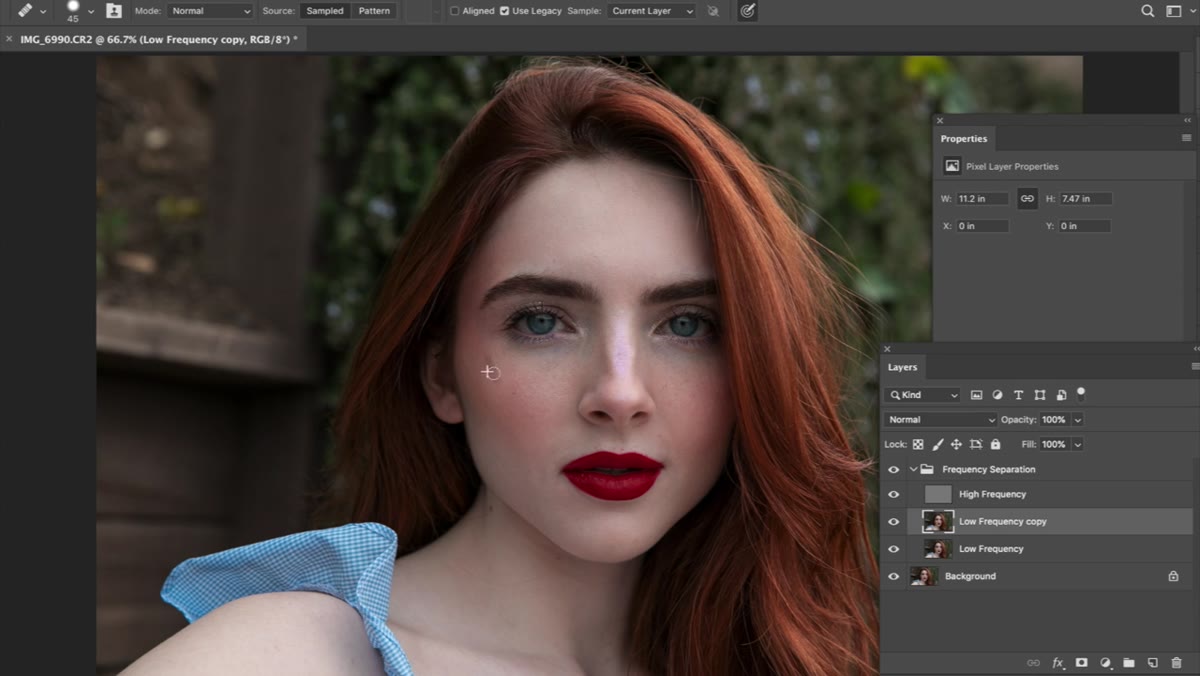
The high-frequency layer is where skin pores, fine lines, and surface texture live. Jessica is deliberate about not over-smoothing this layer. To work here, switch to the Clone Stamp tool set to a low opacity – around 20 to 30 percent – and sample texture from a clean area of skin nearby. Gently stamp over areas where the texture looks uneven or where previous healing work on the low layer has left the texture looking slightly off.
Clone Stamp tool active on high-frequency texture layer
The high-frequency layer is where skin pores, fine lines, and surface texture live. Jessica is deliberate about not over-smoothing this layer. To work here, switch to the Clone Stamp tool set to a low opacity – around 20 to 30 percent – and sample texture from a clean area of skin nearby. Gently stamp over areas where the texture looks uneven or where previous healing work on the low layer has left the texture looking slightly off.
The goal on this layer is consistency, not elimination. Skin should look like skin. If someone could zoom into your retouch and not immediately know you touched it, you’ve done it right.
A Note from My Own Practice: Know When to Stop Early
Here’s something I had to learn after a client told me my portraits looked “like wax figures” – not a fun call to receive. The instinct when you’re learning retouching is to keep going, to fix every tiny thing you notice. But Jessica’s freestyle approach actually guards against this. Because she has no predetermined checklist, she naturally stops when the image looks good rather than when the checklist is exhausted.
I now build deliberate pause points into my own workflow. After the frequency separation pass, I flatten to a new layer, zoom out to 50 percent, and look at the full face for 30 seconds before deciding whether to keep going. More often than not, the image is done. The remaining “flaws” are what make the person look like themselves.
The single most important thing this tutorial demonstrates is that a strong retouching result comes from reading the image, not from following a fixed sequence. Camera Calibration before Basic panel adjustments. Frequency separation before healing. Low-frequency color work before high-frequency texture work. The order is purposeful, but within each step there’s genuine flexibility, and that flexibility is where the craft lives.
Watch the full tutorial on YouTube to see Jessica’s decisions play out in real time – her instincts mid-edit are worth watching just as much as the final result.
Comments (2)
This is exactly what I needed today. Been struggling with this for weeks.
Great breakdown. The step-by-step approach really helps.
Leave a Comment