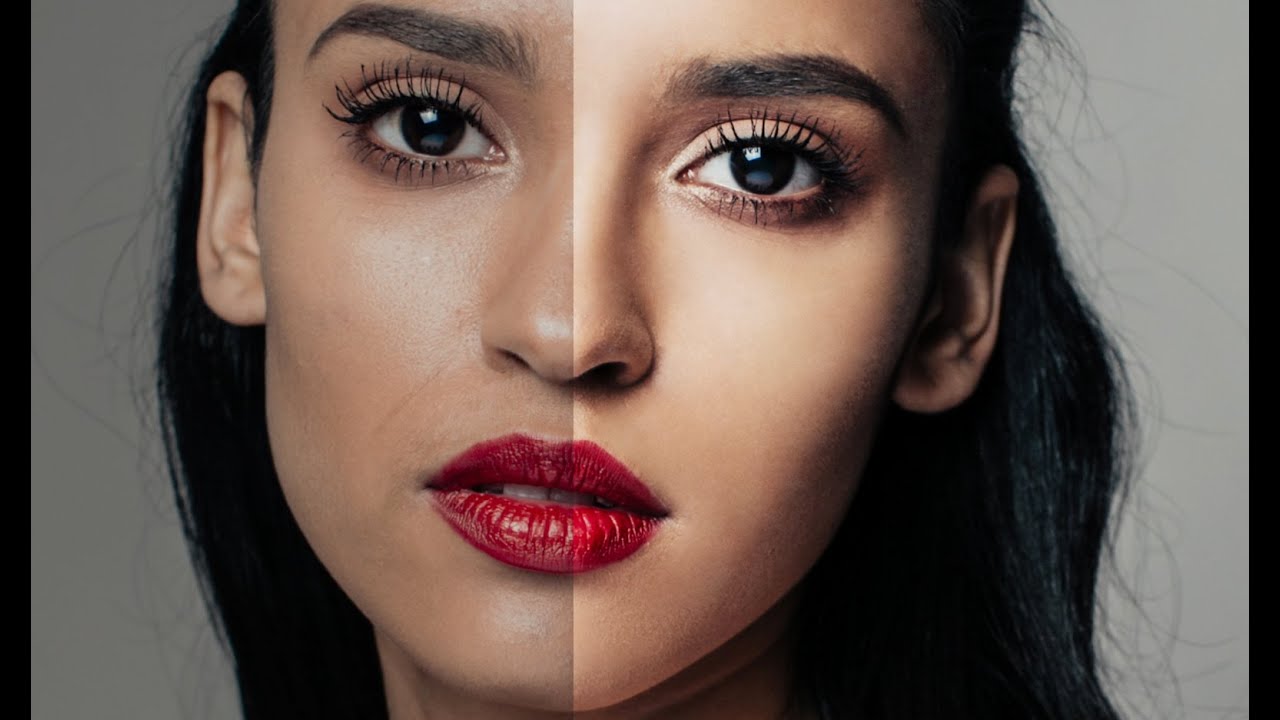
There is a specific kind of client email that still lives rent-free in my head. It came in during my second year of doing beauty work, after I’d transitioned out of wedding photography and was still figuring out what “professional retouching” actually meant. The client’s exact words were: “She looks a little… plastic.” I stared at that word for a long time. The skin was smooth, technically. Perfectly, horribly smooth. I had smeared the texture right off her face and called it retouching.
That one email sent me down a long road of studying how working photographers actually handle skin, and frequency separation became the technique that changed everything for me. So when I came across Watch the full tutorial on YouTube - Jessica Kobeissi’s tutorial on professional portrait skin retouching - I recognized immediately that she was solving the same problem I’d been wrestling with. Her approach is clean, non-destructive, and grounded in the kind of practical logic you only develop after sitting in front of thousands of images. This walkthrough is my attempt to unpack what she demonstrates, step by step, so you can follow along in Photoshop whether or not you’re watching alongside.
The core principle underneath all of it is this: skin has two distinct components. There is the tone and color, and there is the texture - the pores, fine lines, and surface detail. Frequency separation keeps those two things on separate layers so you can work on one without destroying the other. It is the difference between retouching and erasing.
Step 1: Run Your Frequency Separation Action
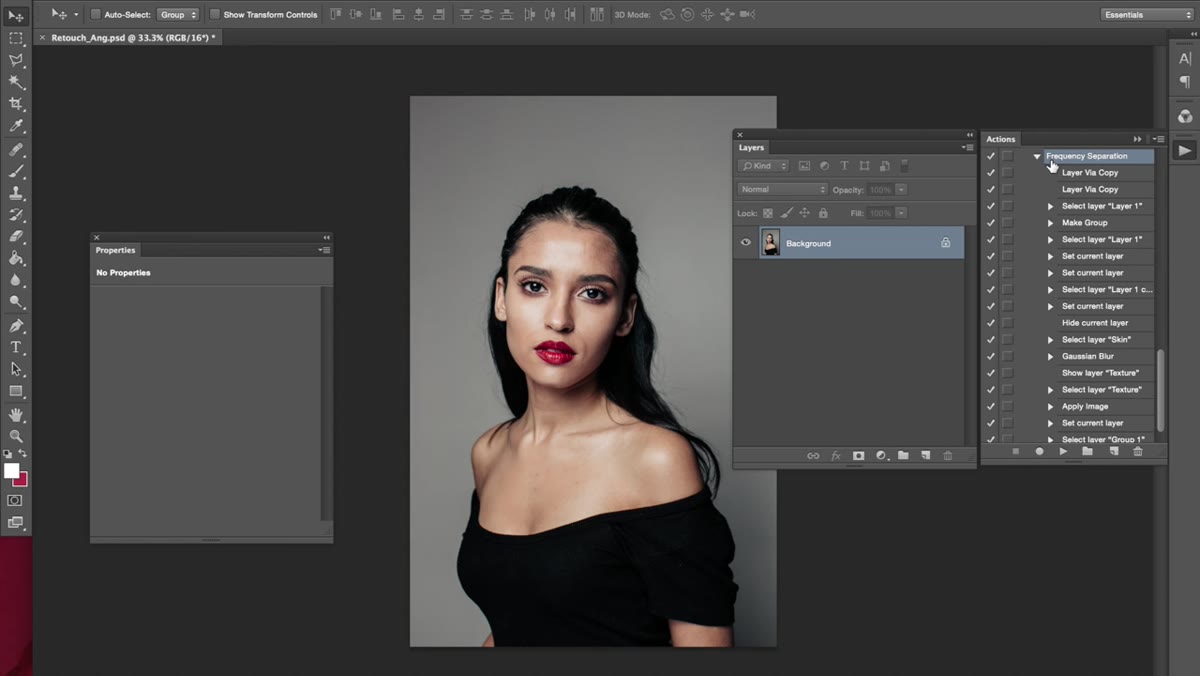 Photoshop action applied, frequency separation layers visible in panel
Jessica starts by running a pre-built Photoshop action to set up her frequency separation layers automatically. If you have never recorded an action before, the basic idea is that you record yourself going through the frequency separation setup steps once, save it as an action, and from that point forward you can trigger the whole process with a single button press. The setup involves creating a high-frequency texture layer and a low-frequency color layer, typically using Apply Image and Gaussian Blur. If you do not have an action built yet, that is genuinely worth doing before you retouch a single portrait - the time savings compound fast.
Photoshop action applied, frequency separation layers visible in panel
Jessica starts by running a pre-built Photoshop action to set up her frequency separation layers automatically. If you have never recorded an action before, the basic idea is that you record yourself going through the frequency separation setup steps once, save it as an action, and from that point forward you can trigger the whole process with a single button press. The setup involves creating a high-frequency texture layer and a low-frequency color layer, typically using Apply Image and Gaussian Blur. If you do not have an action built yet, that is genuinely worth doing before you retouch a single portrait - the time savings compound fast.
Step 2: Turn Off the Texture Layer and Duplicate the Skin Layer
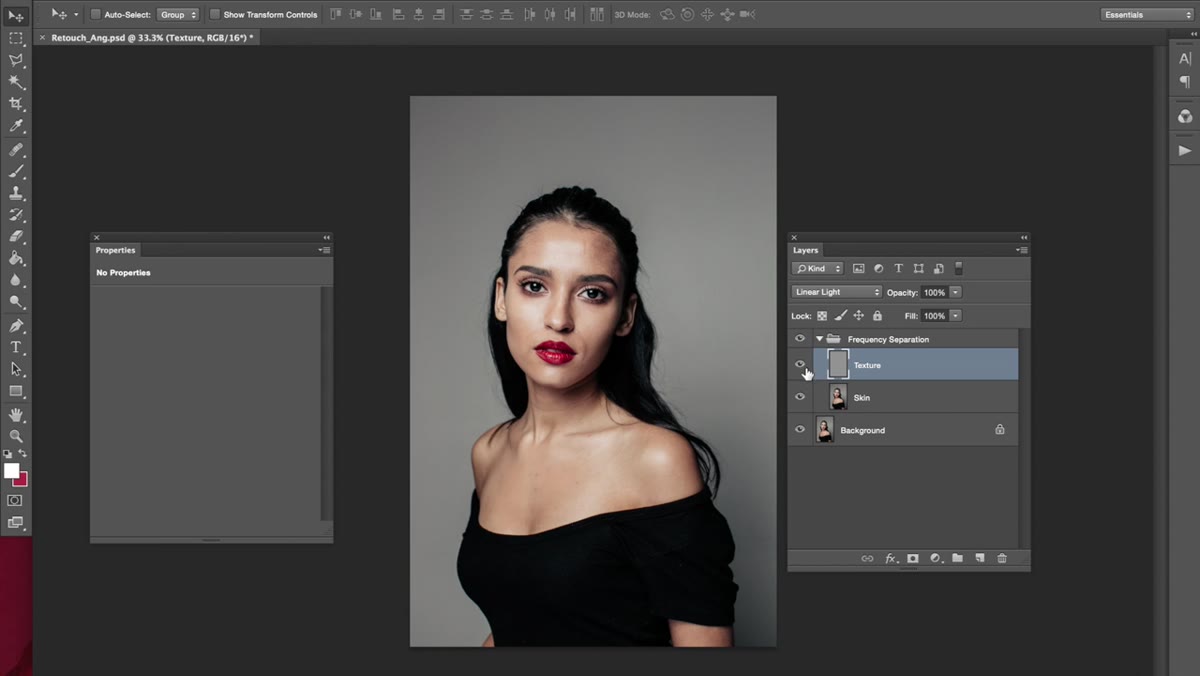 Layers panel showing texture layer toggled off, skin layer selected
Before touching anything, Jessica toggles off the texture layer and duplicates the skin layer she will be working on. Duplicating is done with Command+J on Mac or Control+J on Windows. This one habit alone has saved me from myself more times than I can count. If something goes wrong during healing - and it will, especially near complex areas like the nose or jawline - you can simply delete the damaged duplicate and start fresh from your original. Think of it as a working copy. You never retouch your original layer directly.
Layers panel showing texture layer toggled off, skin layer selected
Before touching anything, Jessica toggles off the texture layer and duplicates the skin layer she will be working on. Duplicating is done with Command+J on Mac or Control+J on Windows. This one habit alone has saved me from myself more times than I can count. If something goes wrong during healing - and it will, especially near complex areas like the nose or jawline - you can simply delete the damaged duplicate and start fresh from your original. Think of it as a working copy. You never retouch your original layer directly.
Step 3: Select the Healing Brush Tool (Not Spot Healing)
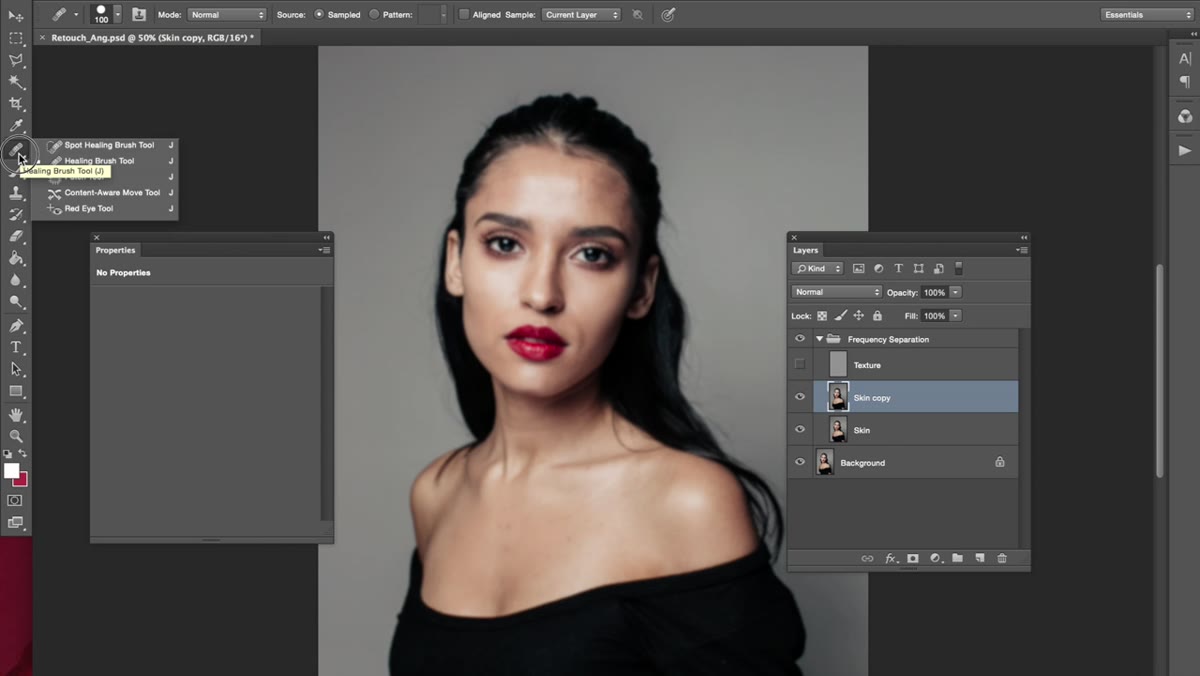 Toolbar showing healing brush selected, not the spot healing brush
This is a distinction that trips up a lot of people early on. The spot healing brush makes its own decision about where to sample from, which sounds convenient but gives you far less control over the result. The regular healing brush - the one that looks like a bandage with a small crosshair - lets you choose your own source point. You hold down Alt (or Option on Mac) to click a clean sample area, then paint over the area you want to fix. That manual source selection is what keeps the results looking like skin instead of a watercolor painting.
Toolbar showing healing brush selected, not the spot healing brush
This is a distinction that trips up a lot of people early on. The spot healing brush makes its own decision about where to sample from, which sounds convenient but gives you far less control over the result. The regular healing brush - the one that looks like a bandage with a small crosshair - lets you choose your own source point. You hold down Alt (or Option on Mac) to click a clean sample area, then paint over the area you want to fix. That manual source selection is what keeps the results looking like skin instead of a watercolor painting.
Step 4: Sample from Clean Skin and Work in Small Strokes
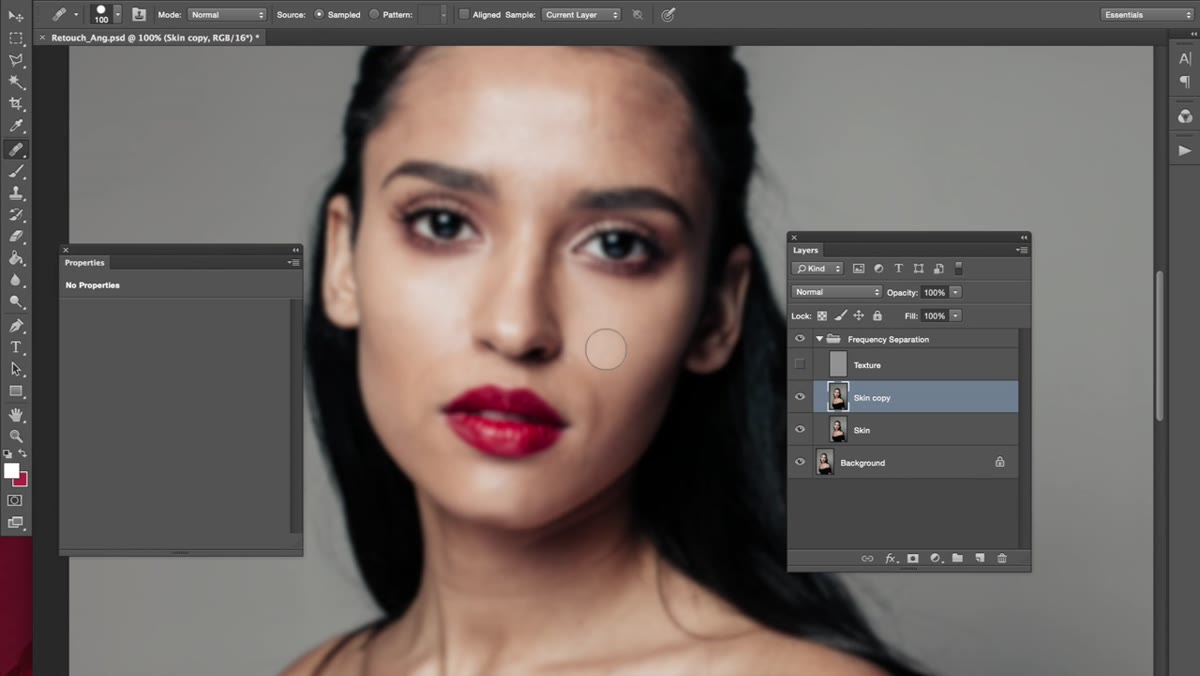 Close-up view, healing brush sampling clean skin area near blemish
The technique here is deliberate and a little meditative. You are looking for areas of skin nearby that already have good, even tone - free of redness, shadows, or texture problems. You sample from that clean zone, then gently stamp or drag the brush over the problem area in short, controlled movements. Jessica is clear that brush size matters a lot here. A brush that is too large grabs color from neighboring zones, like pulling the shadow under the chin up into the cheek. Keep your brush small enough that it is only ever reading from the specific skin zone you intend.
Close-up view, healing brush sampling clean skin area near blemish
The technique here is deliberate and a little meditative. You are looking for areas of skin nearby that already have good, even tone - free of redness, shadows, or texture problems. You sample from that clean zone, then gently stamp or drag the brush over the problem area in short, controlled movements. Jessica is clear that brush size matters a lot here. A brush that is too large grabs color from neighboring zones, like pulling the shadow under the chin up into the cheek. Keep your brush small enough that it is only ever reading from the specific skin zone you intend.
Step 5: Respect Natural Shadows and Defining Lines
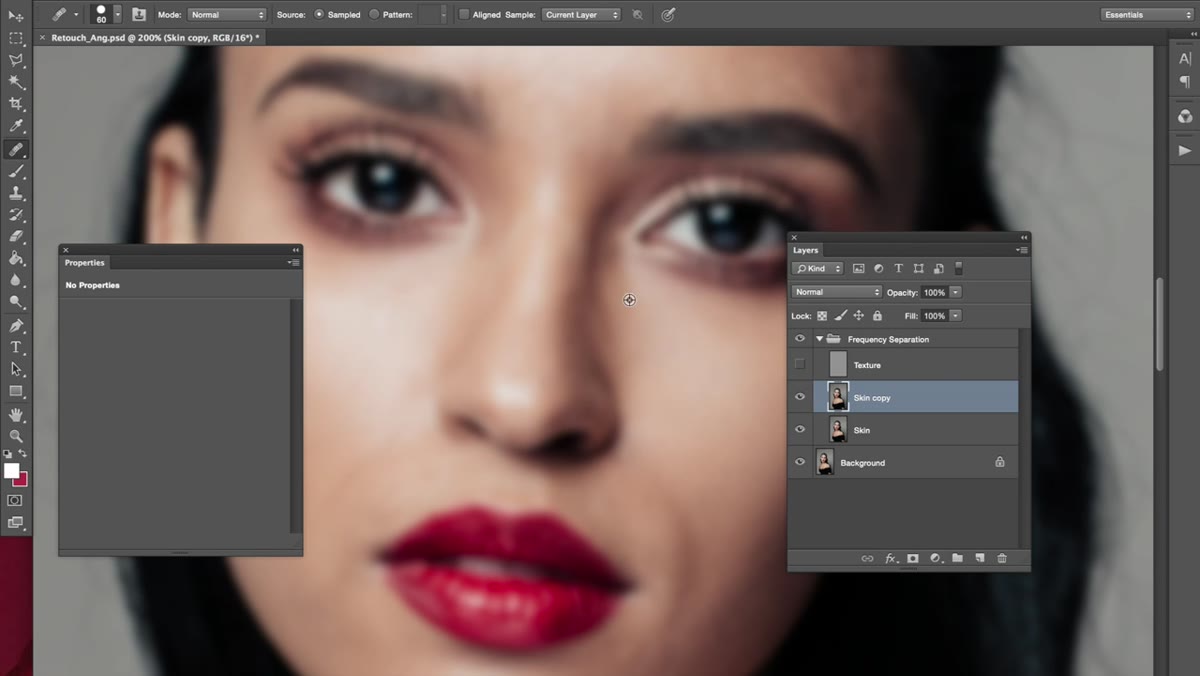 Healing brush approaching a shadow line, careful not to cross it
This is where most beginners do the most damage, and it is the piece of advice I wish someone had given me early on. Every face has structural shadows - the line running from the nostril toward the corner of the mouth, the shadow under the lower lip, the definition around the eye socket. These are not blemishes. They are the architecture of the face, and if you heal across them, you flatten the whole portrait. Jessica is specific: do not cross those lines with your healing brush. Work within each defined zone. If a defined shadow itself needs attention, that requires a different technique entirely, which she covers in later steps.
Healing brush approaching a shadow line, careful not to cross it
This is where most beginners do the most damage, and it is the piece of advice I wish someone had given me early on. Every face has structural shadows - the line running from the nostril toward the corner of the mouth, the shadow under the lower lip, the definition around the eye socket. These are not blemishes. They are the architecture of the face, and if you heal across them, you flatten the whole portrait. Jessica is specific: do not cross those lines with your healing brush. Work within each defined zone. If a defined shadow itself needs attention, that requires a different technique entirely, which she covers in later steps.
Step 6: Work Around the Mouth with Extra Care
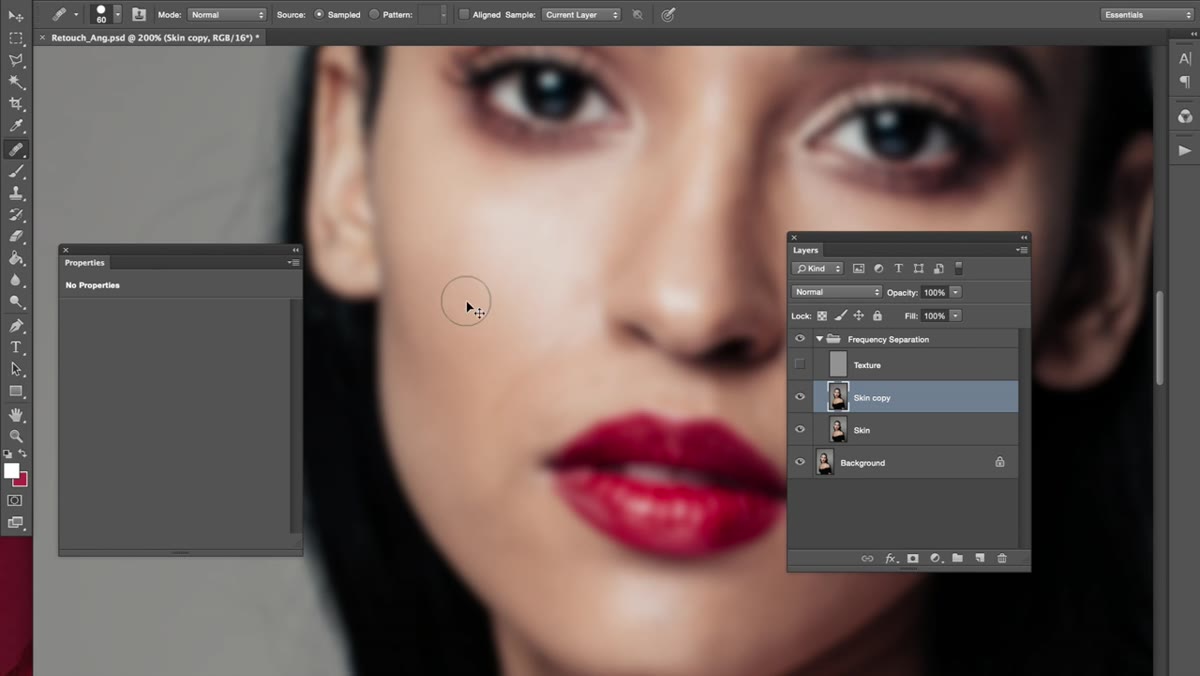 Healing brush making small strokes around the mouth and lip line
The area around the mouth tends to concentrate a lot of fine lines, and it also sits right next to some of the strongest defining contours on the face. The workflow here does not change - sample clean skin, use small strokes, stay within zones - but the patience required goes up. Jessica moves slowly through this area, constantly re-sampling rather than dragging the brush across a wide path. The goal is to reduce the appearance of fine lines and any uneven texture while keeping the natural shadow gradient that gives the mouth its shape and dimension.
Healing brush making small strokes around the mouth and lip line
The area around the mouth tends to concentrate a lot of fine lines, and it also sits right next to some of the strongest defining contours on the face. The workflow here does not change - sample clean skin, use small strokes, stay within zones - but the patience required goes up. Jessica moves slowly through this area, constantly re-sampling rather than dragging the brush across a wide path. The goal is to reduce the appearance of fine lines and any uneven texture while keeping the natural shadow gradient that gives the mouth its shape and dimension.
A Note from My Own Practice: Save Your Undo History Like It’s Sacred
One thing I have added to this workflow over the years is keeping my History panel set to at least 50 states before I start any healing session. Photoshop’s default is lower, and when you are making dozens of small healing strokes in a sensitive area - especially around the eyes or the transition between face and neck - you want the freedom to step back ten or fifteen moves without losing everything. You can change this under Preferences, Performance, History States. Pair that with the layer duplication step above and you have a genuinely forgiving workspace. Retouching should feel exploratory, not like defusing a bomb.
The single most important thing Jessica’s tutorial reinforces is that great skin retouching is built on restraint. The healing brush on the low-frequency layer is a precision instrument, not a paint roller. Every stroke you make should have a reason. When I keep that in mind, I produce work that holds up to a client’s close inspection - skin that looks like skin, just on a particularly good day.
Watch the full tutorial on YouTube to see Jessica’s complete workflow, including the coloring process she covers in part two.
Comments
Leave a Comment