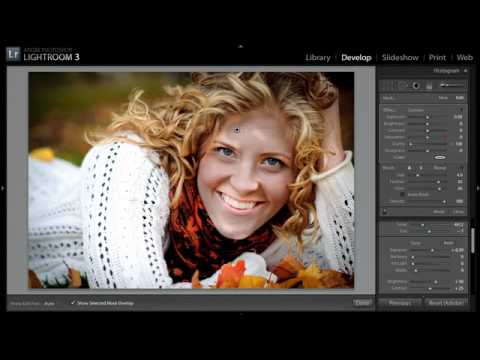
For a long time, I treated Lightroom as a halfway house. I’d do my exposure corrections, pull my highlights, maybe warm up the tone, and then shuffle the file over to Photoshop for anything that actually touched skin. That was just the workflow. Lightroom was for global adjustments. Photoshop was for faces.
Then I came across this KelbyOne tutorial on skin smoothing entirely inside Lightroom, and I had to rethink that assumption. Watch the full tutorial on YouTube. The technique is deceptively simple, and once I started using it on client work for beauty campaigns, I realized it was producing results that didn’t look processed. That matters enormously to me. I spent an embarrassing stretch early in my career delivering edits that one client politely described as “a little plastic-looking,” and I never forgot it. Subtlety is everything in skin work.
What the tutorial demonstrates is using the Adjustment Brush in Lightroom’s Develop module with a deeply negative Clarity value to create a localized softening effect. No Gaussian blur. No frequency separation. No round-tripping between apps. Here’s how to do it, step by step.
Step 1: Open the Adjustment Brush in the Develop Module
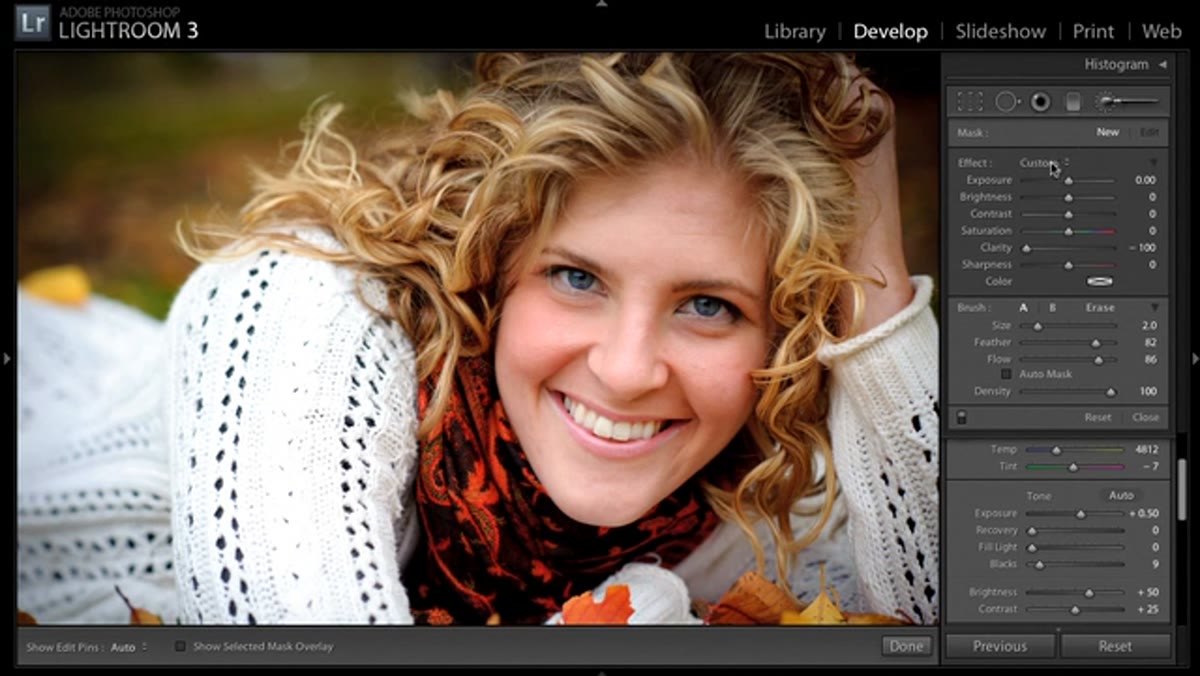 Develop module with Adjustment Brush panel open
Head into the Develop module and activate the Adjustment Brush, which you’ll find in the local adjustments panel just below the histogram. This is the tool that lets you paint corrections onto specific areas of an image rather than applying them globally. If you’ve mostly used it for dodging shadows or warming up a sky, you’re about to use it very differently.
Develop module with Adjustment Brush panel open
Head into the Develop module and activate the Adjustment Brush, which you’ll find in the local adjustments panel just below the histogram. This is the tool that lets you paint corrections onto specific areas of an image rather than applying them globally. If you’ve mostly used it for dodging shadows or warming up a sky, you’re about to use it very differently.
Once the panel is open, you’ll see a list of adjustable sliders. Ignore most of them for now. The one we care about is Clarity.
Step 2: Pull Clarity Down to -100
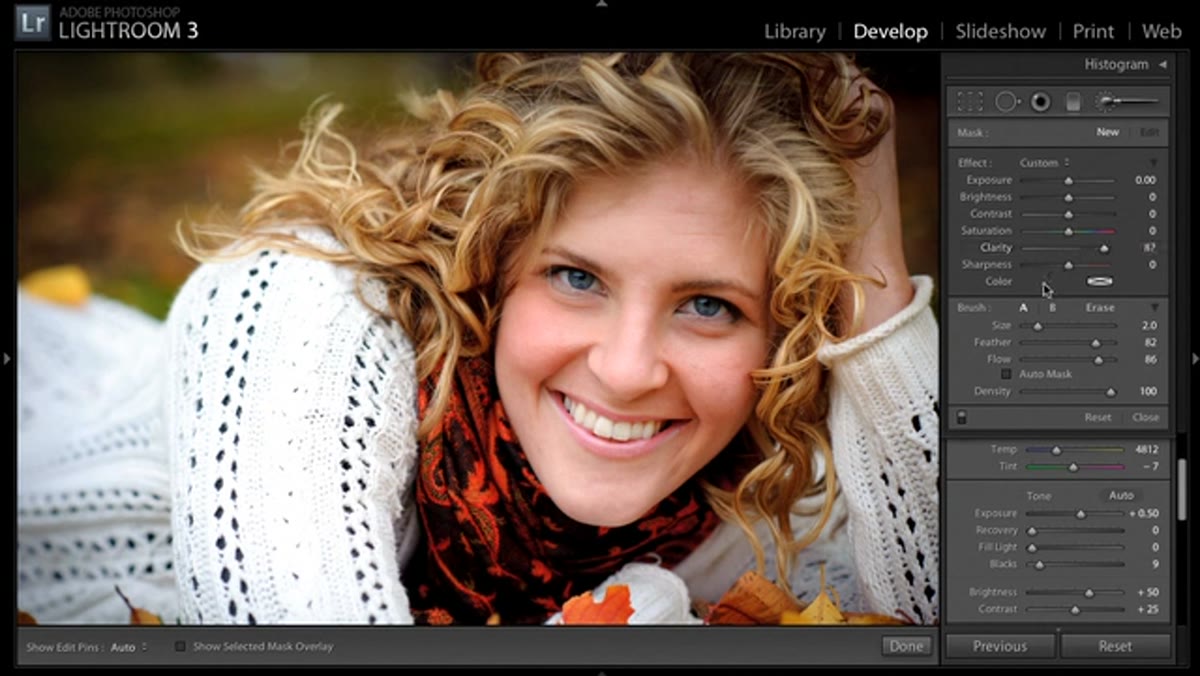 Clarity slider pulled to negative 100 in the Adjustment Brush panel
Clarity, when pushed positive, adds midtone contrast and makes textures pop. Skin, pores, fine lines - all of it becomes more pronounced. When you drag it in the opposite direction, it softens and smooths. At -100, it creates a genuinely flattering diffusion effect on skin tones without smearing edge detail the way a blur filter tends to.
Clarity slider pulled to negative 100 in the Adjustment Brush panel
Clarity, when pushed positive, adds midtone contrast and makes textures pop. Skin, pores, fine lines - all of it becomes more pronounced. When you drag it in the opposite direction, it softens and smooths. At -100, it creates a genuinely flattering diffusion effect on skin tones without smearing edge detail the way a blur filter tends to.
Set the Clarity slider all the way to -100. Leave everything else at zero. This is your entire “recipe” for the effect. The elegance of the technique is that it’s one slider doing one focused job.
Step 3: Set Your Brush Size and Paint the Skin
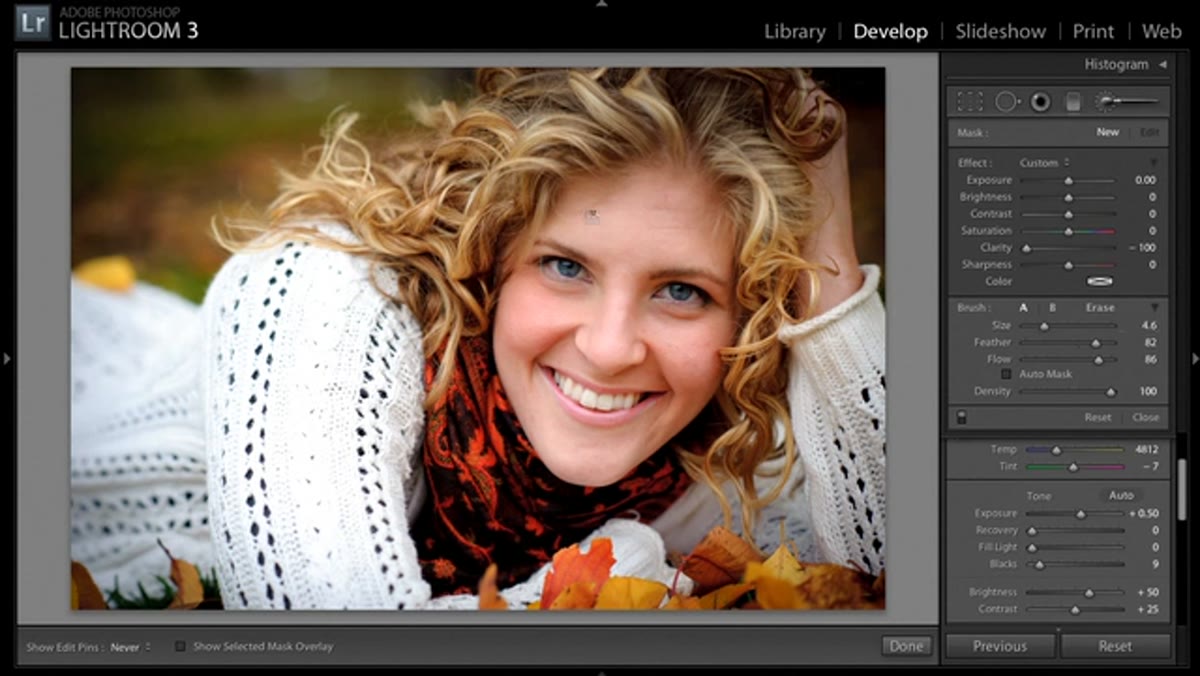 Large brush being painted across forehead and cheek area
Choose a brush size large enough to cover broad skin areas efficiently. Use the right bracket key to increase brush size and the left bracket key to decrease it. For foreheads, cheeks, and necks, work with a generous brush and paint in loose, overlapping strokes.
Large brush being painted across forehead and cheek area
Choose a brush size large enough to cover broad skin areas efficiently. Use the right bracket key to increase brush size and the left bracket key to decrease it. For foreheads, cheeks, and necks, work with a generous brush and paint in loose, overlapping strokes.
At this stage, don’t stress about being precise along the edges of the face. The goal right now is coverage, not cleanliness. You’ll refine the edges in a moment, and being overly cautious with a small brush at this stage just slows you down without improving the result.
Step 4: Use the Mask Overlay to Check Your Coverage
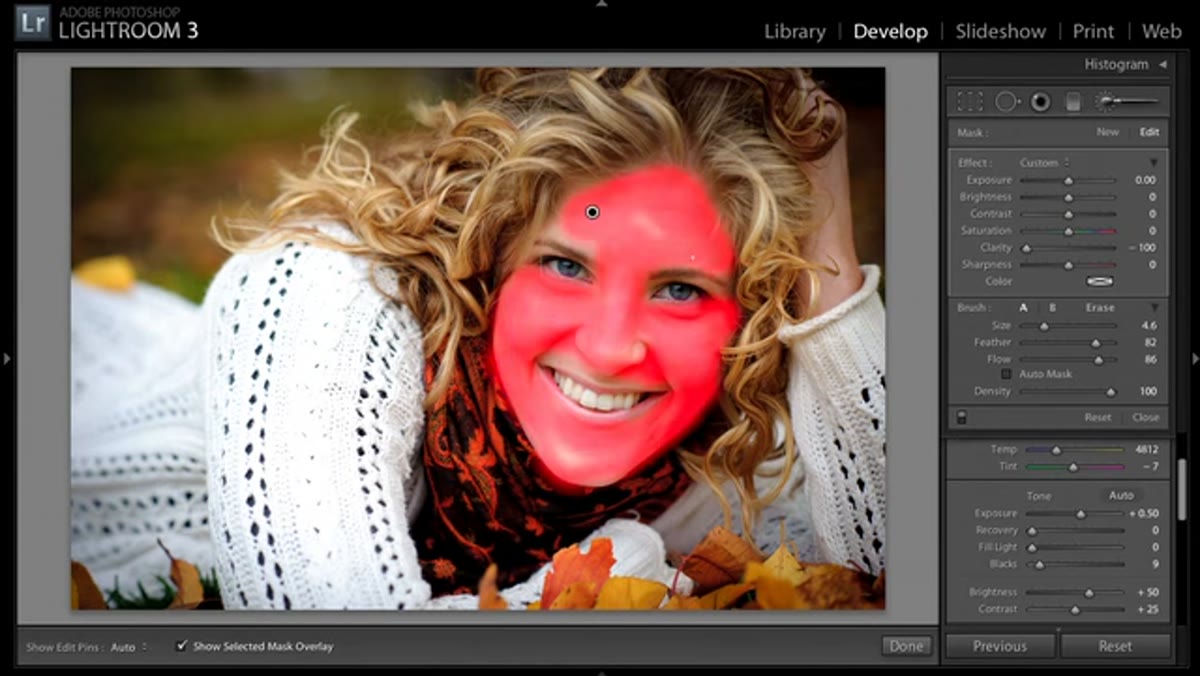 Red mask overlay showing painted areas across the face
Once you’ve painted over the main skin areas, it gets genuinely hard to tell what you’ve covered and what you’ve missed. Press the letter O to toggle the mask overlay on. Lightroom will flood your painted areas with a colored tint - red by default - so you can see exactly where the adjustment is being applied.
Red mask overlay showing painted areas across the face
Once you’ve painted over the main skin areas, it gets genuinely hard to tell what you’ve covered and what you’ve missed. Press the letter O to toggle the mask overlay on. Lightroom will flood your painted areas with a colored tint - red by default - so you can see exactly where the adjustment is being applied.
If the red overlay is hard to read against the image (it can be on warm-toned portraits), press Shift+O to cycle through the other overlay colors: green, white, and gray. Pick whichever gives you the clearest contrast against your subject’s skin. Press O again to turn the overlay off when you’re done checking.
Step 5: Clean Up Edges with the Erase Option
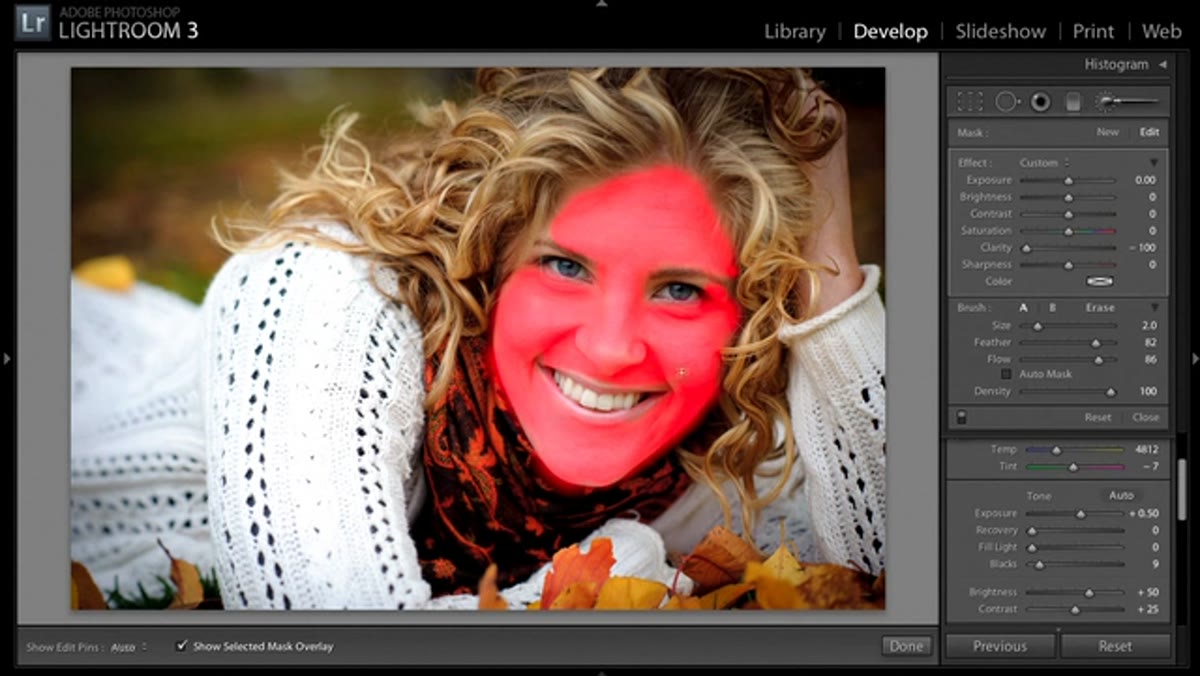 Smaller erase brush cleaning up edge below the chin
Switch to the Erase mode within the Adjustment Brush panel. This turns your brush into an eraser that removes the painted adjustment rather than adding to it. Reduce your brush size using the left bracket key and carefully trace along the edges of the face - the jawline, the hairline, around the eyes, along the nose.
Smaller erase brush cleaning up edge below the chin
Switch to the Erase mode within the Adjustment Brush panel. This turns your brush into an eraser that removes the painted adjustment rather than adding to it. Reduce your brush size using the left bracket key and carefully trace along the edges of the face - the jawline, the hairline, around the eyes, along the nose.
This is where the detail work happens, and it’s worth slowing down here. Eyes especially should be erased cleanly. The softening effect that looks great on skin looks wrong on irises and lashes. Same goes for eyebrows, lips, and any area where fine detail is actually part of what makes the portrait read as sharp and real.
Step 6: Stack a Second Brush Pass for Problem Areas
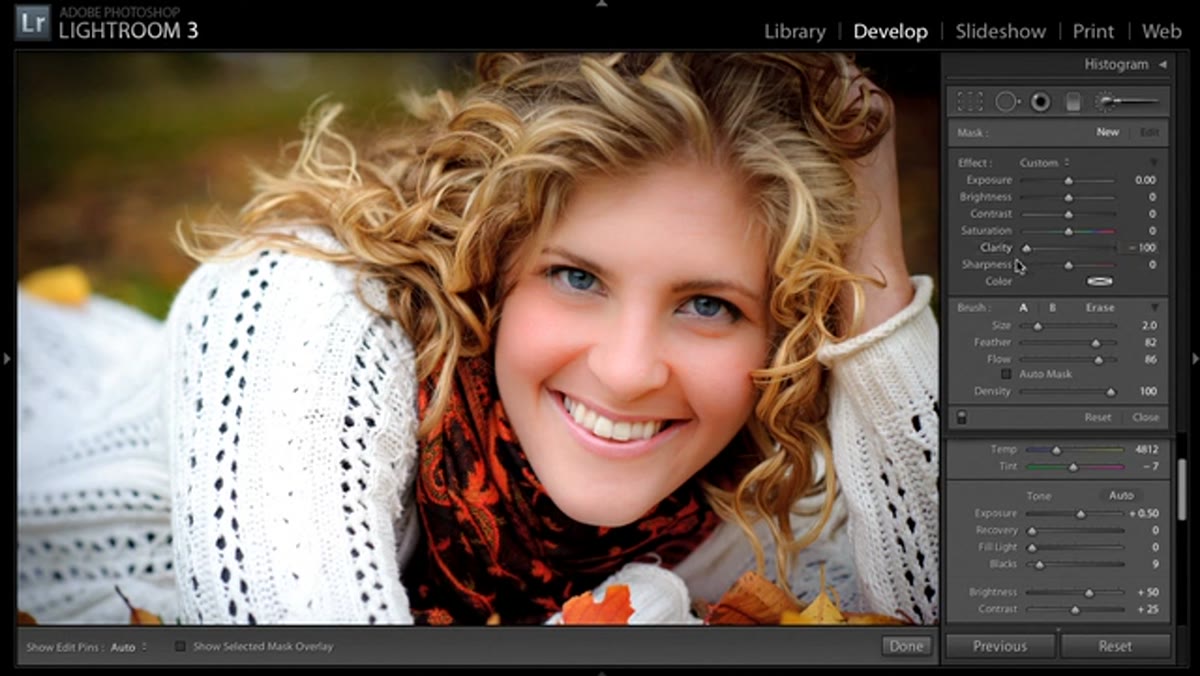 Second adjustment brush pass being applied under the eyes
Here’s the part of the tutorial I’ve found myself using constantly on beauty work: you can layer multiple Adjustment Brush pins, each at -100 Clarity, to build up extra softening exactly where you need it most.
Second adjustment brush pass being applied under the eyes
Here’s the part of the tutorial I’ve found myself using constantly on beauty work: you can layer multiple Adjustment Brush pins, each at -100 Clarity, to build up extra softening exactly where you need it most.
Click “New” in the Adjustment Brush panel to start a fresh pin. Keep Clarity at -100. Then paint just the areas that need additional attention - typically the under-eye zone, any visible texture around the nose, or areas with uneven skin tone. This layered approach means you’re not applying a blanket correction everywhere. You’re being specific, which is how you avoid that plastic look.
A Note from My Own Practice
I want to add something the tutorial doesn’t explicitly cover, because it’s changed how I use this technique on commercial work: the amount of softening that looks right at screen resolution often looks too heavy in print. If you’re delivering files for print campaigns or high-res beauty layouts, zoom into 1:1 or even 2:1 view while you’re painting and erasing. What reads as natural at fit-to-screen can read as smooth at full resolution, and catching it early saves a round of client revisions.
I’ve also found this technique pairs beautifully with a subtle positive Clarity pass on the eyes. After doing the skin softening, I’ll start a new Adjustment Brush pin with Clarity at around +30 and paint just the irises. It creates a gentle contrast between soft skin and sharp eyes that feels natural rather than processed.
The biggest takeaway here is that Lightroom is more capable as a retouching environment than most photographers give it credit for. The Clarity slider used locally isn’t a workaround or a compromise. On portraits where you want a light, clean touch on skin, it genuinely competes with more complex Photoshop techniques - and it keeps your whole edit in one place.
Watch the full tutorial on YouTube to see the before and after comparisons and the full brush workflow in action.
Comments
Leave a Comment