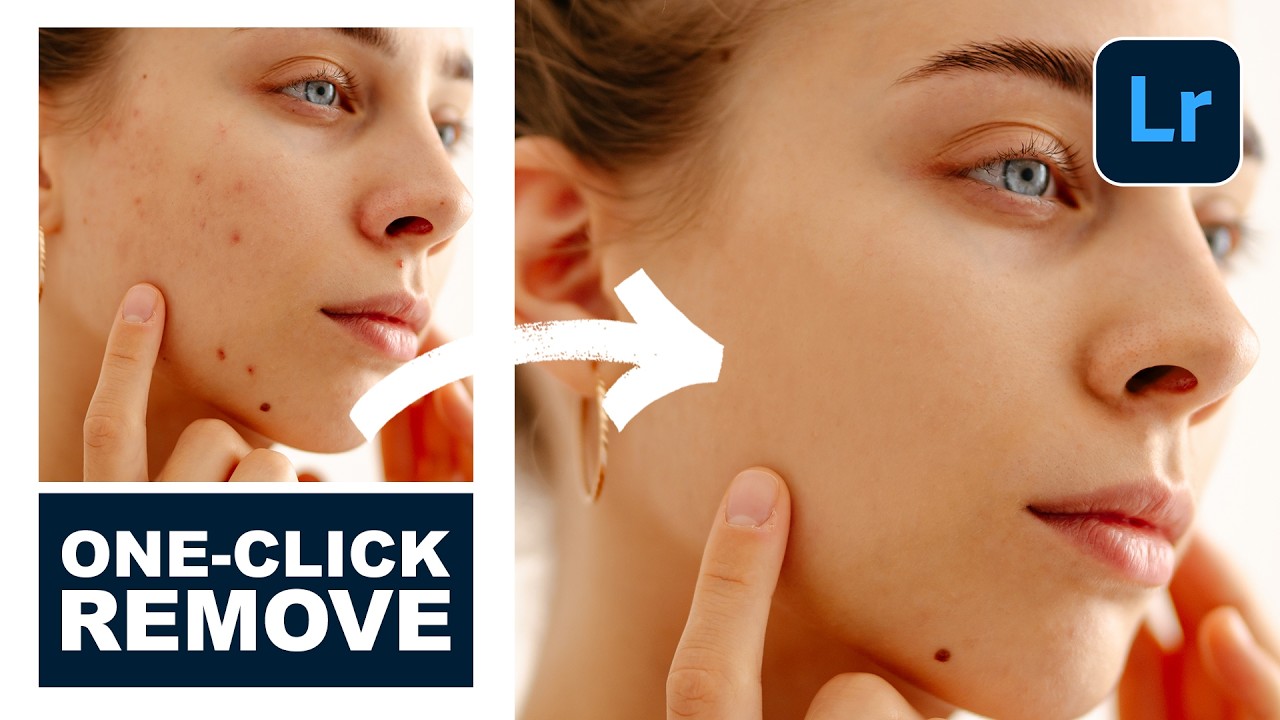
There’s a specific kind of dread that comes with opening a portrait from a last-minute shoot and realizing the skin needs serious work before the client’s deadline in two hours. I’ve been there more times than I’d like to admit, and for years my answer was to open Photoshop, set up my layers, and start healing stamp by healing stamp. It works. It’s also slow, and on mobile it’s basically impossible.
That’s why I stopped mid-coffee this week when I came across a tutorial from PHLEARN showing off a brand new blemish removal tool built right into Lightroom Mobile. Watch the full tutorial on YouTube before we dive in, or follow along below with the step-by-step breakdown. The tool uses AI to detect and remove skin blemishes in seconds, with a slider to dial in how much correction you want. For mobile retouching, this changes the game considerably.
What impressed me most wasn’t just the speed. It was the level of control. A tool that nukes every imperfection with one tap and gives you no way to adjust it is how you end up with that “plastic-looking” result I spent years learning to avoid. This one actually lets you breathe some texture and life back in. Let me show you exactly how it works.
Step 1: Open Your Portrait in Lightroom Mobile and Zoom In
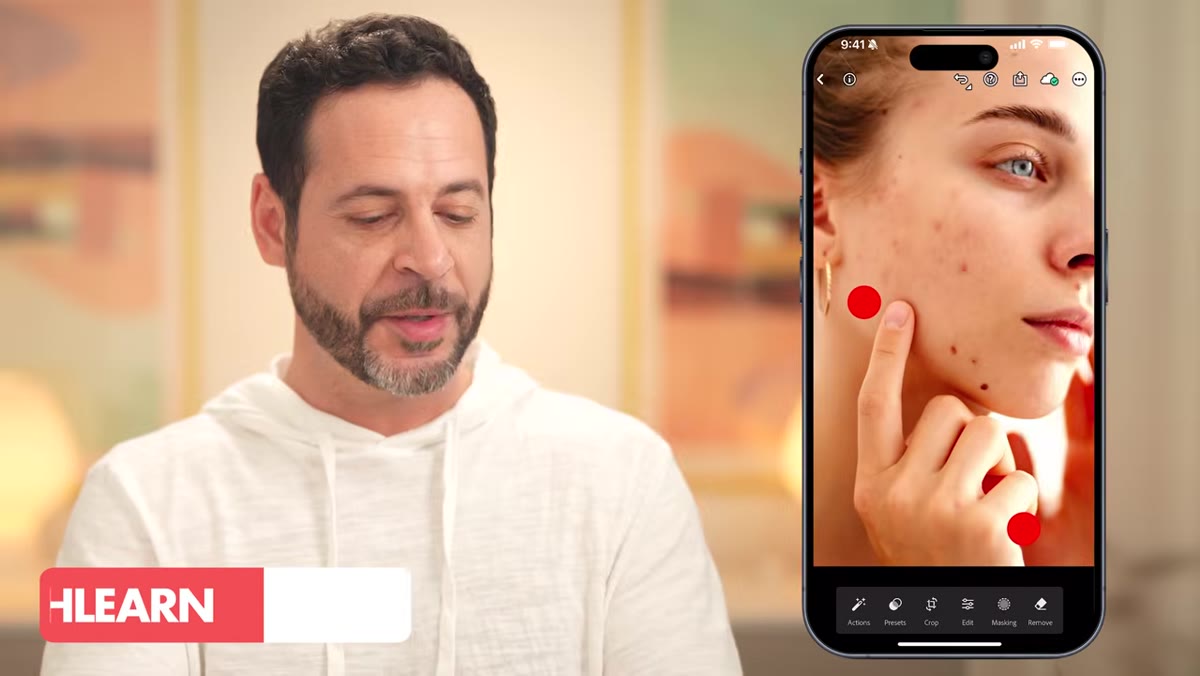 Subject’s face filling screen in Lightroom Mobile
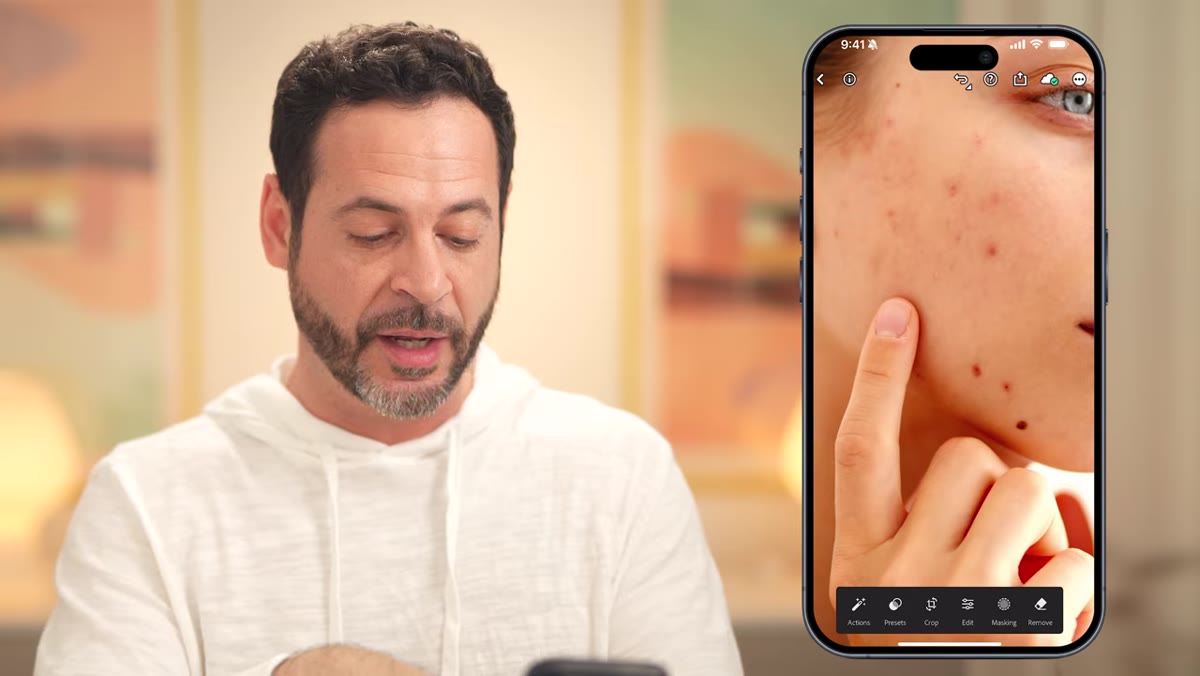
Start by importing your portrait into Lightroom Mobile and zooming in on your subject’s face. This isn’t just good practice before retouching. It helps you see what you’re actually working with before the tool does its thing, so you can assess afterward whether the result is accurate. In the PHLEARN tutorial, the photographer zooms in first and notes a few visible blemishes on the subject’s skin, nothing dramatic, but enough to warrant correction before delivery.
Subject’s face filling screen in Lightroom Mobile
Start by importing your portrait into Lightroom Mobile and zooming in on your subject’s face. This isn’t just good practice before retouching. It helps you see what you’re actually working with before the tool does its thing, so you can assess afterward whether the result is accurate. In the PHLEARN tutorial, the photographer zooms in first and notes a few visible blemishes on the subject’s skin, nothing dramatic, but enough to warrant correction before delivery.
Getting a clear look at the baseline also helps you calibrate the amount slider later. If you know what the skin looked like going in, you’ll have a much better sense of how far to pull back the correction for a result that still looks like a real person.
Step 2: Access Quick Actions from the Bottom Left
 Quick Actions button highlighted in bottom left of screen
Look toward the bottom left of your screen for the Quick Actions panel. Lightroom Mobile uses subject recognition, so when it detects a person in your image, the Quick Actions menu will surface portrait-specific options automatically. Tap that icon to open the panel.
Quick Actions button highlighted in bottom left of screen
Look toward the bottom left of your screen for the Quick Actions panel. Lightroom Mobile uses subject recognition, so when it detects a person in your image, the Quick Actions menu will surface portrait-specific options automatically. Tap that icon to open the panel.
This is one of those features that feels small but reflects a lot of thoughtful design. Rather than hunting through menus for retouching options, Lightroom surfaces the right tools based on what’s actually in your photo. For portrait retouchers working on mobile, that context-awareness saves real time.
Step 3: Select the Retouch Option
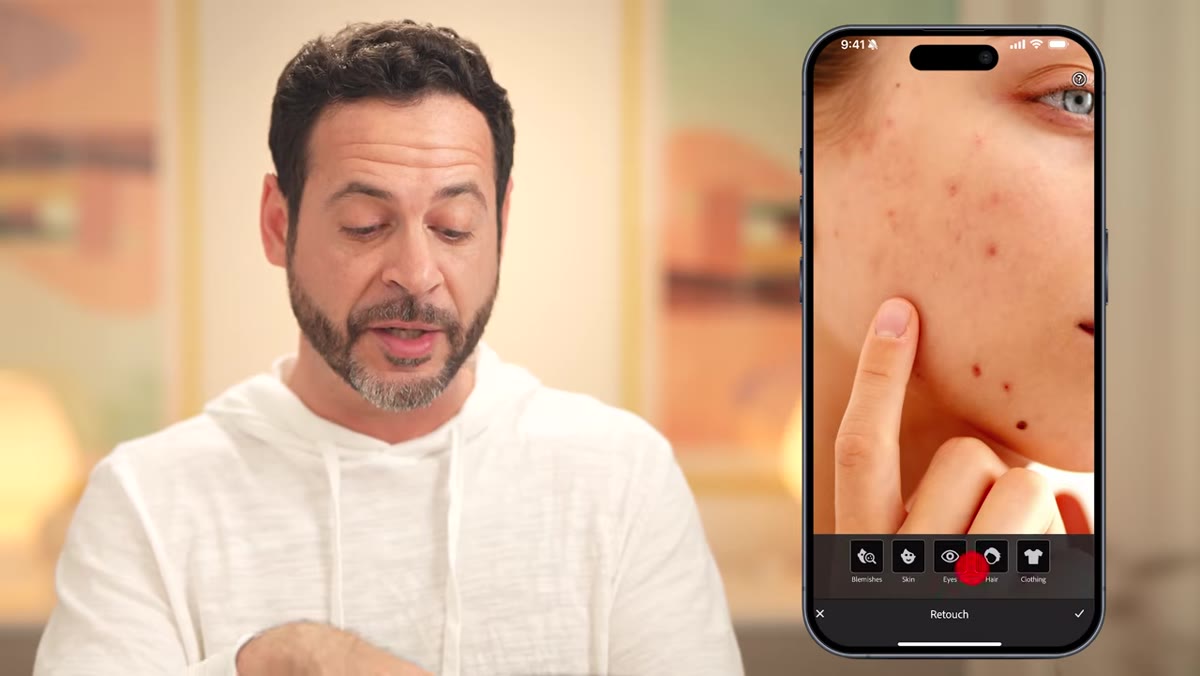 Retouch option appearing in Quick Actions panel
Inside the Quick Actions panel, you’ll see a “Retouch” option. Tap it. This is the gateway to the new blemish tool, and it’s worth taking a second to appreciate how buried this feature would have been in previous versions of Lightroom Mobile. The fact that it now lives inside a one-tap panel makes it genuinely practical for on-location edits or quick turnarounds.
Retouch option appearing in Quick Actions panel
Inside the Quick Actions panel, you’ll see a “Retouch” option. Tap it. This is the gateway to the new blemish tool, and it’s worth taking a second to appreciate how buried this feature would have been in previous versions of Lightroom Mobile. The fact that it now lives inside a one-tap panel makes it genuinely practical for on-location edits or quick turnarounds.
Once you tap Retouch, you’ll see the dedicated blemish removal interface load up, separate from the standard healing tools you may already be familiar with.
Step 4: Tap Blemishes and Watch the AI Work
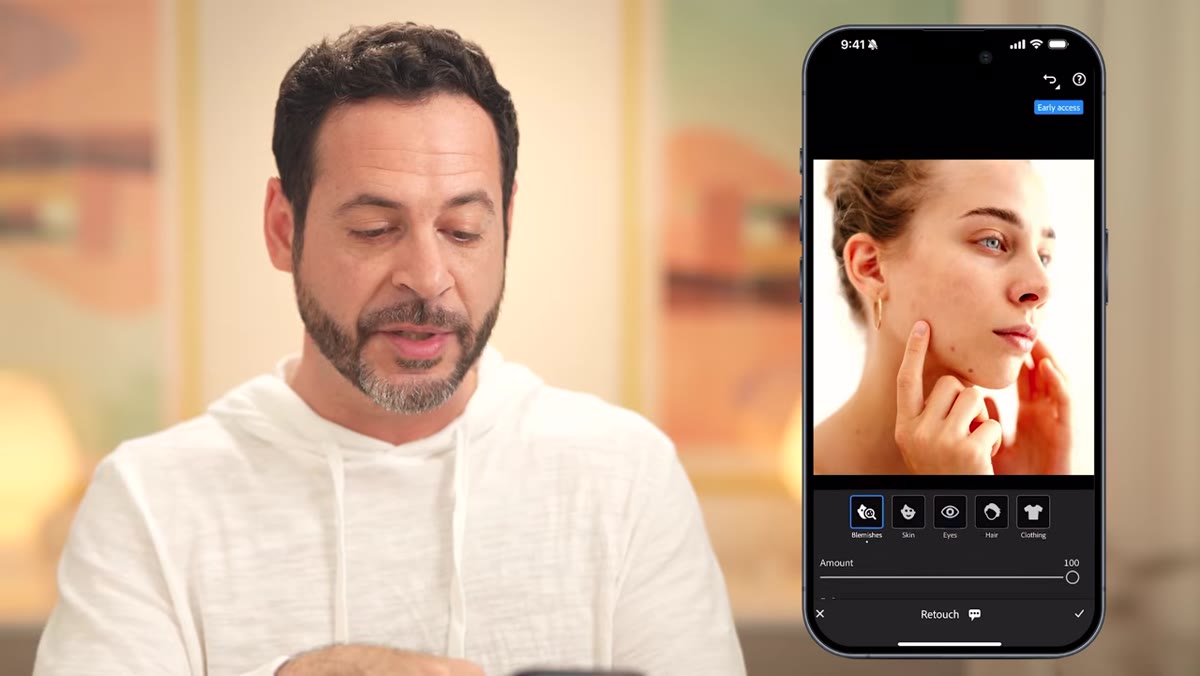 Blemishes tool activated, skin visibly clearing on screen
Tap the “Blemishes” button. The correction happens immediately, and the change is significant. The AI scans the skin, identifies irregular texture and discoloration consistent with blemishes, and removes them without touching the surrounding skin structure.
Blemishes tool activated, skin visibly clearing on screen
Tap the “Blemishes” button. The correction happens immediately, and the change is significant. The AI scans the skin, identifies irregular texture and discoloration consistent with blemishes, and removes them without touching the surrounding skin structure.
What you’ll notice, and this is worth paying attention to, is that the tool doesn’t flatten the skin the way a heavy-handed healing brush might. It’s removing specific problem areas rather than smoothing everything into a blur. That distinction matters a lot if you care about keeping skin looking real.
Step 5: Use the Amount Slider to Dial In a Natural Result
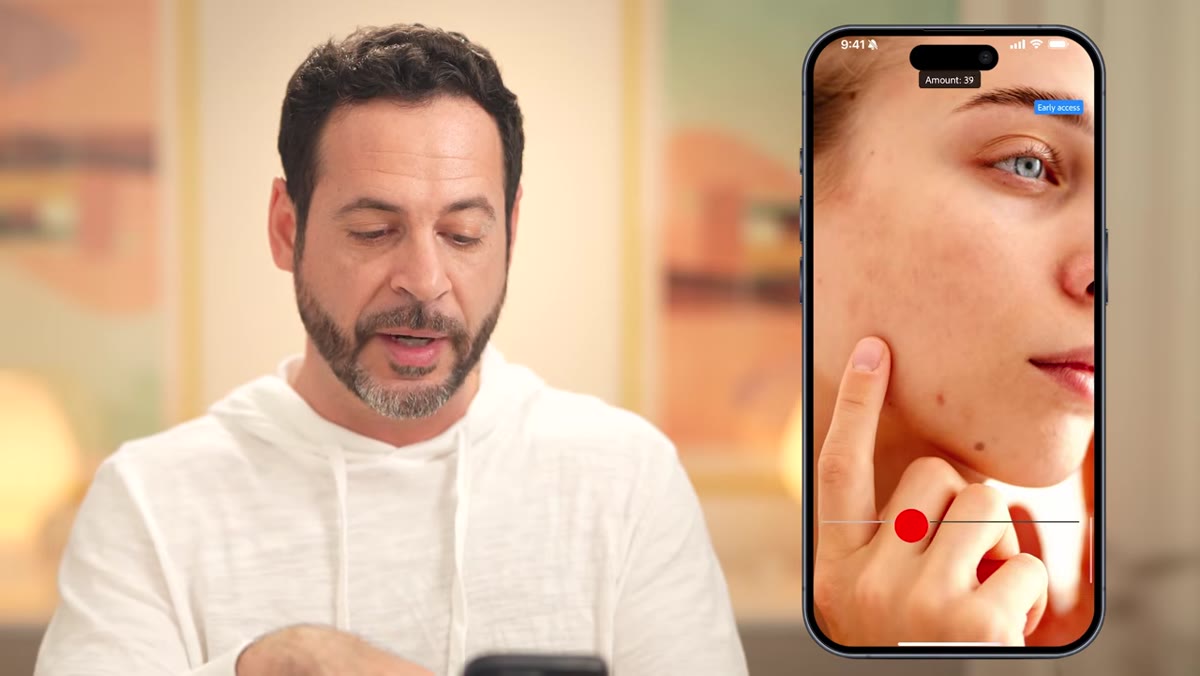 Amount slider being adjusted, blemishes fading in and out
Below the Blemishes button, you’ll find an Amount slider. This is the detail that separates this tool from a blunt-force fix. Drag it left and you’ll see the original blemishes begin to reappear, gradually, like a fade rather than a switch. Drag it right and the correction intensifies.
Amount slider being adjusted, blemishes fading in and out
Below the Blemishes button, you’ll find an Amount slider. This is the detail that separates this tool from a blunt-force fix. Drag it left and you’ll see the original blemishes begin to reappear, gradually, like a fade rather than a switch. Drag it right and the correction intensifies.
In practice, I’d recommend landing somewhere between 70 and 90 percent for most portraits rather than pushing it to full. A small amount of remaining texture reads as natural to the eye, and it keeps the skin from looking processed. Think of it less as “how many blemishes do I want” and more as “how much correction is believable for this particular image and skin type.”
Step 6: Confirm and Address Any Missed Spots with the Remove Tool
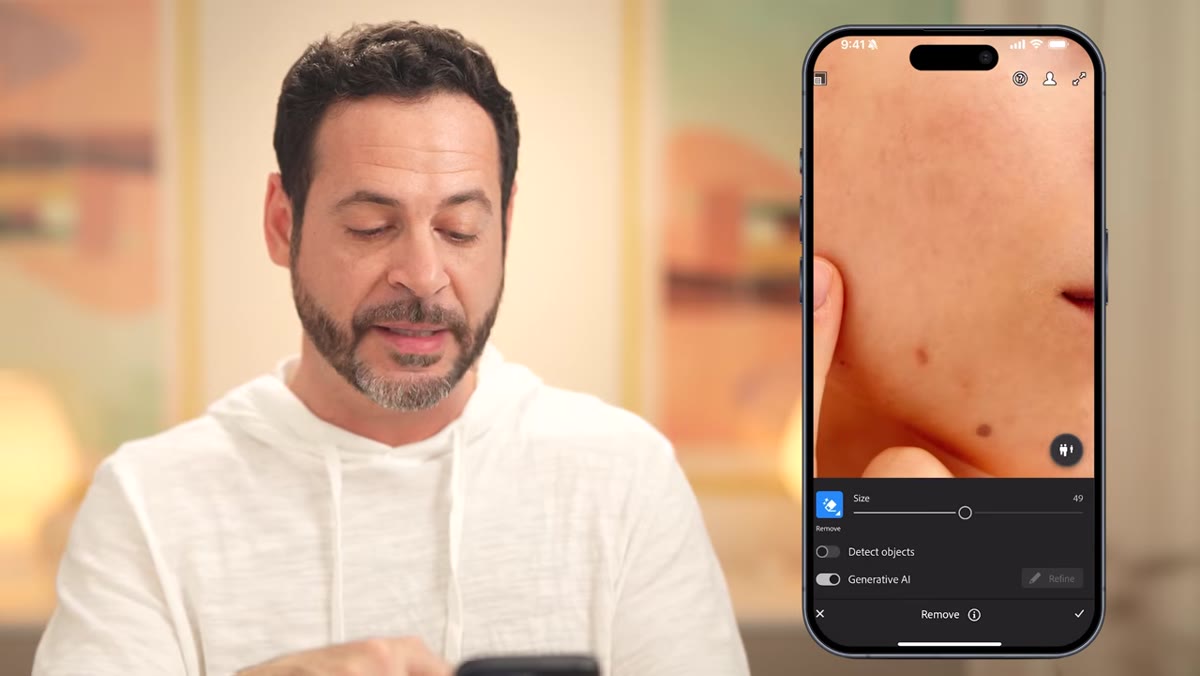 Remove tool being painted over a remaining blemish
Once you’re satisfied with the slider, tap the checkmark to confirm the blemish correction. Then zoom in carefully and check the result. The AI does an impressive job, but it can miss an occasional spot, especially on areas with strong shadows or unusual texture. No tool bats a thousand.
Remove tool being painted over a remaining blemish
Once you’re satisfied with the slider, tap the checkmark to confirm the blemish correction. Then zoom in carefully and check the result. The AI does an impressive job, but it can miss an occasional spot, especially on areas with strong shadows or unusual texture. No tool bats a thousand.
For anything the automatic step didn’t catch, reach for the Remove icon in the bottom right. Paint directly over the missed area with your finger or stylus, and Lightroom’s AI will analyze the surrounding skin and fill it cleanly. Confirm with the checkmark when you’re done. It takes seconds per spot, and the blending is smooth.
Step 7: Do a Before-and-After Check Before Exiting
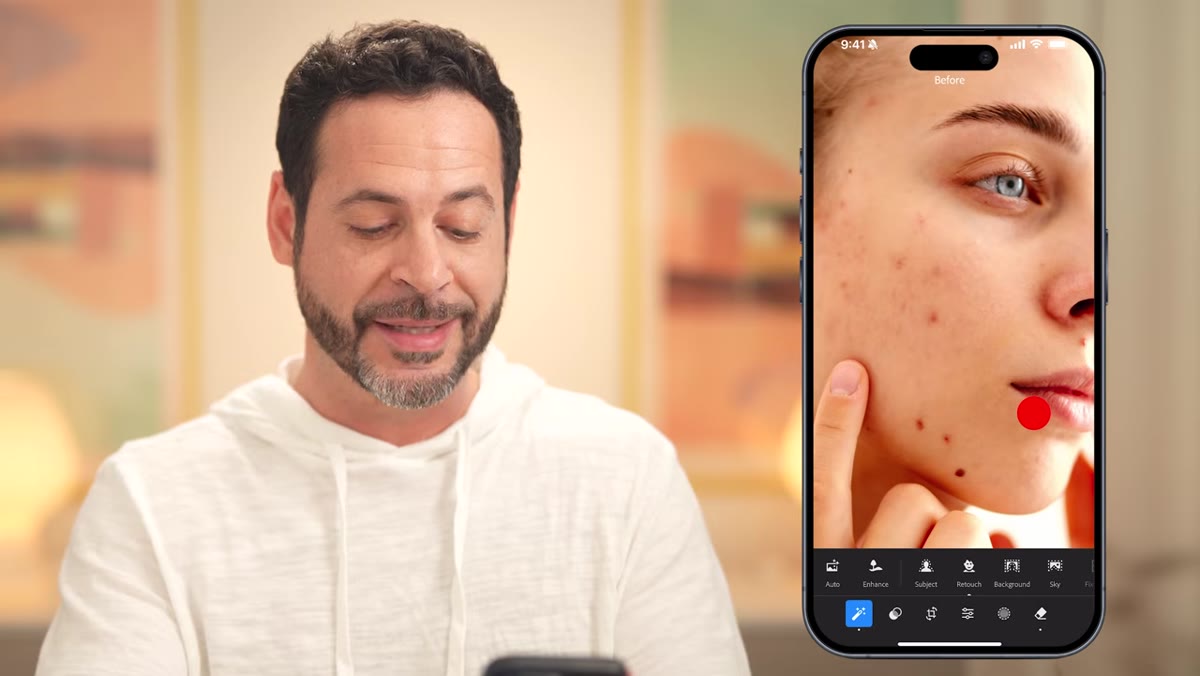 Press-and-hold showing before and after comparison
Press and hold anywhere on the image to toggle between your before and after. This is the honest moment. Look at the skin critically, not just at whether blemishes are gone, but whether the person still looks like themselves. If the after looks like a different face, go back to the slider and reduce the amount.
Press-and-hold showing before and after comparison
Press and hold anywhere on the image to toggle between your before and after. This is the honest moment. Look at the skin critically, not just at whether blemishes are gone, but whether the person still looks like themselves. If the after looks like a different face, go back to the slider and reduce the amount.
This comparison step is something I build into every retouching session regardless of the tool I’m using. It keeps you honest, and it’s the fastest way to catch overcorrection before it leaves your hard drive.
A Note from My Own Practice: Don’t Skip This on Desktop Too
If you’re primarily a desktop retoucher, don’t let “Lightroom Mobile” make you dismiss this. I tested the same Quick Actions workflow synced through the Lightroom ecosystem and found it genuinely useful as a first pass before going into Photoshop for frequency separation work. Knocking out the obvious blemishes in Lightroom first means less time cloning in Photoshop, which means I can spend that time on the work that actually requires a skilled eye, fine texture, color variation, under-eye work.
The blemish tool won’t replace a full beauty retouch for high-end campaign work. But as a time-saving first pass, or as a complete solution for editorial and delivery portraits, it earns its place in the workflow.
The single most important thing this tool gets right is giving you control over the result rather than making the decision for you. One-tap AI fixes are only useful if they leave room for judgment, and this one does. Use the slider. Check your before-and-after. Let the skin breathe a little.
Watch the full tutorial on YouTube to see the PHLEARN team demo the tool in real time. It’s one minute well spent.
Comments (4)
Solid advice. I'd just add that shooting in RAW makes this ten times easier.
Shared this with my photography group. Everyone found it useful.
Finally someone explains this without making it overly complicated.
Mostly agree, though I've had better results doing step 2 before step 1.
Leave a Comment