
If you do any volume of beauty or portrait work, you already know that waiting on Lightroom is part of the job. Waiting for exports, waiting for AI masking, waiting for denoise to grind through a raw file while your cursor just sits there, taunting you. I’ve lost whole stretches of productive time staring at a progress bar when I could have been culling the next batch or answering emails. So when Adobe drops an update that actually addresses a real workflow bottleneck, I pay attention.
Watch the full tutorial on YouTube
In this Matt Kloskowski tutorial covering the April 2026 Lightroom ecosystem updates, Matt walks through what’s new across both Lightroom Classic and Lightroom Desktop. Some features are platform-specific, some are shared, and at least one made me genuinely stop and re-read the screen. I’ve pulled out the updates most relevant to retouchers and portrait photographers, with my own notes on how I’m already thinking about working them into my process.
Step 1: Understand What “Background Processing” Actually Means Now
 Denoise running with editing temporarily disabled message shown
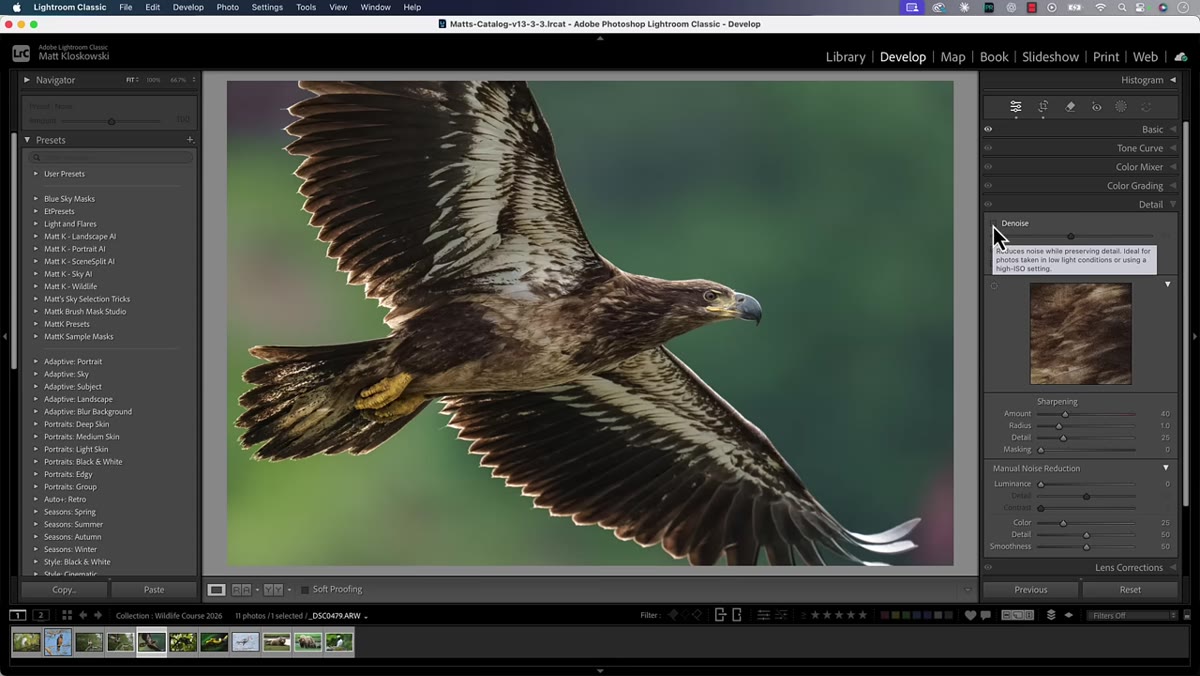
The headline Lightroom Classic feature this update is background AI processing, specifically for denoise. Previously, when you ran Adobe’s AI denoise on a raw file, a modal window blocked your entire Lightroom session until it finished. You couldn’t browse, you couldn’t cull, you couldn’t do anything. For a single portrait this was annoying. For a batch of twenty skin-heavy beauty shots, it was a workflow killer.
Denoise running with editing temporarily disabled message shown
The headline Lightroom Classic feature this update is background AI processing, specifically for denoise. Previously, when you ran Adobe’s AI denoise on a raw file, a modal window blocked your entire Lightroom session until it finished. You couldn’t browse, you couldn’t cull, you couldn’t do anything. For a single portrait this was annoying. For a batch of twenty skin-heavy beauty shots, it was a workflow killer.
Now, when denoise is running, you’ll see a small status indicator telling you that editing on that specific photo is temporarily disabled, but Lightroom Classic itself stays fully functional. You can navigate to other photos, work in the Library module, check your exports. The locked photo stays locked until processing completes, but nothing else is frozen.
Step 2: Use Sync to Batch Denoise Without Losing Your Afternoon
 Multiple photos selected in filmstrip with Sync button visible
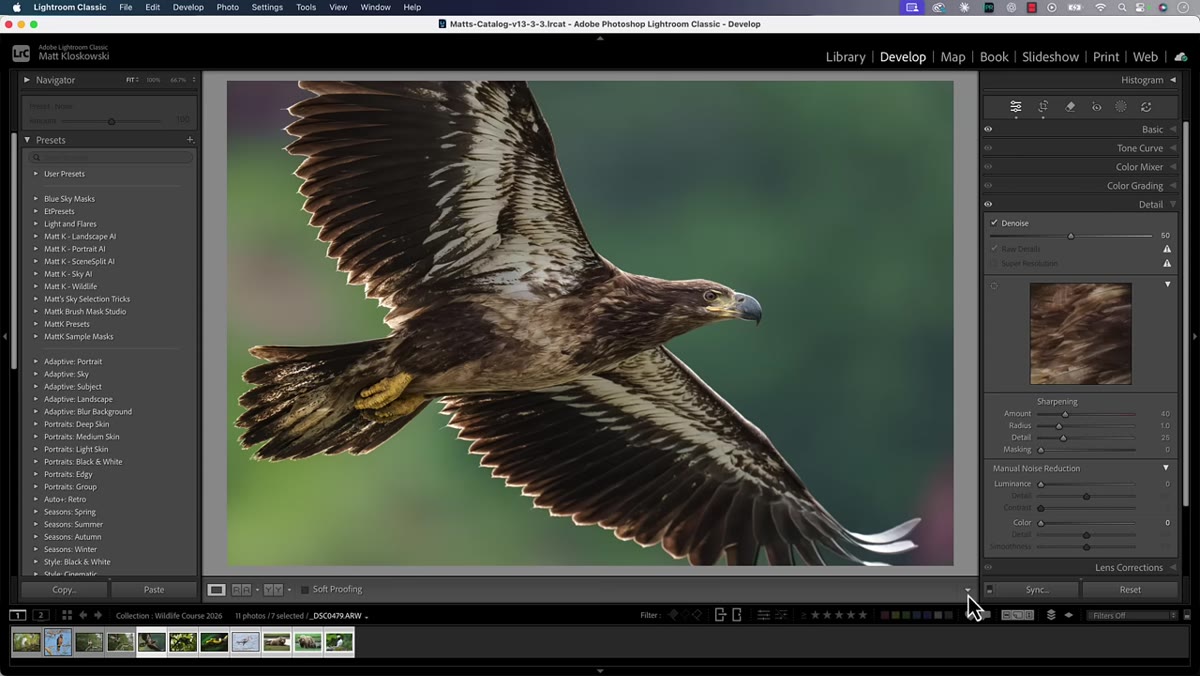
This is the part that matters most for high-volume retouching work. Here’s how the old workflow went: you’d apply denoise to one photo, then select a group of similar shots and hit Sync, include denoise in the sync settings, and then essentially leave. You had no choice. Lightroom was locked until every single file processed.
Multiple photos selected in filmstrip with Sync button visible
This is the part that matters most for high-volume retouching work. Here’s how the old workflow went: you’d apply denoise to one photo, then select a group of similar shots and hit Sync, include denoise in the sync settings, and then essentially leave. You had no choice. Lightroom was locked until every single file processed.
Now, with background processing active, you can select your batch, hit Sync, check denoise in the sync panel, and let it run while you keep working. Go through your culling in another folder. Respond to a client. The processing queues in the background and Lightroom doesn’t hold you hostage. For anyone who shoots tethered under low-light studio conditions or pulls high-ISO files that always need denoise, this change is not small.
Step 3: Find the New Film-Inspired Presets (And Decide If You Actually Need Them)
 Film-inspired presets visible in the Presets panel
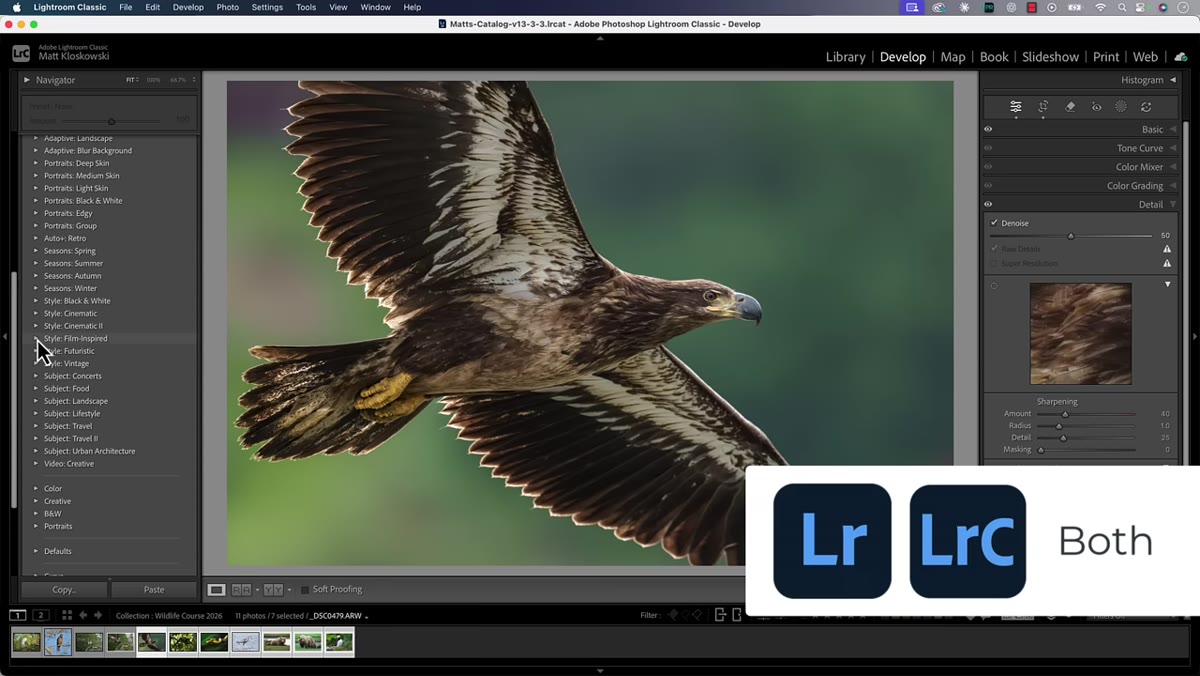
Available in both Lightroom Classic and Lightroom Desktop, Adobe has added a new set of film-inspired presets to the Presets panel. Matt is diplomatically honest here, noting he hasn’t had a single person request these. That tracks with my experience too. For beauty retouching, I’m rarely reaching for a filmic grain look right out of the gate.
Film-inspired presets visible in the Presets panel
Available in both Lightroom Classic and Lightroom Desktop, Adobe has added a new set of film-inspired presets to the Presets panel. Matt is diplomatically honest here, noting he hasn’t had a single person request these. That tracks with my experience too. For beauty retouching, I’m rarely reaching for a filmic grain look right out of the gate.
That said, if you shoot editorial portraits or work with clients who want a more analog, textured aesthetic, it’s worth a few minutes to scroll through what’s available. Presets in Lightroom are non-destructive and easy to back out of, so the cost of exploring is low. My suggestion: apply one to a finished retouch, not a raw file, so you’re judging the effect on skin tones that have already been worked rather than a starting point that might be throwing off your read.
Step 4: Check PSB File Support If You Work Across Lightroom and Photoshop
 PSB large document format referenced in Lightroom cloud sync settings
This one is quieter but genuinely useful for retouchers who move files between Photoshop and Lightroom. PSB files, which are Photoshop’s Large Document Format used for files that exceed the standard 2GB PSD size limit, are now supported in Lightroom’s cloud sync.
PSB large document format referenced in Lightroom cloud sync settings
This one is quieter but genuinely useful for retouchers who move files between Photoshop and Lightroom. PSB files, which are Photoshop’s Large Document Format used for files that exceed the standard 2GB PSD size limit, are now supported in Lightroom’s cloud sync.
If you do heavy compositing, work with very high-resolution medium format files, or stack a lot of layers in your retouching workflow, you may have hit the PSB situation before without realizing it. Your file got big, Photoshop saved it as a PSB, and then it behaved oddly or didn’t sync properly through Lightroom. That friction is now gone. If you’re on Lightroom Desktop and working in the cloud ecosystem, your large retouching files should now move more cleanly between applications.
Step 5: Know the Assisted Culling Update Exists, But Know You Can Turn It Off
 Assisted culling option visible in Library module menu
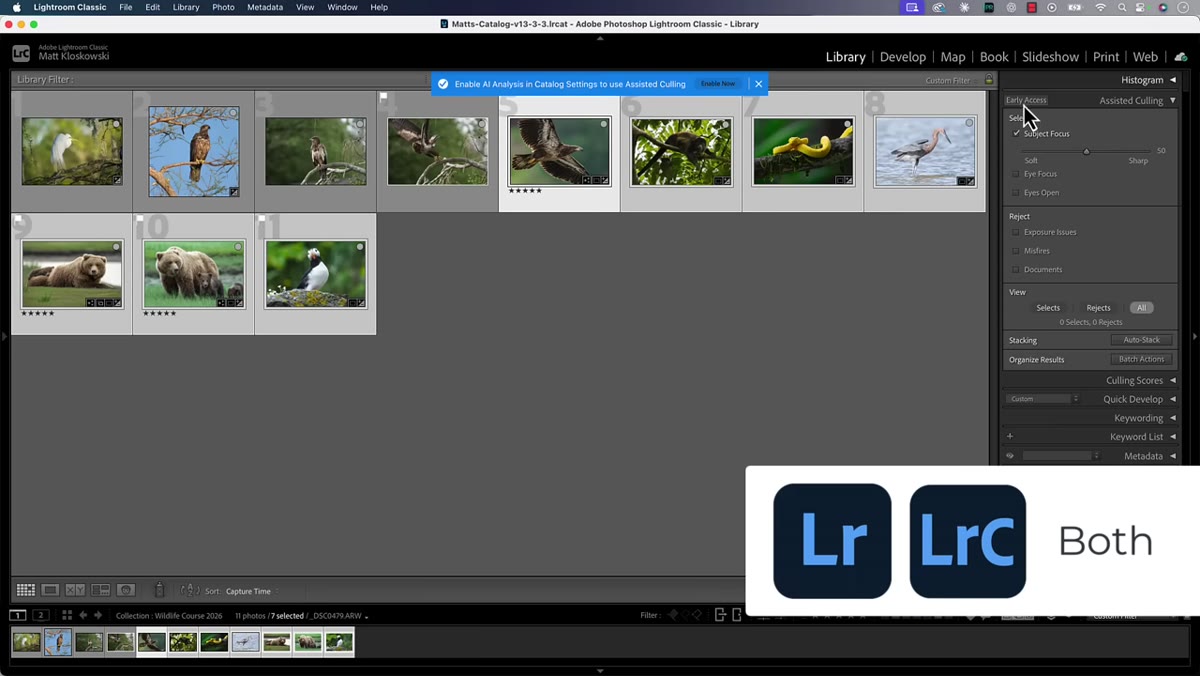
Both versions of Lightroom have updated the assisted culling feature in the Library module. Matt is upfront that he turned it off completely because for his type of photography it created more noise than signal. I’d say the same is true for portrait retouching work. Assisted culling is more useful when you’re sorting through hundreds of similar frames from a shoot looking for sharpness and expression. Most retouchers receive pre-culled selects from the photographer.
Assisted culling option visible in Library module menu
Both versions of Lightroom have updated the assisted culling feature in the Library module. Matt is upfront that he turned it off completely because for his type of photography it created more noise than signal. I’d say the same is true for portrait retouching work. Assisted culling is more useful when you’re sorting through hundreds of similar frames from a shoot looking for sharpness and expression. Most retouchers receive pre-culled selects from the photographer.
If you’re a photographer-retoucher doing your own culling, it’s worth trying the updated version with fresh eyes. But if it’s cluttering your workflow, there’s no shame in switching it off. Matt mentions there’s a walkthrough in the video for disabling it, and it only takes a moment in your preferences.
Step 6: Try the Firefly Mood Board Feature With Genuinely Low Expectations
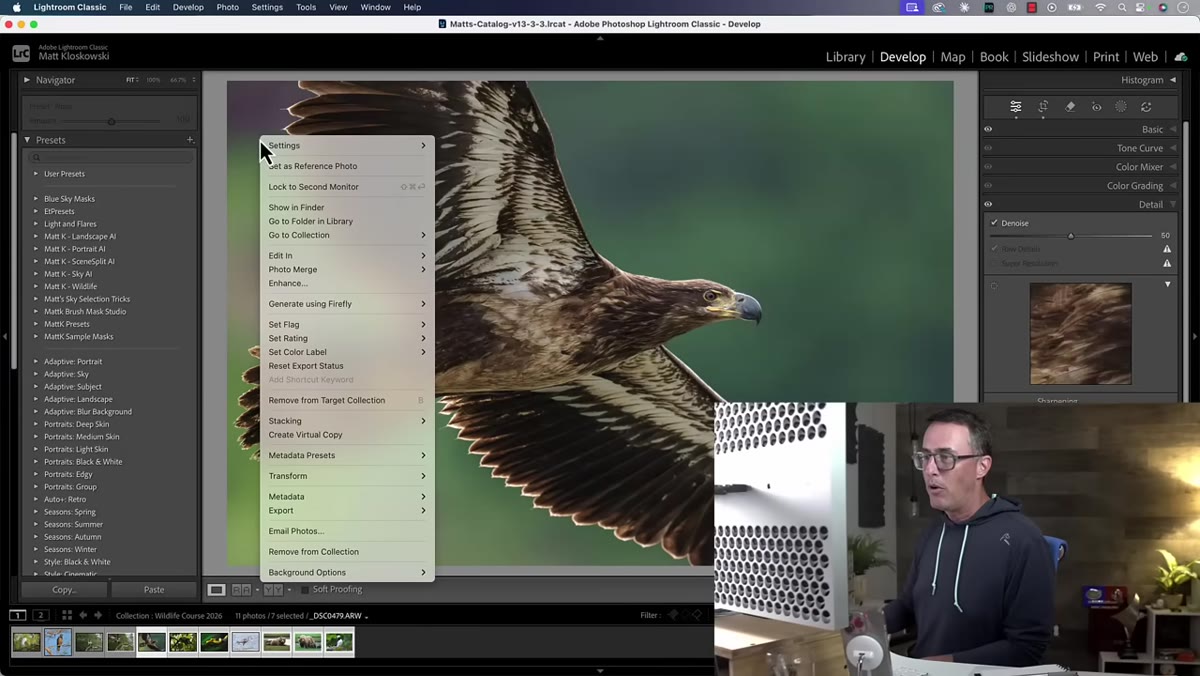 Right-click context menu showing Generate using Firefly and mood board option
Right-clicking on a photo in either version of Lightroom now gives you the option to start a mood board using Adobe Firefly. You can send your photo into Firefly Boards and build out visual references from there. Matt flags this is not an April Fool’s joke, and I appreciate the disclaimer because my first reaction was exactly that.
Right-click context menu showing Generate using Firefly and mood board option
Right-clicking on a photo in either version of Lightroom now gives you the option to start a mood board using Adobe Firefly. You can send your photo into Firefly Boards and build out visual references from there. Matt flags this is not an April Fool’s joke, and I appreciate the disclaimer because my first reaction was exactly that.
For retouchers, this might have more use than it sounds. If you’re in early client conversations and trying to establish a look and feel for a beauty campaign, pulling reference images into a mood board directly from your Lightroom library is faster than screenshotting Pinterest. Whether Firefly’s generative tools add anything meaningful to that process is a separate question I’m still working out.
A Note From Someone Who Relies on Denoise Daily
The background processing update is the one I want to put a star next to for anyone doing retouching work at any real volume. I work with a lot of beauty brand clients whose photographers shoot in challenging lighting, and AI denoise has become a standard part of my raw processing step before skin work begins. The old locked-Lightroom behavior wasn’t just annoying, it was actively breaking my momentum on heavy editing days.
My practical tip: start your denoise sync at the beginning of a session, right after you’ve done your initial import and flagging. Let it run in the background while you move on to your first edit. By the time you cycle back to the second batch, processing is done and you haven’t lost a minute.
The single biggest thing to take away from this update is that Adobe is finally treating AI processing like background infrastructure rather than a foreground event that demands your full attention. That’s the right direction, and it makes Lightroom Classic feel meaningfully more professional for high-volume retouching work.
Watch the full tutorial on YouTube to see Matt walk through each feature live, including the safe spaces feature I ran out of room to cover here (yes, it’s exactly what it sounds like, and yes, it’s a real Lightroom feature now).
Comments (4)
Printing this out and pinning it next to my monitor. That good.
Well explained. I think my audience would really benefit from this — mind if I link to it?
Simple but effective. Sometimes that's all you need.
Quality content like this is rare. Keep it up.
Leave a Comment