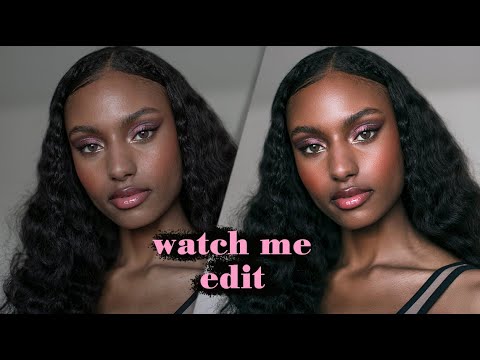
There’s a particular kind of client feedback that stays with you. Mine came early in my career, when someone looked at a beauty edit I’d spent three hours on and said the skin looked “like a wax figure.” I’d been heavy-handing my retouching without a solid workflow underneath it, and the result showed. What I needed was a structured approach to building a clean, flexible base before touching a single blemish. That’s exactly what Watch the full tutorial on YouTube this Jessica Kobeissi tutorial delivers, and why I keep coming back to it when I’m onboarding new students in my workshops.
In this Jessica Kobeissi tutorial from her “Retouch and Chill” series, she walks through a complete portrait edit with a refreshingly honest, unpolished energy. There’s no over-produced perfection here. She restarts after Camera Raw resets her work, she jokes about Photoshop’s before-and-after view being chaotic, and she retouches while talking about learning Japanese. That realness is part of what makes the workflow so easy to absorb. You’re watching a working photographer think out loud, and the decisions she makes are the same ones the rest of us face on every job.
What I want to do here is pull out the actual technique, name the settings, and give you something you can sit down and follow without needing to pause and rewind every thirty seconds.
Step 1: Open in Camera Raw and Set a Warm, Low-Contrast Base
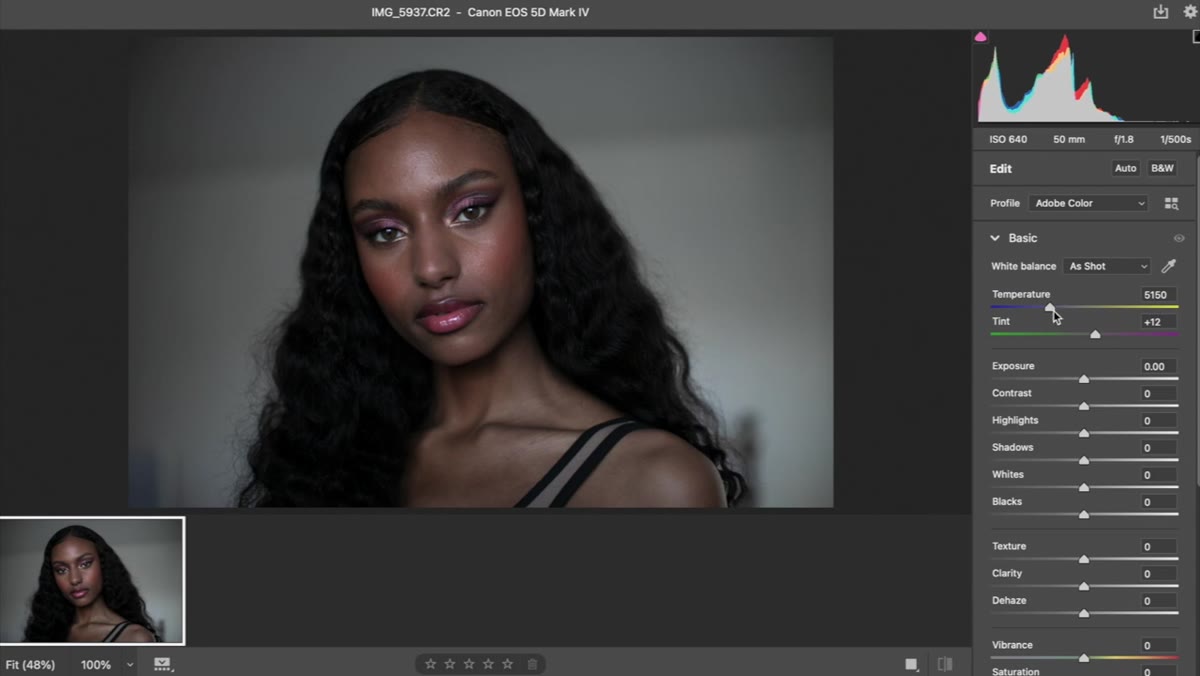 Camera Raw panel open with temperature and contrast sliders visible
Before anything touches Photoshop, Jessica works the image in Camera Raw to create what she calls a “soft base.” She increases the temperature slider to push the image warmer. The exact value will depend on your raw file, but the intention is to lean into golden, skin-flattering warmth rather than a neutral or cool tone. From there, she pulls the contrast down. This is counterintuitive if you’re used to reaching for contrast to make images pop, but the logic is sound: a high-contrast base compresses your shadows and highlights early, making it harder to add refined light and color later without things looking muddy or overdone.
Camera Raw panel open with temperature and contrast sliders visible
Before anything touches Photoshop, Jessica works the image in Camera Raw to create what she calls a “soft base.” She increases the temperature slider to push the image warmer. The exact value will depend on your raw file, but the intention is to lean into golden, skin-flattering warmth rather than a neutral or cool tone. From there, she pulls the contrast down. This is counterintuitive if you’re used to reaching for contrast to make images pop, but the logic is sound: a high-contrast base compresses your shadows and highlights early, making it harder to add refined light and color later without things looking muddy or overdone.
She also lifts the shadows slightly to open up darker areas of the skin, and adds a touch of clarity for micro-contrast and edge definition. The goal at this stage is not a finished look. It’s a clean, malleable image that gives you room to work.
Step 2: Enable Lens Profile Corrections in the Optics Panel
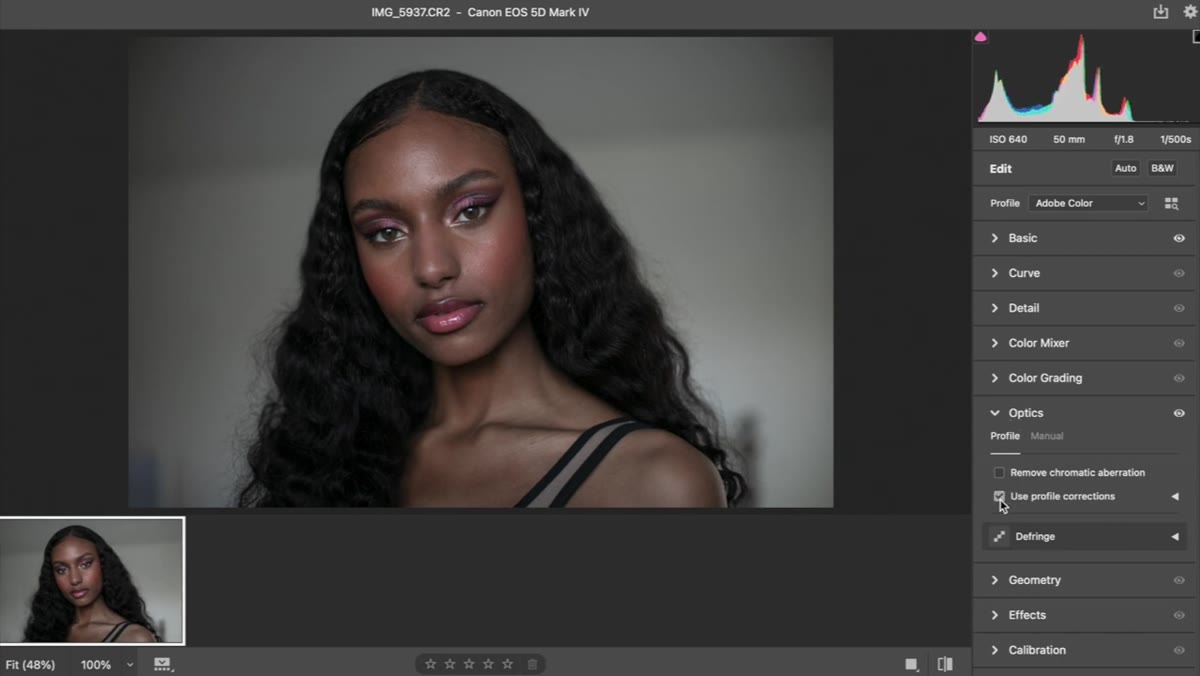 Optics panel open with Use Profile Corrections checkbox enabled
Still inside Camera Raw, navigate to the Optics tab and check “Use Profile Corrections.” This one checkbox removes two problems at once: barrel distortion and vignetting that the lens introduces. Vignetting in particular can throw off your skin retouching because darkened edges affect how you read tone across the face. Correcting it here, before the image comes into Photoshop, means you’re working with accurate, even light from the start. Jessica treats this as a quick housekeeping step rather than a creative decision, and that’s the right framing. Get the lens artifacts out of the way so they don’t quietly corrupt everything downstream.
Optics panel open with Use Profile Corrections checkbox enabled
Still inside Camera Raw, navigate to the Optics tab and check “Use Profile Corrections.” This one checkbox removes two problems at once: barrel distortion and vignetting that the lens introduces. Vignetting in particular can throw off your skin retouching because darkened edges affect how you read tone across the face. Correcting it here, before the image comes into Photoshop, means you’re working with accurate, even light from the start. Jessica treats this as a quick housekeeping step rather than a creative decision, and that’s the right framing. Get the lens artifacts out of the way so they don’t quietly corrupt everything downstream.
Step 3: Open in Photoshop and Run Your Frequency Separation Action
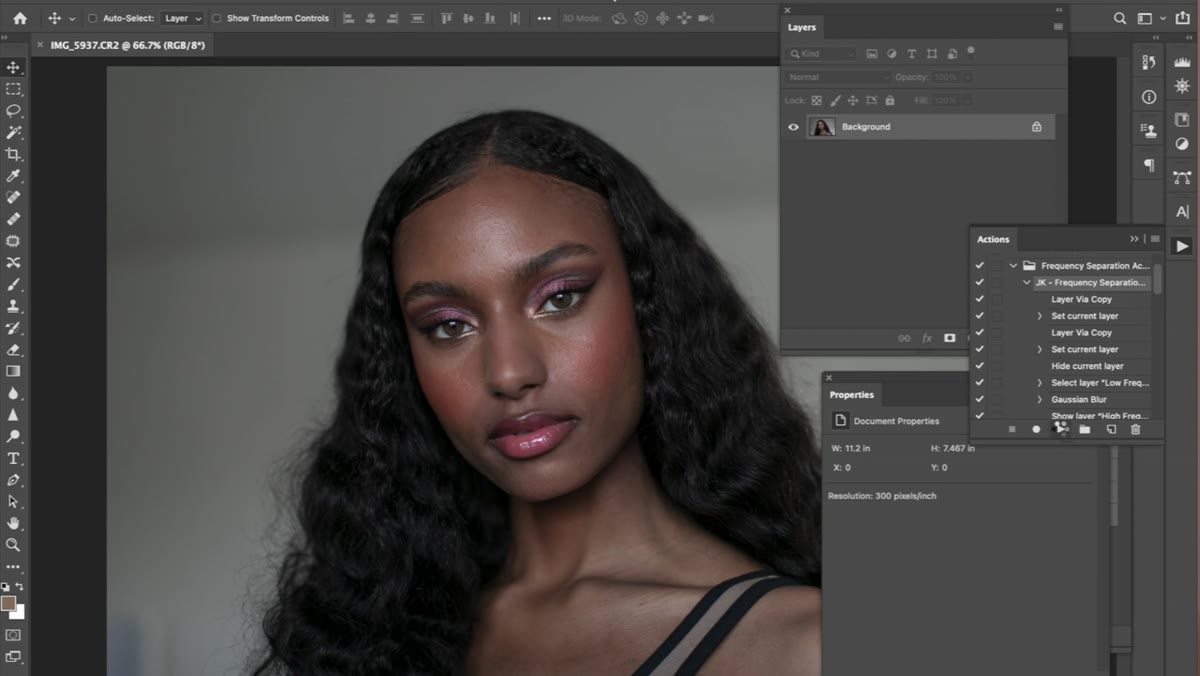 Frequency separation action running in the Actions panel
Once the image is open in Photoshop, Jessica immediately runs a frequency separation action. If you haven’t built one yet, this is worth spending an afternoon on. Frequency separation splits the image into two layers: a low frequency layer that holds color, tone, and volume, and a high frequency layer that holds texture, pores, and fine detail. The power of this split is that you can retouch skin tone and blotchiness without disturbing texture, which is what separates natural-looking retouching from that wax-figure effect I know too well.
Frequency separation action running in the Actions panel
Once the image is open in Photoshop, Jessica immediately runs a frequency separation action. If you haven’t built one yet, this is worth spending an afternoon on. Frequency separation splits the image into two layers: a low frequency layer that holds color, tone, and volume, and a high frequency layer that holds texture, pores, and fine detail. The power of this split is that you can retouch skin tone and blotchiness without disturbing texture, which is what separates natural-looking retouching from that wax-figure effect I know too well.
Jessica plays her action directly from the Actions panel, which takes seconds. She then moves the panel out of the way and duplicates the low frequency layer before touching anything. That duplicate is your safety net. If you retouch on the original and make a mistake twenty minutes in, you’re redoing everything. The duplicate costs you nothing and saves you from yourself.
Step 4: Retouch Skin Texture on the Low Frequency Layer with the Healing Brush
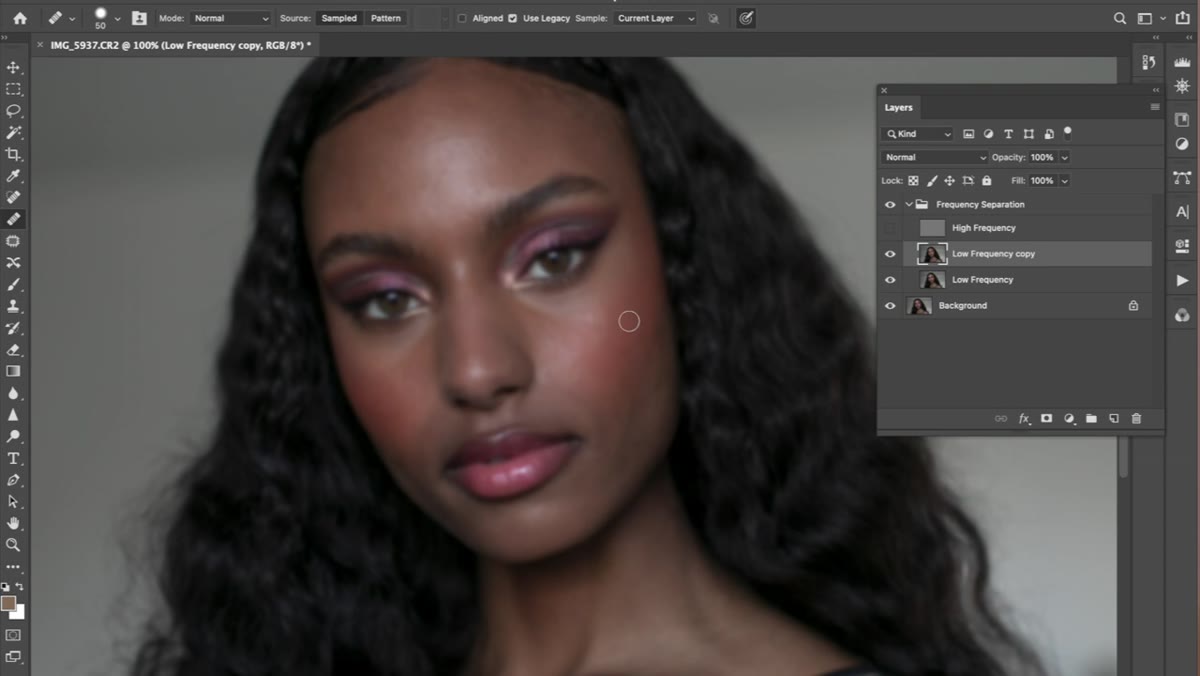 Healing brush active on the low frequency layer copy
With the low frequency layer copy selected, Jessica switches to the Healing Brush tool (not the Spot Healing Brush, which samples automatically and can pull in the wrong texture). She’s working with a graphics tablet here, which gives her pressure sensitivity and more nuanced control than a mouse. If you’re doing volume retouching on faces regularly, a tablet is one of those investments that changes how retouching feels, not just how it looks.
Healing brush active on the low frequency layer copy
With the low frequency layer copy selected, Jessica switches to the Healing Brush tool (not the Spot Healing Brush, which samples automatically and can pull in the wrong texture). She’s working with a graphics tablet here, which gives her pressure sensitivity and more nuanced control than a mouse. If you’re doing volume retouching on faces regularly, a tablet is one of those investments that changes how retouching feels, not just how it looks.
On the low frequency layer, she targets areas of uneven color and blotchiness. Because texture lives on the high frequency layer above, she can paint over tone and redness without flattening the skin’s natural surface. Sample a clean area nearby, paint over the problem area, and the skin stays dimensional. This is the step where most retouchers either build good habits or cement bad ones. Take it slow and sample often rather than using one spot as your source for the whole face.
Step 5: Avoid Heavy Color Grading in Raw, Save It for Photoshop
 Camera Raw panel showing minimal settings, no HSL or color grading adjustments
Jessica makes an explicit choice to skip color grading inside Camera Raw and save that work for Photoshop. This is worth flagging because it goes against how some retouching pipelines are taught. Her reasoning is flexibility: in Photoshop, color grading lives on adjustment layers you can mask, reduce in opacity, or delete entirely. In Camera Raw, those decisions are baked into the base before you’ve even seen the image in full context. Doing it her way means you can push a color grade, see it interact with your retouching, and dial it back if it stops serving the skin tones.
Camera Raw panel showing minimal settings, no HSL or color grading adjustments
Jessica makes an explicit choice to skip color grading inside Camera Raw and save that work for Photoshop. This is worth flagging because it goes against how some retouching pipelines are taught. Her reasoning is flexibility: in Photoshop, color grading lives on adjustment layers you can mask, reduce in opacity, or delete entirely. In Camera Raw, those decisions are baked into the base before you’ve even seen the image in full context. Doing it her way means you can push a color grade, see it interact with your retouching, and dial it back if it stops serving the skin tones.
What I Add to This Workflow in My Own Practice
Jessica’s workflow is lean and purposeful, and I use the same bones in almost every beauty job. The one place I extend it is on the high frequency layer. After addressing the low frequency, I go back to the high frequency layer and use the Clone Stamp at a low opacity, around 30 to 40 percent, to smooth any particularly coarse texture that draws the eye without eliminating it entirely. This is especially useful on high-resolution images shot on modern sensors where skin texture can read as aggressively sharp even when the model’s skin is genuinely lovely. The goal is always to make the skin look like the subject on their best day, not like a different person entirely.
I also name my frequency separation action after a film. Currently it’s called “Phantom Thread” because I find it appropriately meticulous. This is not a professional tip. It just makes opening Photoshop slightly more enjoyable.
The single most transferable idea from this tutorial is something Jessica doesn’t make a big speech about: she builds a forgiving, low-contrast base before retouching begins, and she protects her work with duplicated layers. Both decisions cost almost no time and prevent the majority of mistakes that make retouching feel frustrating instead of satisfying. Start soft, duplicate before you retouch, and let Photoshop do the heavy lifting on the layers where it belongs.
Watch the full tutorial on YouTube to follow along with Jessica’s edit in real time and catch the details that are easier to absorb by watching.
Comments
Leave a Comment