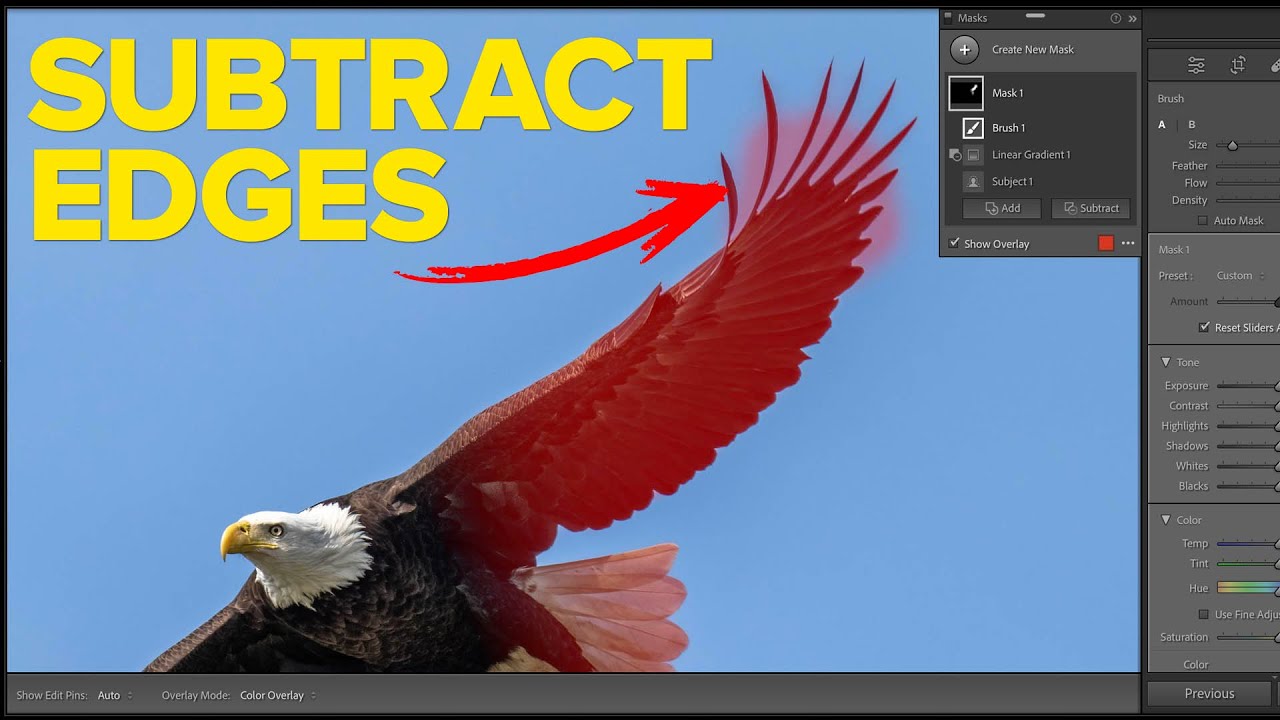
There’s a particular kind of frustration that comes from making a solid selection, bumping the exposure, and then noticing that weird glowing halo creeping around the edges of your subject. I ran into this constantly when I first started doing beauty work, and for a long time my solution was either to accept the flaw or spend twenty minutes in Photoshop doing painstaking manual cleanup. Neither option felt right. When I came across this Matt Kloskowski tutorial on the power of the Subtract tool in Lightroom and Photoshop masking, I realized I had been overcomplicating something that has a much more elegant fix built right into the tools I already use every day.
The core idea Matt walks through is deceptively simple: automated selections like “Select Subject” are fast and genuinely impressive, but they are never truly perfect. The edges drift, the mask bleeds into areas it shouldn’t, and the result looks processed instead of polished. Subtract mode, paired with a heavily feathered brush, gives you a precise and forgiving way to carve back those imperfections without rebuilding the mask from scratch. For anyone doing portrait or beauty retouching, this workflow translates directly to skin, hair, and background separation work. Watch the full tutorial on YouTube and follow along with the steps below.
Step 1: Make Your Initial Selection with Select Subject
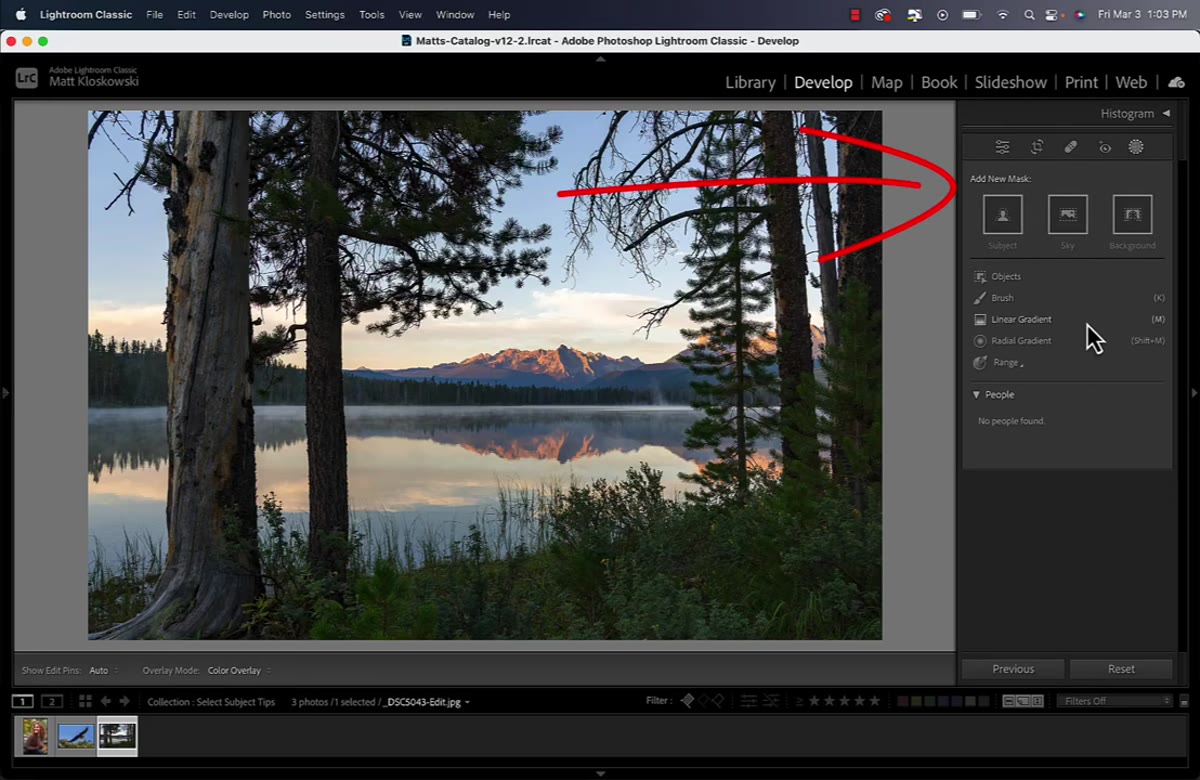 Lightroom masking panel open, subject selected
Start by opening your image and heading straight to the Masking panel, which lives in the same place in both Lightroom and Photoshop’s Camera Raw filter. Run “Select Subject” to get your baseline mask. At this stage, don’t worry if the selection isn’t perfect. The point of this workflow is specifically that it doesn’t need to be. What you’re looking for here is a solid overall read on the subject, maybe 85 to 90 percent accurate, which is exactly what Select Subject typically delivers.
Lightroom masking panel open, subject selected
Start by opening your image and heading straight to the Masking panel, which lives in the same place in both Lightroom and Photoshop’s Camera Raw filter. Run “Select Subject” to get your baseline mask. At this stage, don’t worry if the selection isn’t perfect. The point of this workflow is specifically that it doesn’t need to be. What you’re looking for here is a solid overall read on the subject, maybe 85 to 90 percent accurate, which is exactly what Select Subject typically delivers.
This step works identically whether you’re in Lightroom or in Camera Raw via Photoshop’s Filter menu, so the skill transfers completely. Matt is clear about this early in the tutorial, and it matters: you only need to learn the logic once.
Step 2: Apply an Adjustment to Reveal Edge Problems
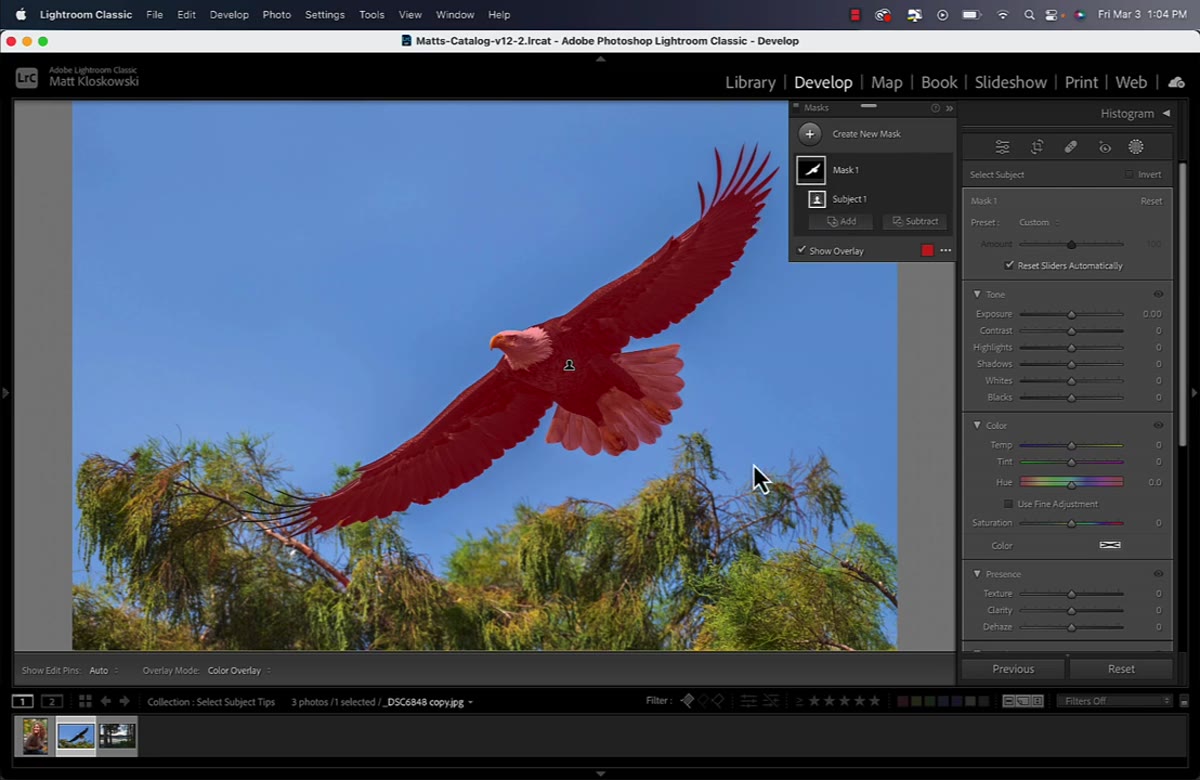 Exposure slider increased, glowing edge visible around subject
Before you can fix a mask edge, you need to be able to see it clearly. Temporarily push your exposure or a contrast slider to an exaggerated level, something obviously too strong, so any halo or bleed around the selection edge becomes impossible to miss. You’re not committing to this adjustment; you’re using it as a diagnostic tool.
Exposure slider increased, glowing edge visible around subject
Before you can fix a mask edge, you need to be able to see it clearly. Temporarily push your exposure or a contrast slider to an exaggerated level, something obviously too strong, so any halo or bleed around the selection edge becomes impossible to miss. You’re not committing to this adjustment; you’re using it as a diagnostic tool.
This is a habit I now use in all my beauty retouching, not just here. Pushing an adjustment past where you’d ever actually land it forces the mask to confess its problems. Soft transitions look fine at normal exposure levels but fall apart the moment you push the image. Better to catch that now than after you’ve saved a final export.
Step 3: Switch to Subtract Mode in the Mask Panel
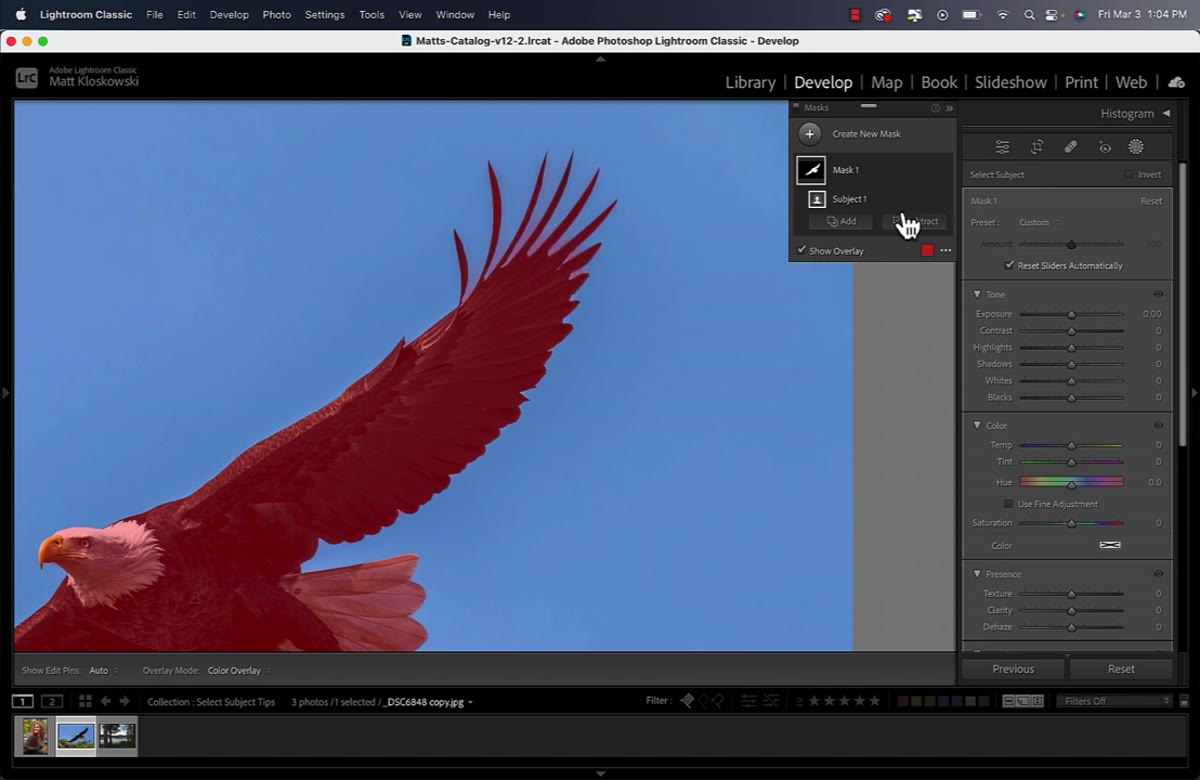 Subtract option selected in masking panel dropdown
With your mask active, open the mask options and choose Subtract. This tells Lightroom or Camera Raw that any brush strokes you now apply will remove from the existing mask rather than add to it. Think of it as an eraser that respects feathering and opacity, which makes it far more controllable than a hard-edged selection edit.
Subtract option selected in masking panel dropdown
With your mask active, open the mask options and choose Subtract. This tells Lightroom or Camera Raw that any brush strokes you now apply will remove from the existing mask rather than add to it. Think of it as an eraser that respects feathering and opacity, which makes it far more controllable than a hard-edged selection edit.
You stay in the same mask you already created. There is no need to build a new layer or duplicate anything. Subtract operates directly on top of your existing work, which is what keeps this technique fast enough to use on real client deadlines.
Step 4: Configure the Subtract Brush for Edge Work
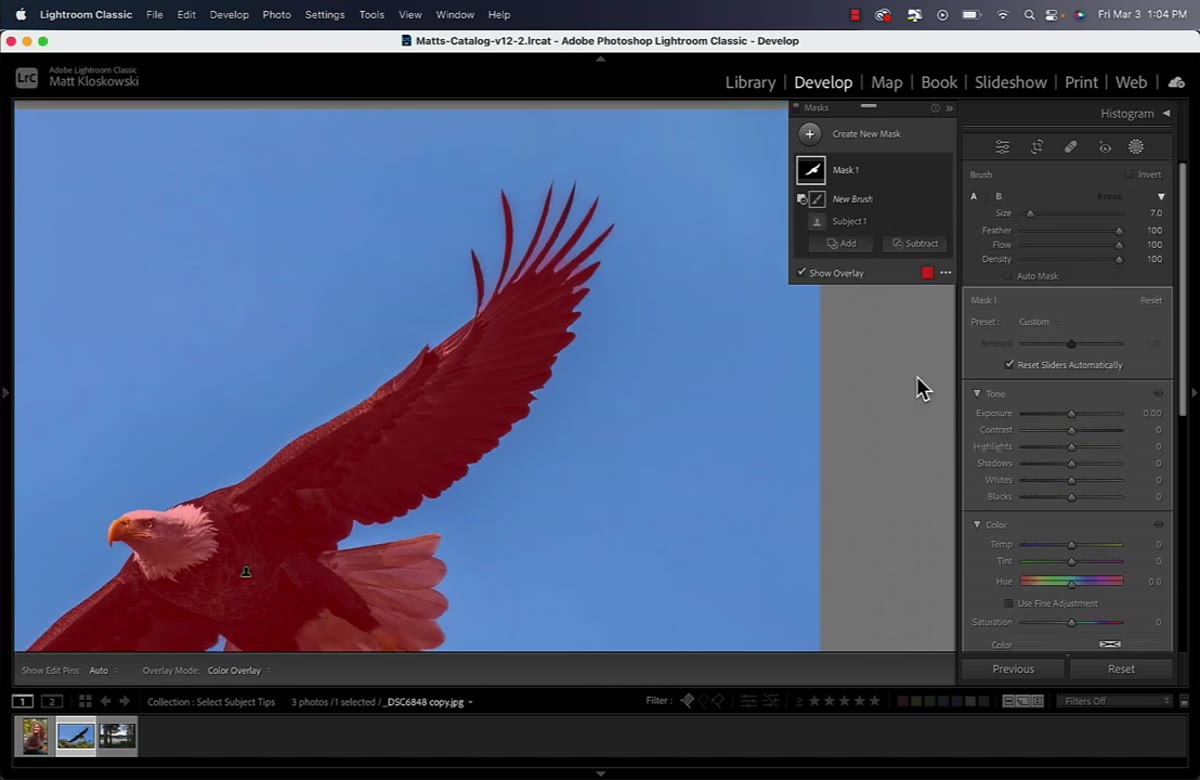 Brush settings panel showing Feather at 100, Flow and Density at 100
Open the brush settings within Subtract mode. Set Flow to 100, Density to 100, and Feather to 100. That last number is the important one. A Feather of 100 creates a brush where the inner circle represents the full-strength effect and the space between the inner and outer circles is a gradual falloff. This falloff is what does the actual softening work along the edge.
Brush settings panel showing Feather at 100, Flow and Density at 100
Open the brush settings within Subtract mode. Set Flow to 100, Density to 100, and Feather to 100. That last number is the important one. A Feather of 100 creates a brush where the inner circle represents the full-strength effect and the space between the inner and outer circles is a gradual falloff. This falloff is what does the actual softening work along the edge.
Use the left and right bracket keys to resize the brush on the fly. For edge work, Matt recommends going slightly larger than you might expect. You are not painting over the mask in broad strokes; you are running the feathered outer ring along the edge so that the transition gradually softens rather than cuts off abruptly.
Step 5: Skim the Brush Along the Problem Edges
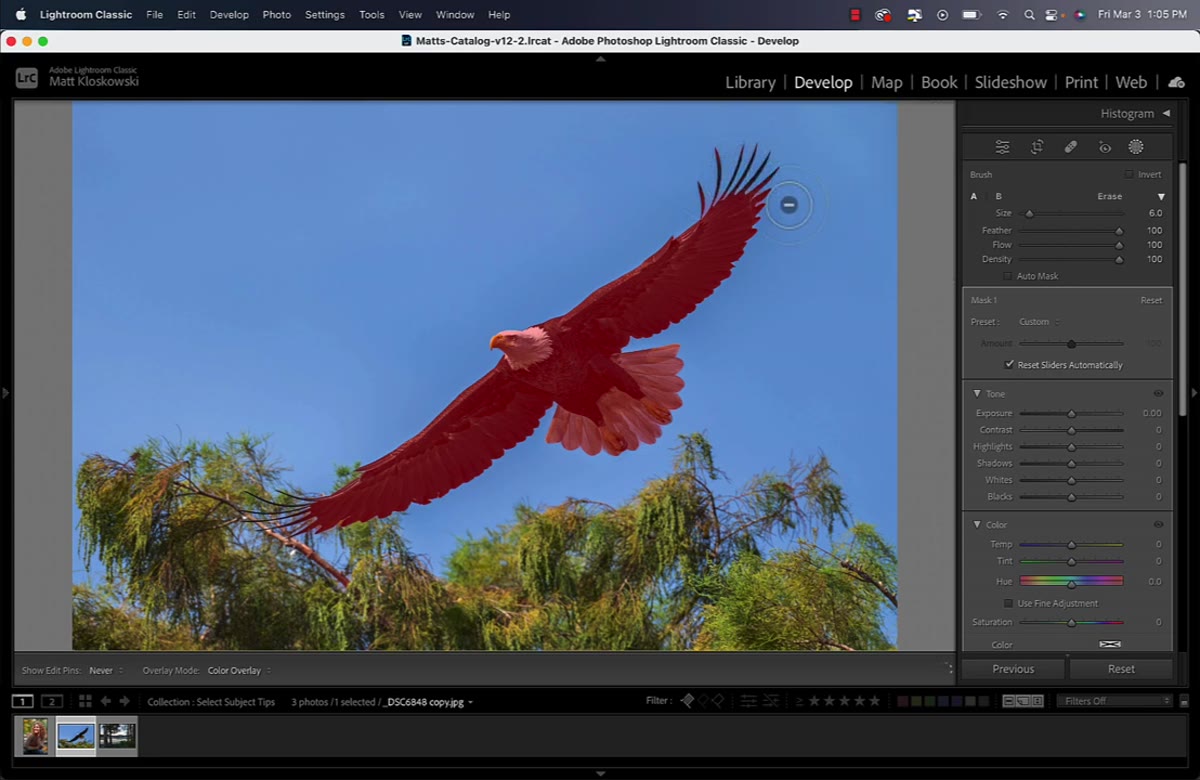 Large feathered brush being moved along subject’s wing edge
Position the brush so the center circle sits just outside the subject’s edge, not on top of the subject itself. Then skim it along the boundary in smooth, controlled passes. The goal is to let the feathered falloff blend the mask edge rather than forcefully removing chunks of the selection.
Large feathered brush being moved along subject’s wing edge
Position the brush so the center circle sits just outside the subject’s edge, not on top of the subject itself. Then skim it along the boundary in smooth, controlled passes. The goal is to let the feathered falloff blend the mask edge rather than forcefully removing chunks of the selection.
This is not a painting motion. It’s closer to ironing a crease, a single pass moving along the contour. The visual result is that harsh halos and glowing transitions soften into something that reads as natural. Matt’s benchmark here is useful: if the edge would go unnoticed at a normal processing level, you’ve done enough.
Step 6: Toggle Between Subtract and Add to Correct Overcorrection
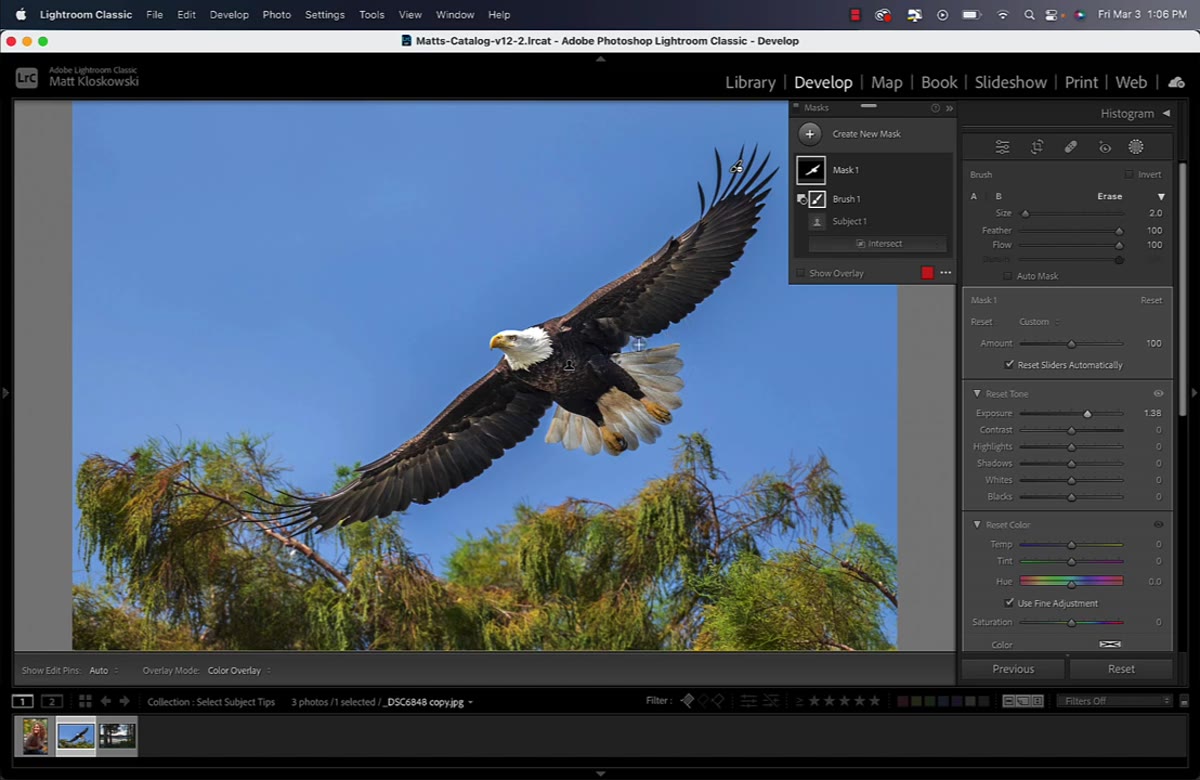 Option key held down, brush switching to Add mode mid-stroke
If you subtract too much and the mask starts pulling back from areas you actually need covered, there is a fast recovery built in. While in Subtract mode, hold the Option key on Mac or the Alt key on Windows and you temporarily flip into Add mode. Release the key and you’re back in Subtract. The bracket keys for brush resizing work in both modes, so your sizing stays consistent as you flip back and forth.
Option key held down, brush switching to Add mode mid-stroke
If you subtract too much and the mask starts pulling back from areas you actually need covered, there is a fast recovery built in. While in Subtract mode, hold the Option key on Mac or the Alt key on Windows and you temporarily flip into Add mode. Release the key and you’re back in Subtract. The bracket keys for brush resizing work in both modes, so your sizing stays consistent as you flip back and forth.
This toggle keeps you inside a single mask editing session. No mode switching in the panel, no undoing and restarting. It’s the kind of small workflow efficiency that adds up quickly when you’re working through a full retouching session with multiple masks active.
How I Apply This in Beauty Retouching
The portrait work I do involves a lot of selective skin edits, and the Subtract brush has become my go-to for cleaning up luminosity masks and subject selections on hair edges. Hair is where automated tools suffer most, and a feathered Subtract pass along a hairline can rescue a mask that would otherwise require a dedicated Refine Edge session in full Photoshop.
One thing I’d add from my own practice: use this technique after you’ve done your corrective work, not during it. Build the mask, apply your adjustment conservatively, then do the Subtract pass as a final refinement. If you try to refine and adjust at the same time, you end up chasing your own corrections in circles.
The single most important idea in this tutorial is that “good enough to refine” is a perfectly valid starting point for a mask. Automated selections give you a strong foundation; the Subtract brush with a high feather value is how you finish the job without starting over. If you’ve been avoiding complex masking because the initial results felt too rough to salvage, this is the technique that changes that.
Watch the full tutorial on YouTube to see Matt walk through the edge refinement in real time. The visual of that brush skimming the edge makes the technique click in a way that description alone can’t fully capture.
Comments
Leave a Comment