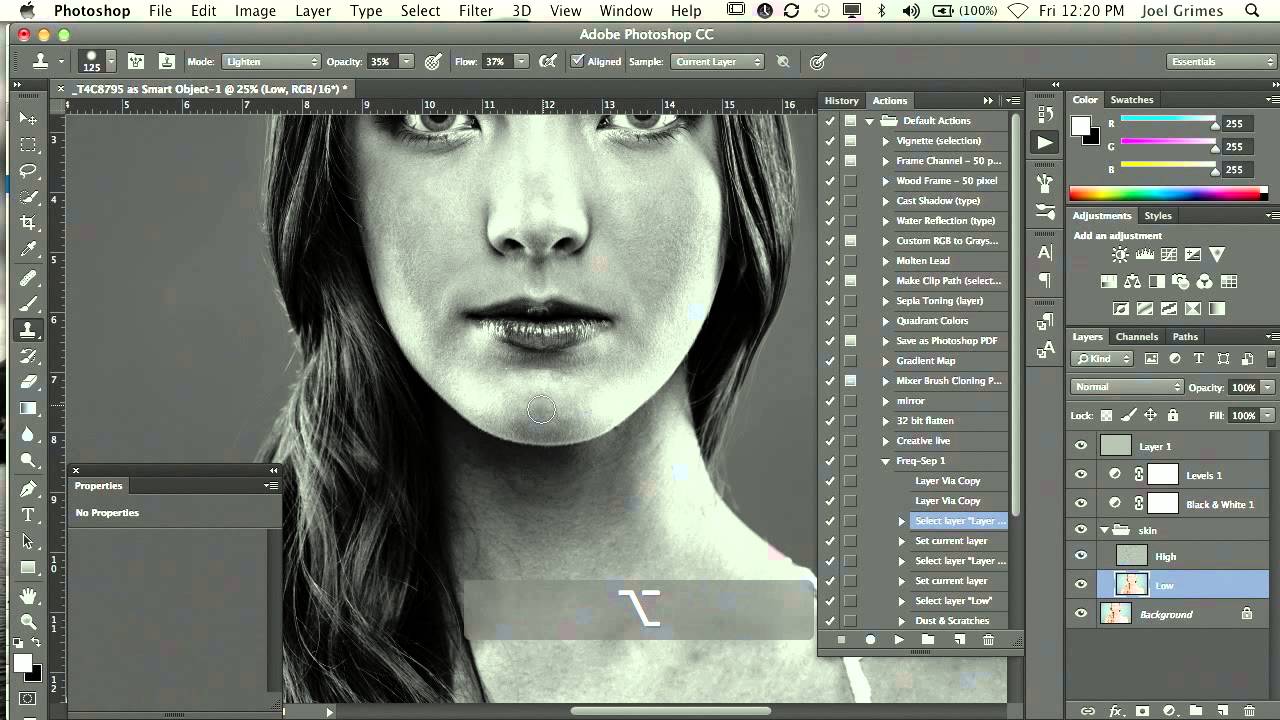
There’s a specific kind of client feedback that stays with you. Mine came early in my retouching career, when someone told me my skin edits looked “like plastic.” She wasn’t wrong. I’d been over-smoothing, chasing perfection in all the wrong ways, and the results looked like my subjects had been wrapped in cellophane. That comment sent me down a long road of studying how professional retouchers actually work, and one of the techniques that genuinely changed my approach was watching Joel Grimes demonstrate his skin retouching workflow in a CreativeLive session. Watch the full tutorial on YouTube
What I respect about Joel’s approach is that he’s honest about what he knows and what he doesn’t. He’s not performing mastery. He demonstrates the frequency separation low layer and dodge-and-burn workflow as a working professional would, showing you the logic behind the tools rather than just the clicks. That kind of transparency is rare and genuinely useful. What follows is my breakdown of the core techniques he covers, translated into steps you can sit down and apply today.
Step 1: Set Up Your Frequency Separation Layers
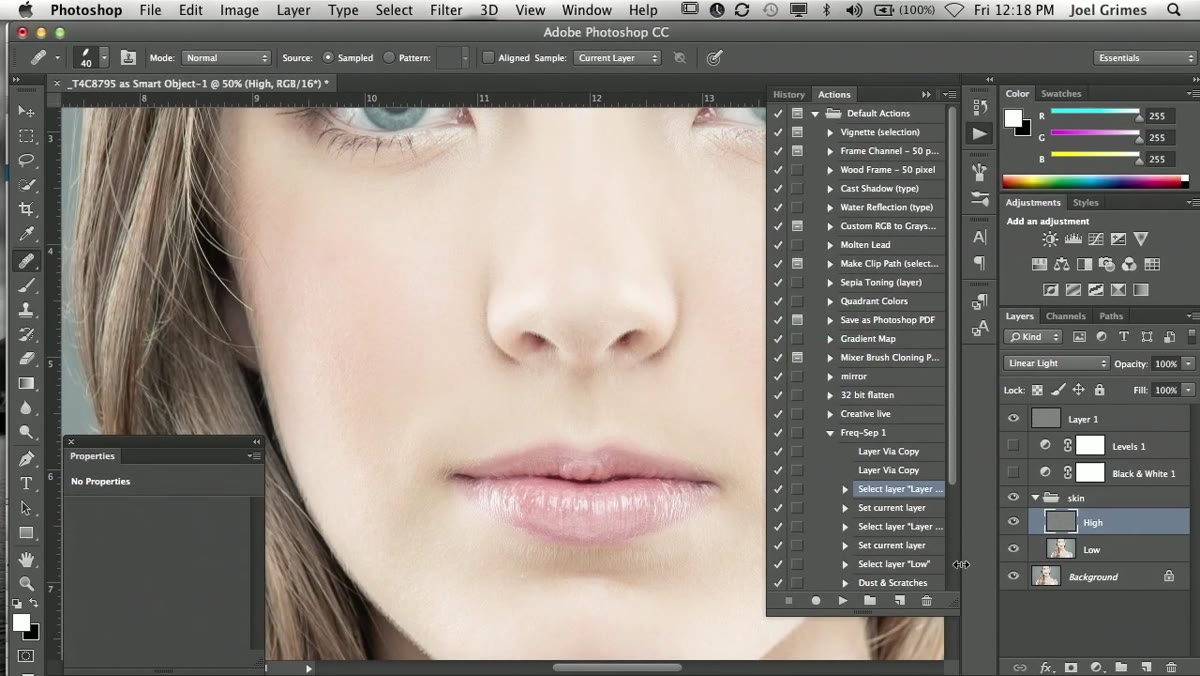 Frequency separation layers visible in Photoshop panel
Frequency separation splits a portrait into two layers: a texture layer (high frequency) that holds skin detail like pores and fine lines, and a color layer (low frequency) that holds tone and color information. The power of this setup is that you can fix uneven skin tone without touching skin texture, which is exactly how you avoid that plastic look. If you’re not already working with a frequency separation setup, there are many free actions online to get you started. I named mine “The Departed” because it destroys blemishes. Joel works with both layers visible at the start and toggles them on and off to evaluate progress as he goes. Get into that habit early.
Frequency separation layers visible in Photoshop panel
Frequency separation splits a portrait into two layers: a texture layer (high frequency) that holds skin detail like pores and fine lines, and a color layer (low frequency) that holds tone and color information. The power of this setup is that you can fix uneven skin tone without touching skin texture, which is exactly how you avoid that plastic look. If you’re not already working with a frequency separation setup, there are many free actions online to get you started. I named mine “The Departed” because it destroys blemishes. Joel works with both layers visible at the start and toggles them on and off to evaluate progress as he goes. Get into that habit early.
Step 2: Use the Clone Stamp on the Low Layer to Transfer Color
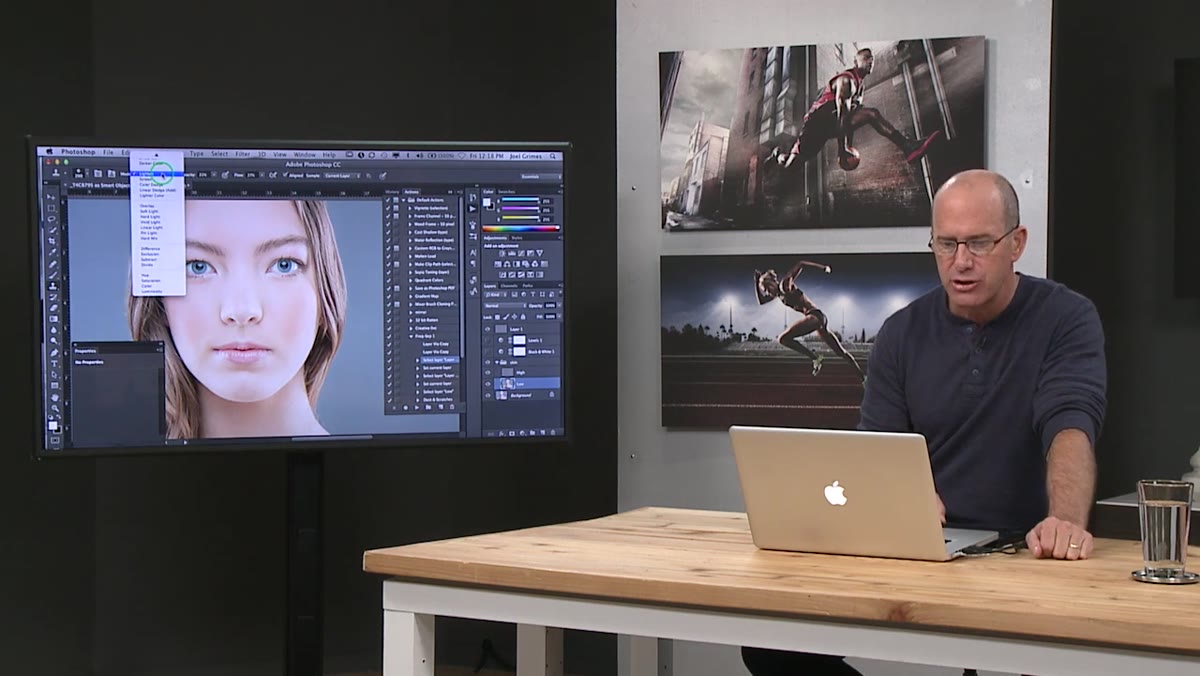 Clone stamp tool selected with Lighten blending mode active
This is the move I wish someone had shown me years ago. With your low frequency (color) layer selected, grab the Clone Stamp tool and change its blending mode in the top toolbar from Normal to Lighten. Set your sample source to Current Layer. What this does is allow you to sample a clean area of skin tone and paint it over an uneven area, blending the color smoothly without smearing texture.
Clone stamp tool selected with Lighten blending mode active
This is the move I wish someone had shown me years ago. With your low frequency (color) layer selected, grab the Clone Stamp tool and change its blending mode in the top toolbar from Normal to Lighten. Set your sample source to Current Layer. What this does is allow you to sample a clean area of skin tone and paint it over an uneven area, blending the color smoothly without smearing texture.
Joel’s settings here are deliberate: around 35% opacity and roughly 37% flow. Low numbers give you control. You’re not stamping a hard copy of one area onto another. You’re gently nudging the color toward balance. Hold Alt (Option on Mac) to sample a clean patch of skin near the problem area, then paint lightly over the discoloration. Joel focuses on the cheeks and the area under the eyes, both places where uneven tone tends to pool. Work slowly, resample often, and stop before it looks uniform. Uniform is not the goal. Natural is.
Step 3: Identify the Problem Areas Before You Commit
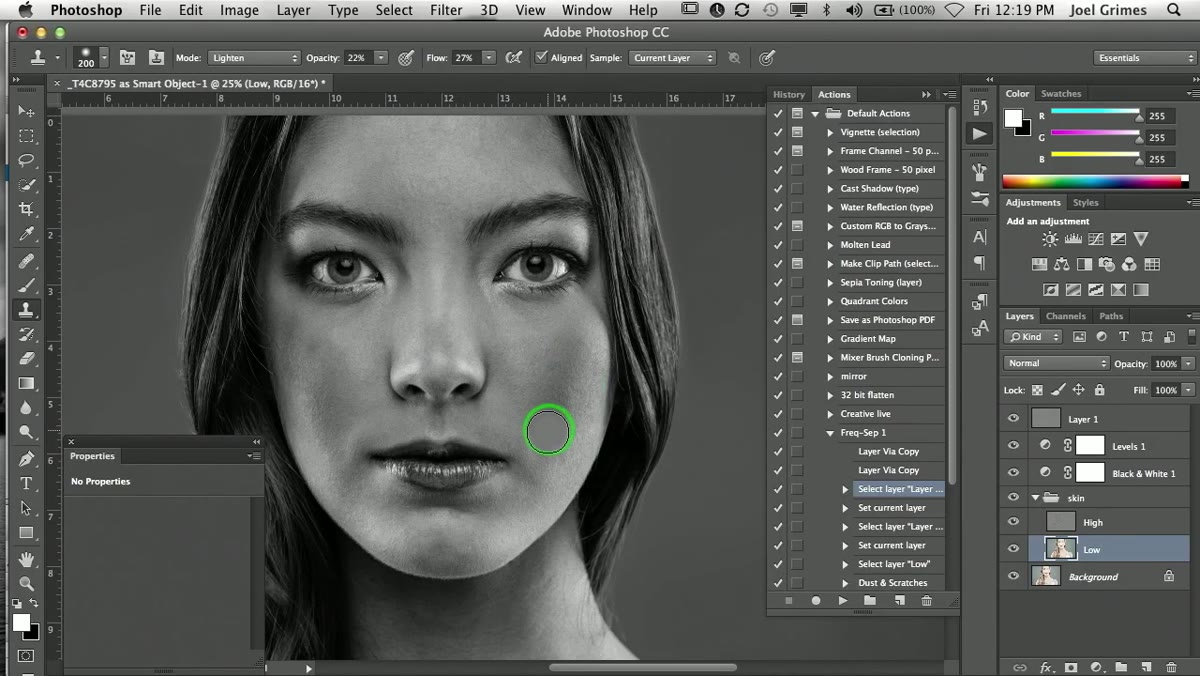 Levels adjustment toggled to reveal uneven tone on cheek
Joel uses a Levels adjustment layer as a diagnostic tool, temporarily cranking the contrast to make subtle tone wobbles visible. This is a technique I now use on every portrait I retouch. What looks fine at normal view can reveal patchy, uneven color the moment you push the contrast. Toggle the Levels layer on and off as you work so you’re not guessing. Once you’ve cleaned up what the Levels layer reveals, turn it off and evaluate your progress on the actual image. This step keeps you honest.
Levels adjustment toggled to reveal uneven tone on cheek
Joel uses a Levels adjustment layer as a diagnostic tool, temporarily cranking the contrast to make subtle tone wobbles visible. This is a technique I now use on every portrait I retouch. What looks fine at normal view can reveal patchy, uneven color the moment you push the contrast. Toggle the Levels layer on and off as you work so you’re not guessing. Once you’ve cleaned up what the Levels layer reveals, turn it off and evaluate your progress on the actual image. This step keeps you honest.
Step 4: Create a Gray-Filled Layer for Dodge and Burn
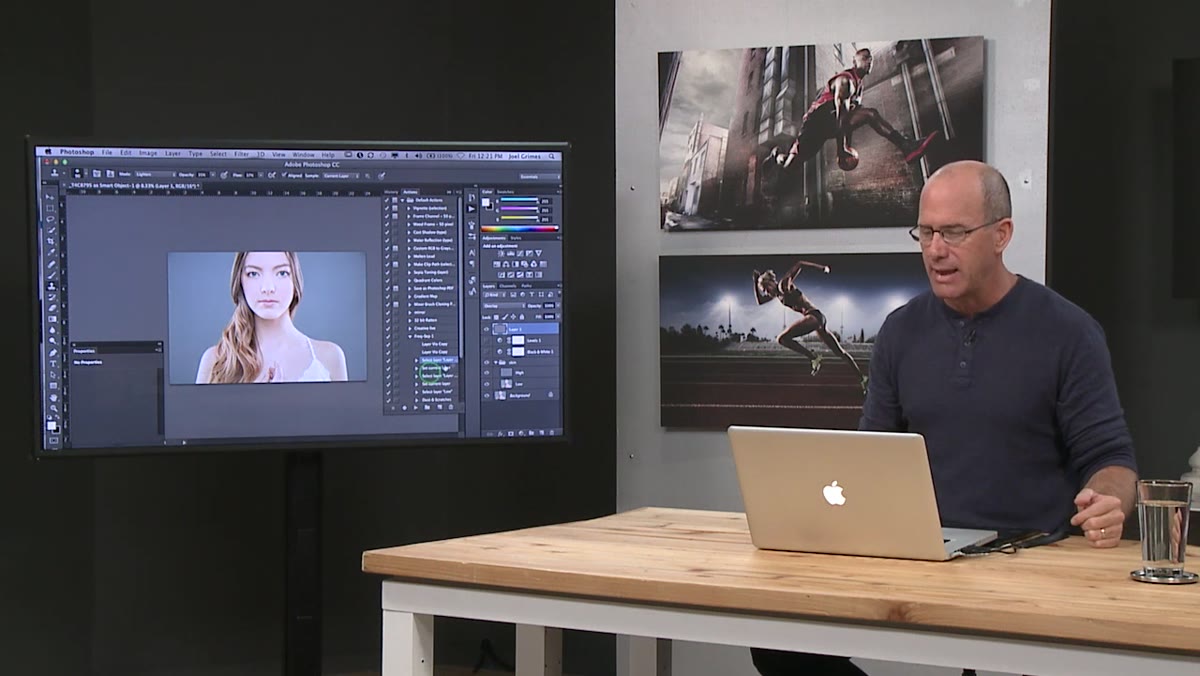 Blank gray layer added above skin layers in Photoshop
Here is where Joel transitions to what he calls one of the most underused and most powerful retouching techniques: dodge and burn. His preferred method is straightforward. Create a new blank layer, fill it with 50% gray (Edit > Fill > 50% Gray), and set that layer’s blending mode to Overlay. In Overlay mode, pure gray is invisible. Anything lighter will brighten the image, anything darker will deepen it. This means you can dodge and burn non-destructively, on a layer you can dial back or throw away without touching a single pixel of the original.
Blank gray layer added above skin layers in Photoshop
Here is where Joel transitions to what he calls one of the most underused and most powerful retouching techniques: dodge and burn. His preferred method is straightforward. Create a new blank layer, fill it with 50% gray (Edit > Fill > 50% Gray), and set that layer’s blending mode to Overlay. In Overlay mode, pure gray is invisible. Anything lighter will brighten the image, anything darker will deepen it. This means you can dodge and burn non-destructively, on a layer you can dial back or throw away without touching a single pixel of the original.
This approach keeps the edit completely reversible, which matters when a client comes back three weeks later asking for a different version. I keep all my dodge and burn layers named and grouped. It takes ten extra seconds and has saved me hours.
Step 5: Dodge and Burn with Midtones at 3%
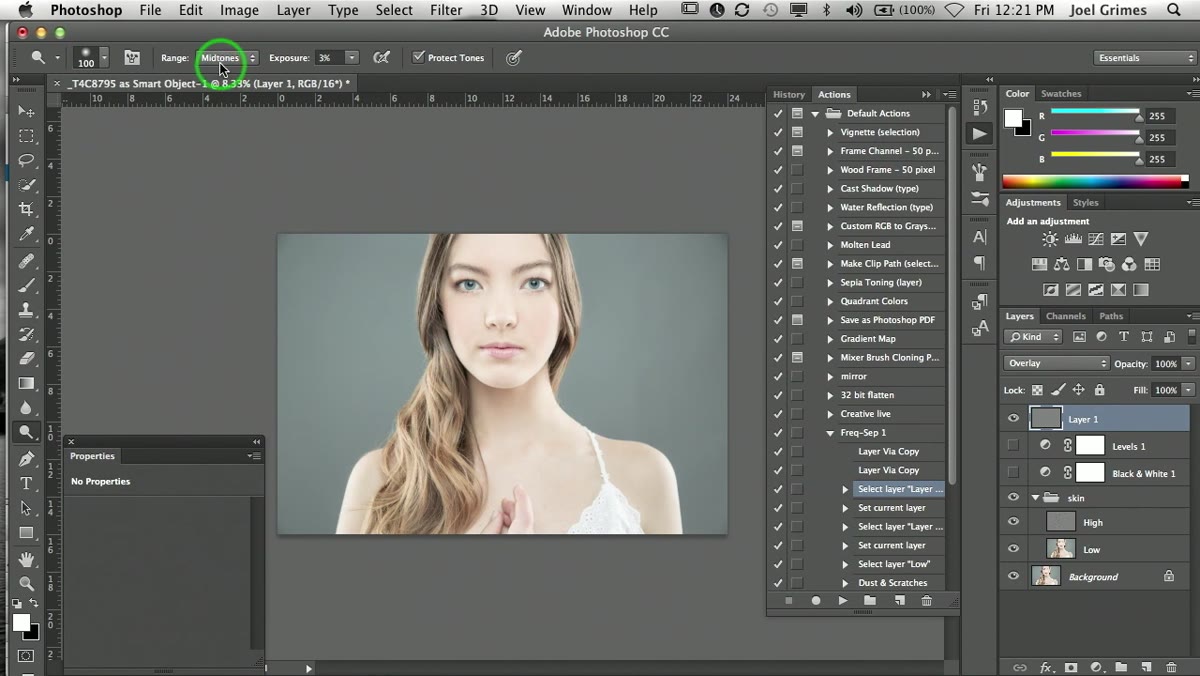 Dodge tool active with Midtones range and 3% exposure set
Select the Dodge tool, set the Range to Midtones, and bring the Exposure down to 3%. That number sounds almost too low, but it’s exactly right. Skin retouching at this level is about accumulation, not single strokes. Joel runs the Dodge tool along the high planes of the face, the areas that would naturally catch light, and uses it to gently lift shadows that create the appearance of uneven texture or depth.
Dodge tool active with Midtones range and 3% exposure set
Select the Dodge tool, set the Range to Midtones, and bring the Exposure down to 3%. That number sounds almost too low, but it’s exactly right. Skin retouching at this level is about accumulation, not single strokes. Joel runs the Dodge tool along the high planes of the face, the areas that would naturally catch light, and uses it to gently lift shadows that create the appearance of uneven texture or depth.
The key shortcut here is the Option key (Alt on PC). Holding it while using the Dodge tool temporarily switches you to the Burn tool, so you can flow between lightening and darkening without breaking your rhythm to click between tools. Joel burns slightly into shadow transitions to give them weight, then dodges the adjacent areas to restore contrast. The result isn’t flat, airbrushed skin. It’s skin that looks lit correctly, where the structure of the face reads clearly.
What I’d Add From My Own Practice
Joel’s workflow is clean and replicable, but I want to flag one thing for anyone working on beauty or commercial portraits specifically: the order of operations matters. I always do my clone stamp color work on the low frequency layer before I dodge and burn. If you reverse it, you risk painting over tone corrections you just made. I learned this the tedious way, undoing about forty minutes of dodge and burn because I’d stamped color over it.
I’d also add that your dodge and burn gray layer benefits from occasional opacity checks. Zoom out, drop the layer opacity to 50%, compare. It’s easy to get into a groove and over-build contrast without realizing it. Joel’s 3% Exposure setting is a guardrail against this, but checking your overall layer opacity every few minutes keeps the edit from creeping into heavy-handed territory.
The single most important idea in Joel’s tutorial is this: dodge and burn is how you sculpt light, not how you erase imperfection. That shift in thinking, from erasing to sculpting, is what separates retouching that looks natural from retouching that looks processed. Every time I open a portrait now, I ask myself where the light should be, not just where the blemishes are.
Watch the full tutorial on YouTube and pay attention to how Joel narrates his uncertainty alongside his expertise. There’s as much to learn from that as from the technique itself.
Comments
Leave a Comment