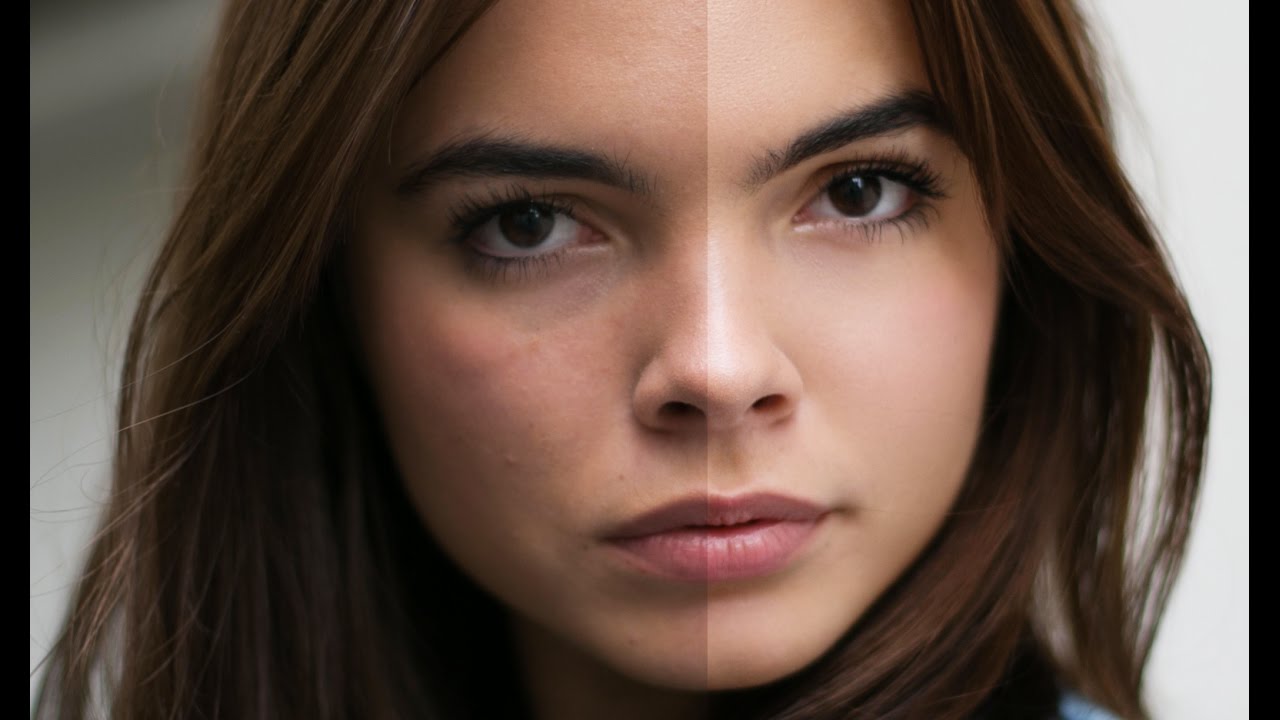
I spent the better part of a year making skin look plastic. Not intentionally, obviously. I was working on beauty campaigns and thinking I was doing good work, until a client gently suggested my edits looked “a little unnatural.” That was the moment I got serious about frequency separation, and more specifically, about understanding which part of frequency separation actually does the heavy lifting. It turns out I had been overcomplicating things in the worst possible way.
Watch the full tutorial on YouTube
In this Jessica Kobeissi tutorial on professional skin retouching, she cuts straight to the practical reality that most beginners miss: the low frequency layer is where your results live. The high frequency layer gets all the mystique, but as Jessica shows, you can dramatically transform a portrait without ever touching it. What follows is a step-by-step breakdown of her workflow, written so you can follow along in Photoshop without pausing every ten seconds.
Step 1: Set Up Your Frequency Separation Layers
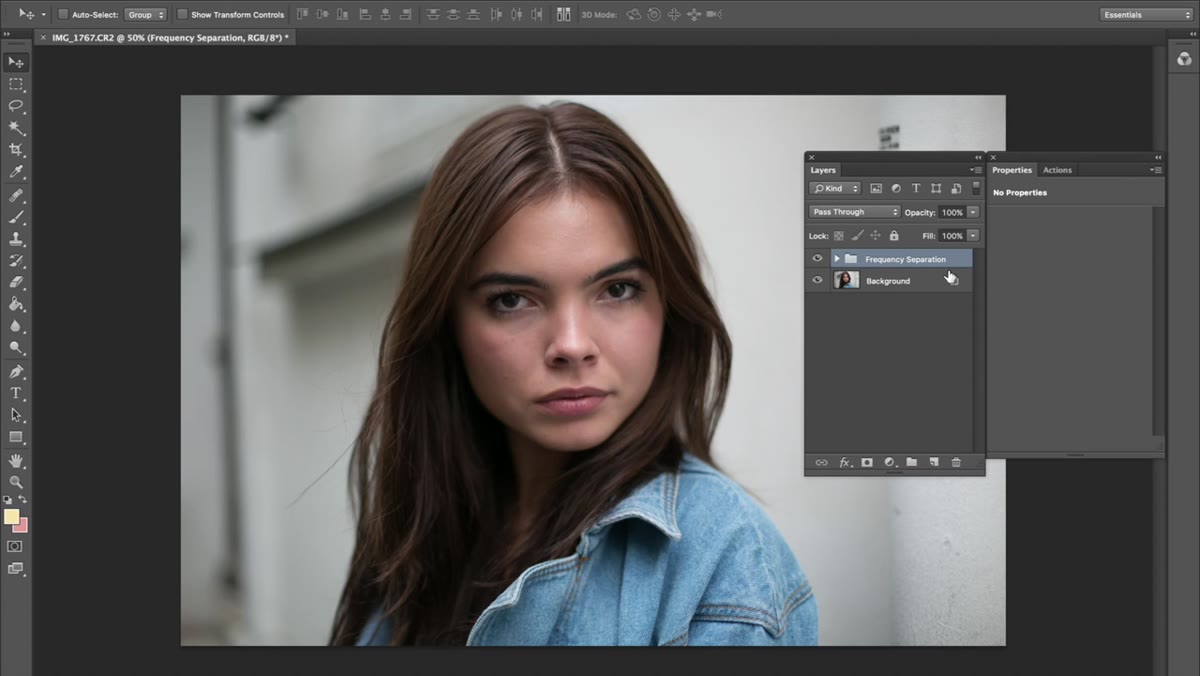 Frequency separation folder visible in Photoshop layers panel
Jessica starts with her frequency separation folder already in place, created by running a free Photoshop action she provides. If you don’t have an action set up, you can find frequency separation tutorials online to create the layers manually, but an action is genuinely worth it. It creates your high frequency and low frequency layers automatically and keeps your layer panel organized from the start. The key structure to understand: the low frequency layer carries the color and tone information, while the high frequency layer holds texture and fine detail like pores and hair strands.
Frequency separation folder visible in Photoshop layers panel
Jessica starts with her frequency separation folder already in place, created by running a free Photoshop action she provides. If you don’t have an action set up, you can find frequency separation tutorials online to create the layers manually, but an action is genuinely worth it. It creates your high frequency and low frequency layers automatically and keeps your layer panel organized from the start. The key structure to understand: the low frequency layer carries the color and tone information, while the high frequency layer holds texture and fine detail like pores and hair strands.
Once your layers are generated, duplicate the low frequency layer by pressing Command+J (or Ctrl+J on Windows). You will be doing all your work on this duplicate, not the original. This protects you from destructive edits and gives you a fallback if anything goes sideways.
Step 2: Hide the High Frequency Layer
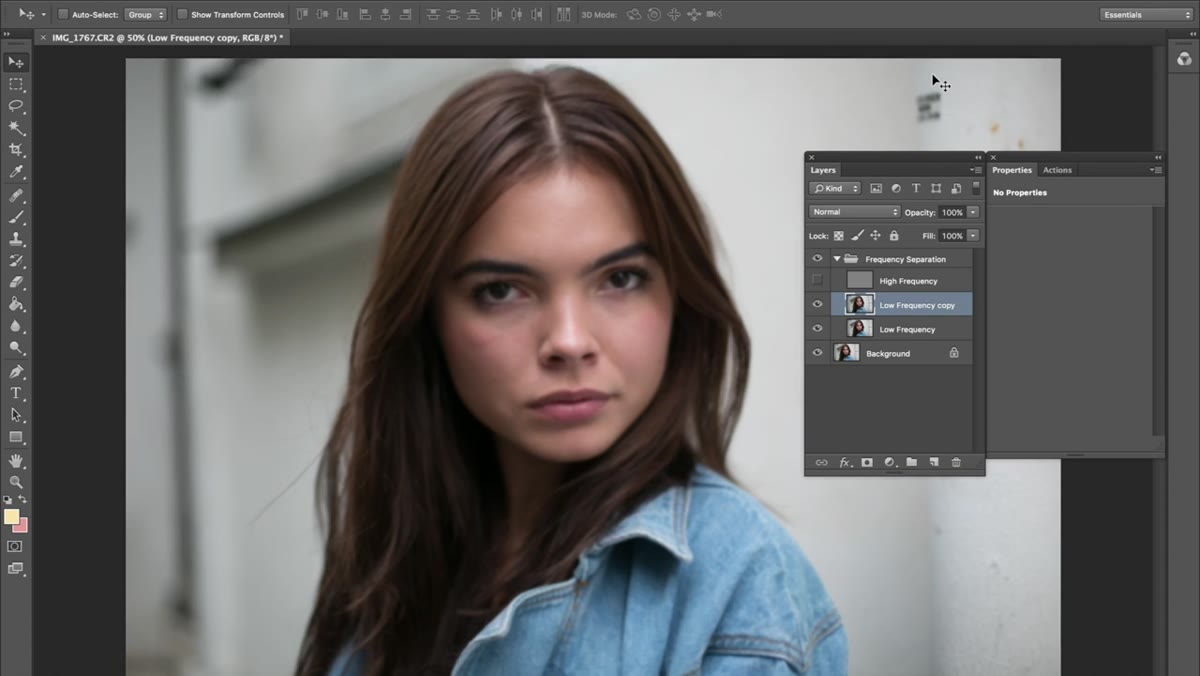 High frequency layer toggled off, revealing low frequency tones
This is the move that changed how I think about retouching. Turn off visibility on the high frequency layer so you are only looking at the blurry, color-and-tone version of the image. It looks strange at first, almost like looking at a portrait through frosted glass. But this view makes it dramatically easier to see uneven color patches, redness, and tonal inconsistencies that you would otherwise struggle to isolate.
High frequency layer toggled off, revealing low frequency tones
This is the move that changed how I think about retouching. Turn off visibility on the high frequency layer so you are only looking at the blurry, color-and-tone version of the image. It looks strange at first, almost like looking at a portrait through frosted glass. But this view makes it dramatically easier to see uneven color patches, redness, and tonal inconsistencies that you would otherwise struggle to isolate.
Jessica makes a point worth internalizing: do not fixate on the high frequency layer. Most of your retouching impact comes from smoothing out these underlying tones. When the color and light are even, skin looks healthy and balanced rather than airbrushed.
Step 3: Select the Healing Brush Tool and Dial In Your Settings
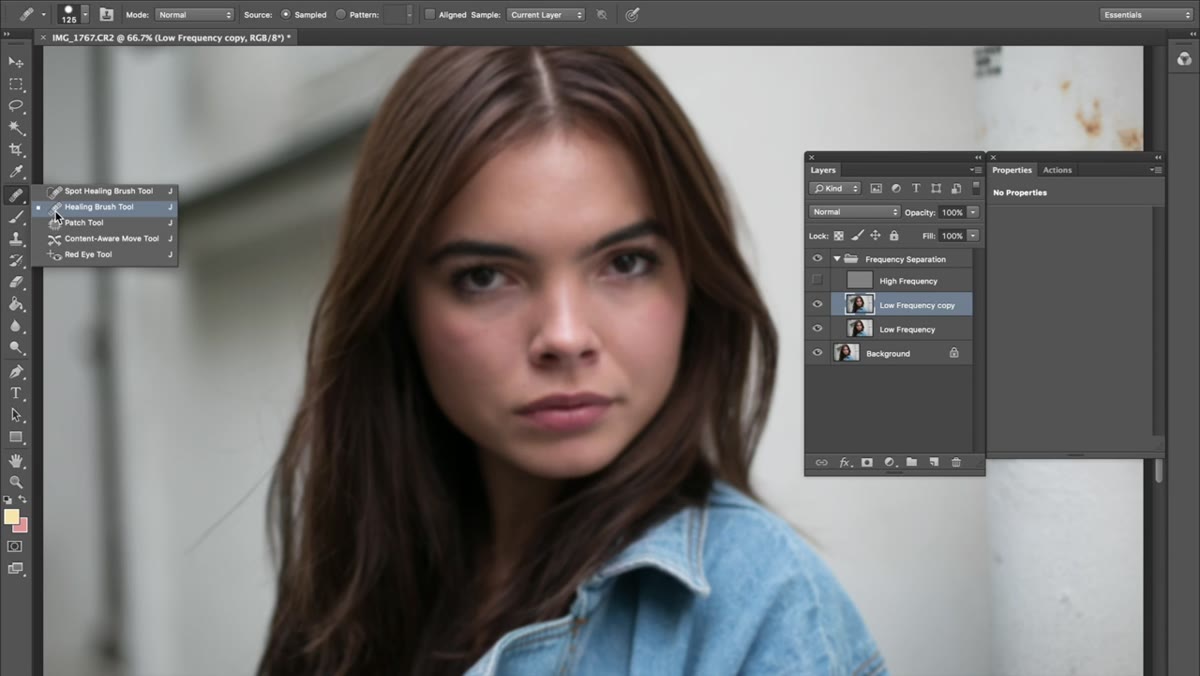 Healing brush tool selected with brush settings panel open
Go to the Healing Brush Tool in the toolbar. Not the Spot Healing Brush. The regular Healing Brush Tool, which requires you to manually define a source point. This distinction matters because the Spot Healing Brush makes decisions for you, and on the low frequency layer those decisions are frequently wrong.
Healing brush tool selected with brush settings panel open
Go to the Healing Brush Tool in the toolbar. Not the Spot Healing Brush. The regular Healing Brush Tool, which requires you to manually define a source point. This distinction matters because the Spot Healing Brush makes decisions for you, and on the low frequency layer those decisions are frequently wrong.
Jessica’s starting settings: brush size around 80 pixels, hardness at 71%. Spacing is not something she adjusts much, and the brush style is just the standard round default. You do not need anything exotic here. A mid-size brush with moderate hardness gives you enough control to work precisely without creating hard edges that look patched rather than blended.
Step 4: Sample Colors From Nearby Areas As You Paint
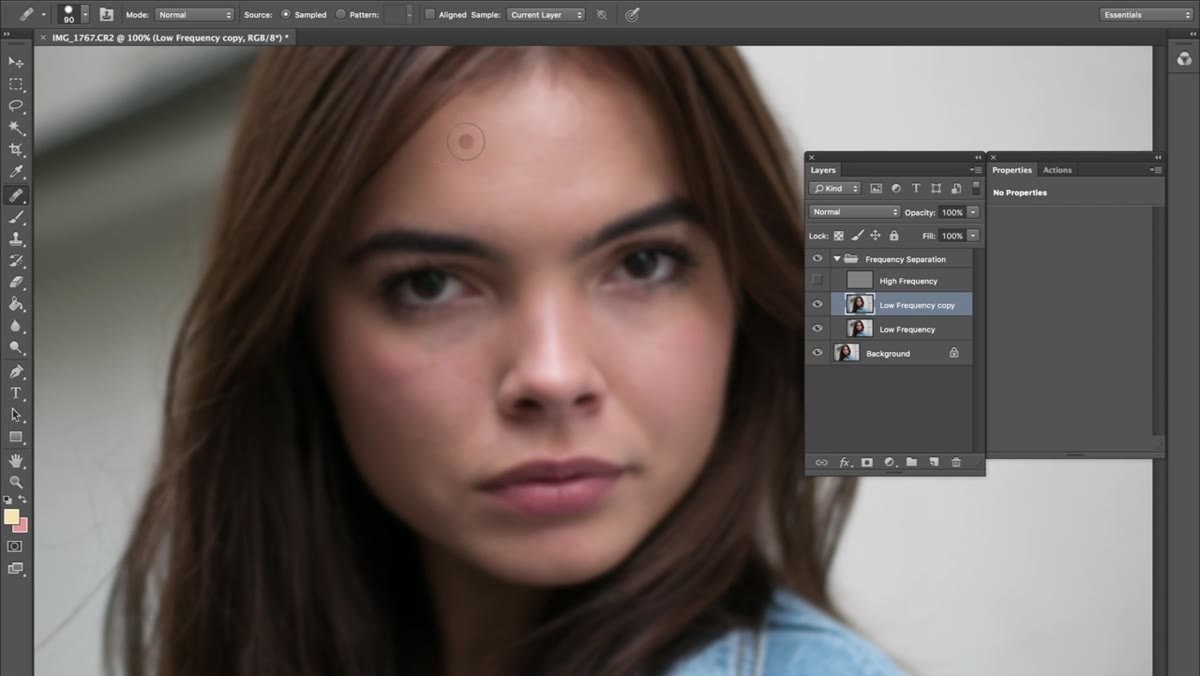 Alt-click sampling near retouched area on low frequency layer
Here is the part of this technique that takes the most practice to internalize. Hold Alt (Option on Mac) and click to sample a source color, then click or paint over the problem area. The critical habit to build: re-sample frequently. Every few strokes, pick up a new source point from an area close to where you are currently working.
Alt-click sampling near retouched area on low frequency layer
Here is the part of this technique that takes the most practice to internalize. Hold Alt (Option on Mac) and click to sample a source color, then click or paint over the problem area. The critical habit to build: re-sample frequently. Every few strokes, pick up a new source point from an area close to where you are currently working.
Why does this matter so much? Skin tone shifts constantly across a face. The color near the temple is different from the color under the eye, which is different again from the color along the jaw. If you sample once and paint across all of those zones, you will drag the wrong tone into areas it does not belong, and the result looks muddy rather than smooth. Think of it as color-matching in small, contained neighborhoods rather than averaging across the whole face.
Step 5: Work Across the Face, Then Toggle Visibility to Check Progress
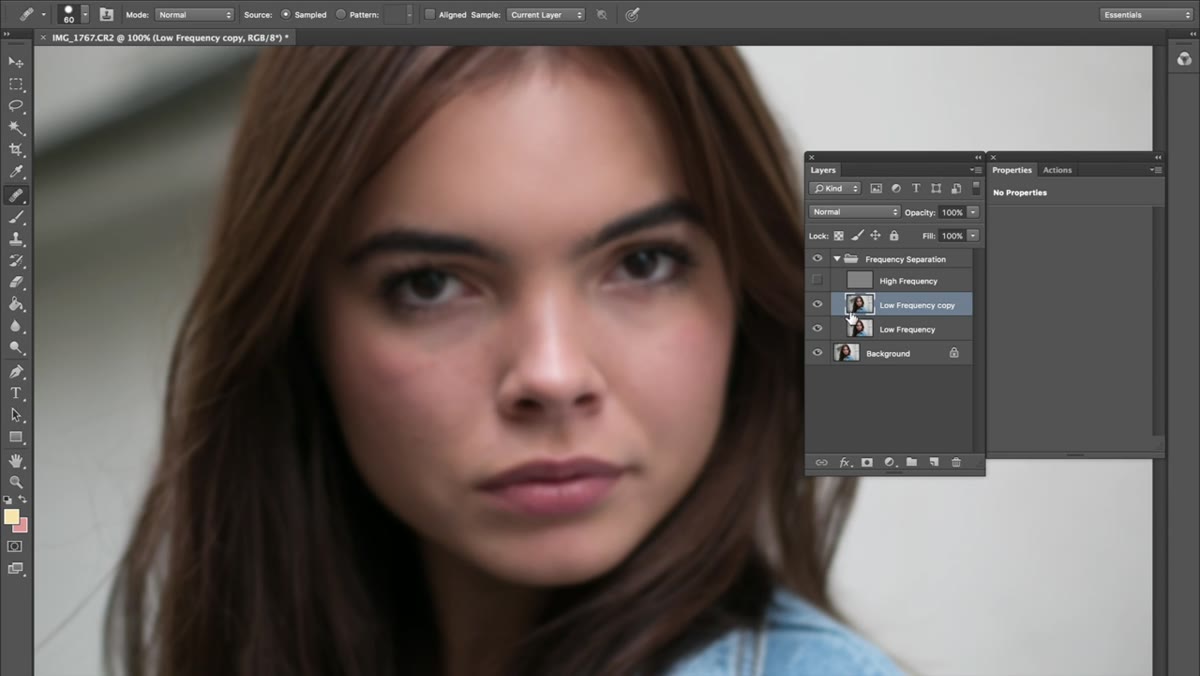 Before and after comparison showing smoothed low frequency layer
Move methodically across the face, always sampling nearby. Jessica focuses on blending uneven patches, reducing redness, and smoothing out color transitions, particularly in the under-eye area where color tends to pool and look heavy. She is not erasing those tones entirely. She is evening them out so the transition from one zone to another feels natural.
Before and after comparison showing smoothed low frequency layer
Move methodically across the face, always sampling nearby. Jessica focuses on blending uneven patches, reducing redness, and smoothing out color transitions, particularly in the under-eye area where color tends to pool and look heavy. She is not erasing those tones entirely. She is evening them out so the transition from one zone to another feels natural.
Once you have worked through a section, turn the high frequency layer back on and compare. This is the honest check. The texture and pore detail comes rushing back, but the skin underneath is now tonally balanced. The difference between before and after, even at this early stage, is usually striking enough to feel genuinely encouraging.
Step 6: Keep the Under-Eye Area Natural
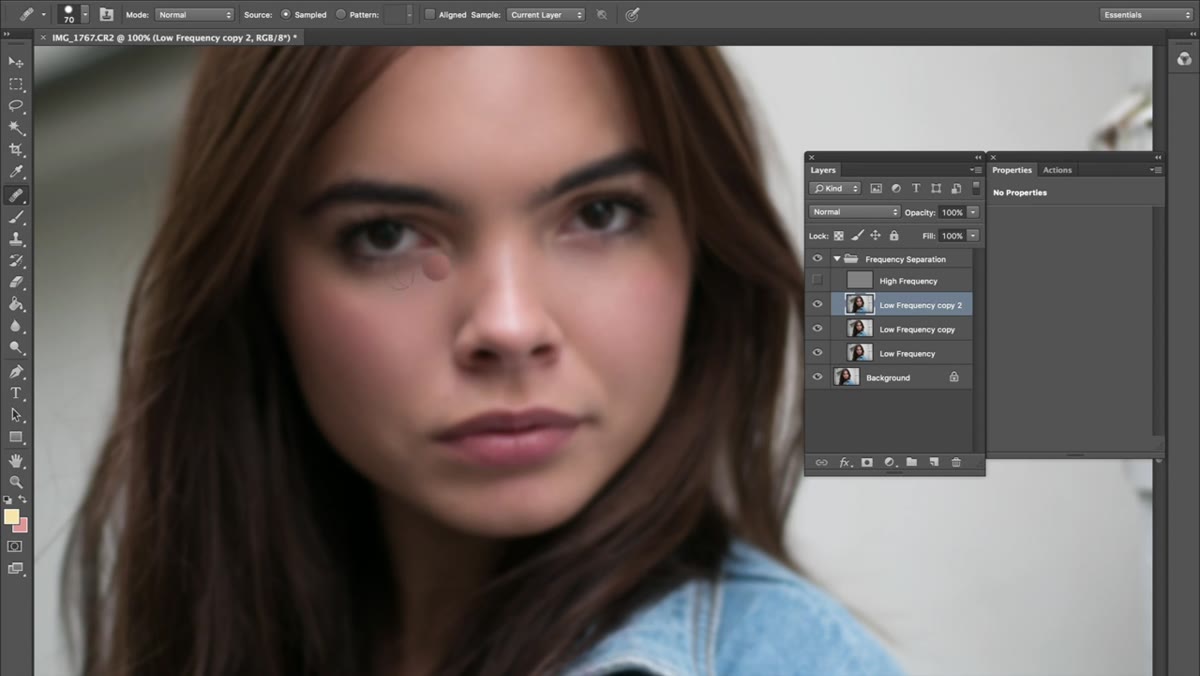 Under-eye area being blended on low frequency layer
Jessica is deliberate about the under-eye zone. The goal is not to wipe it clean. Some warmth and shadow in the under-eye area is part of what makes a face look like a real human face. She blends the color to reduce harsh discoloration while preserving the natural contour. This is a judgment call you will get better at with repetition, but a useful gut check is: if it starts looking like someone applied a filter, you have gone too far.
Under-eye area being blended on low frequency layer
Jessica is deliberate about the under-eye zone. The goal is not to wipe it clean. Some warmth and shadow in the under-eye area is part of what makes a face look like a real human face. She blends the color to reduce harsh discoloration while preserving the natural contour. This is a judgment call you will get better at with repetition, but a useful gut check is: if it starts looking like someone applied a filter, you have gone too far.
A Note From Someone Who Has Done This Wrong
The first time I tried frequency separation, I spent 80% of my time on the high frequency layer, cloning out individual pores and surface details. The results looked hyper-edited and frankly odd. What Jessica’s workflow made clear to me, and what I now tell every student in my workshops, is that the low frequency layer is where your foundational decisions happen. Everything you do there compounds. Smooth the tones first, and the high frequency detail on top will look like it belongs to healthy, natural skin rather than a mannequin.
If you are new to this technique, keep your sessions short at first. Retouch for twenty minutes, step away, come back with fresh eyes. It is easy to chase perfection on a zoomed-in crop and lose the thread of what the actual portrait is supposed to feel like.
The single most important takeaway from Jessica’s approach: prioritize the low frequency layer, sample constantly from nearby skin tones, and do not overcorrect. Restraint is the skill that separates retouching that looks professional from retouching that looks processed.
Watch the full tutorial on YouTube to see Jessica’s complete walkthrough, including her free frequency separation action download.
Comments
Leave a Comment