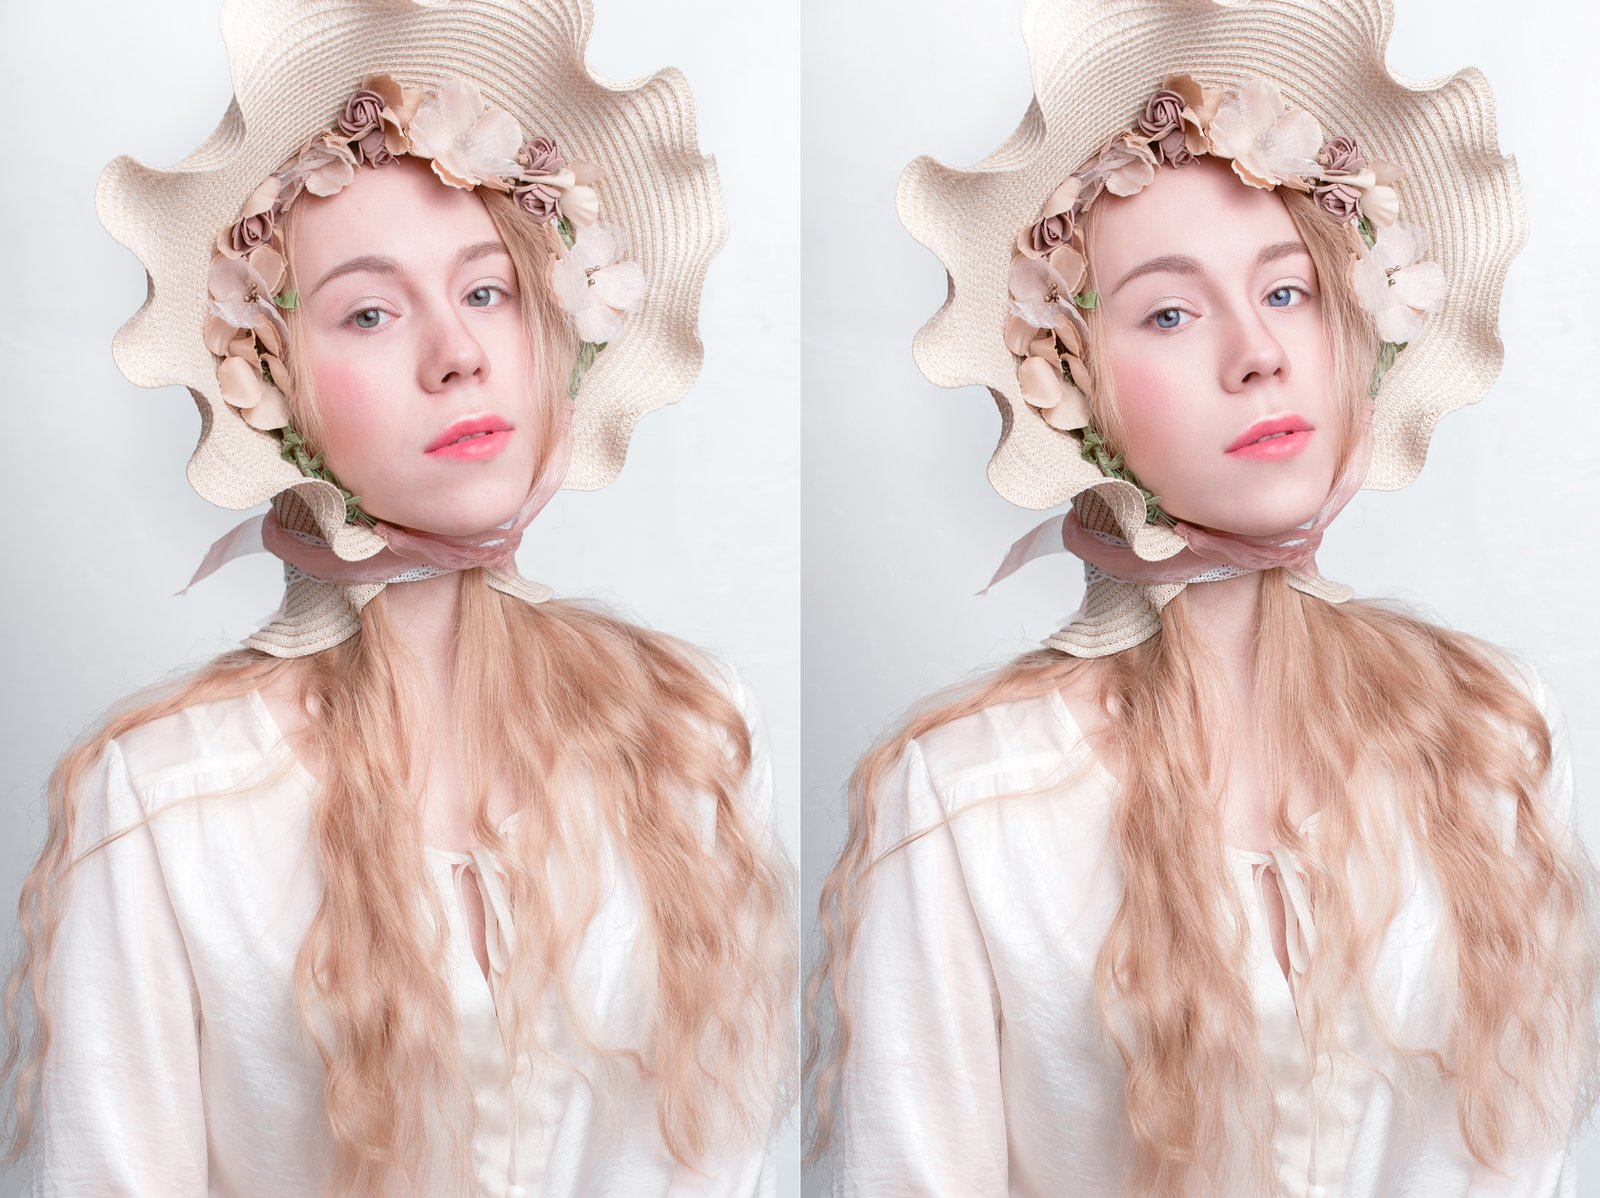
A few years into freelancing, I got a message from a client that I still think about. She’d hired me to retouch a series of beauty shots for a skincare campaign, and after I delivered the first round, she wrote back: “The skin looks great, but the lipstick looks like it was painted on in Microsoft Paint.” She wasn’t wrong. I had dodged and burned the lip color directly on the original layer, flattened the texture, and produced something that looked like a wax figure wearing a lip stain. I’d been so focused on cleaning up the edges that I’d forgotten lips have topography.
That’s the trap with makeup retouching. It feels like a color and brightness problem, but it’s actually a texture problem in disguise.
Why Digital Makeup Fails at the Physics Level
When makeup is applied to skin in real life, it sits on top of pores, fine lines, and surface variations. It catches light differently across the curve of a cheekbone. A matte eyeshadow absorbs light; a highlighter scatters it. Your camera captures all of that information.
When we retouch makeup digitally, we’re intervening in a system that has real physical logic baked into it. The moment you paint flat color over a lip or deepen eyeshadow with a simple Curves layer, you’re erasing the micro-texture that tells the viewer’s brain “this is real.” The brain doesn’t consciously notice what’s missing. It just knows something is wrong, which is exactly the feedback that client gave me.
The fix is not to work harder. It’s to work on the right layer.
The Three-Layer Stack That Keeps Texture Intact
Here’s the workflow I now run on every makeup retouch, and it starts before I touch a single adjustment layer.
First, I duplicate my base layer and run a frequency separation split at a radius of 2.0 pixels for beauty work (I go up to 3.0 for lower-resolution files under 20 megapixels). The high-frequency layer holds all the texture, pores, fine lines. The low-frequency layer holds color and tone. I name these “HF” and “LF” in my layers panel, and I never touch the high-frequency layer during makeup work. Ever.
On the low-frequency layer, I create a Hue/Saturation adjustment clipped to it. This is where I shift lip color, deepen eyeshadow, or warm up a blush that read too pink in camera. Because we’re working on the LF layer, the texture from the HF layer shows through on top. The result is color-corrected makeup that still has the skin’s natural micro-relief under it.
For intensity, I’ll add a Curves adjustment clipped to the same LF layer, set to Luminosity blend mode, and use it to pop the depth in eyeshadow or bring a highlight forward on the inner corner of the eye. I keep my opacity on these layers between 40 and 70 percent. If I’m pushing past 70, I’m usually overcomping for something I should fix in the Hue/Saturation step instead.
Masking for Makeup Edges Without Losing the Lip Line
Lip edges are where most retouchers, including past me, make the biggest mistakes. The instinct is to grab the Lasso tool, draw a tight selection around the lips, and work inside it. The problem is that lips do not have hard edges. There’s a gradient of color that bleeds into the skin around the vermilion border, and feathering a selection by 2 or 3 pixels doesn’t replicate that.
What I do instead: I paint my masks by hand using a soft round brush at 10 percent opacity, starting at 100 percent hardness at the center of the lips and pulling outward with progressively more feathering as I reach the edge. I toggle the mask view on (Option-click the mask thumbnail) to check my work. If the edge looks clean and sharp in the mask, it will look plastic in the final image. A good lip mask looks slightly blurry around the border, almost like a soft watercolor edge.
For eyeshadow, I’ll often use Select > Color Range with a fuzziness of 25 to 35 to build my initial mask, then refine by hand. This saves me roughly 8 to 12 minutes per eye on complex looks.
Matching Sheen and Finish Without Overpainting
The finish of a makeup product, whether it’s matte, satin, or full gloss, is communicated through specularity. Matte products kill highlights. Gloss products create concentrated, bright hotspots. If you retouch lip color and the highlight behavior doesn’t match the product’s finish, the makeup reads as wrong even if the color is perfect.
For glossy products, I add a small Curves S-curve on a new layer set to Screen blend mode, masked tightly to the lightest part of the lip highlight, and I bring the opacity down to somewhere between 15 and 30 percent. This amplifies the existing highlight rather than painting a new one. For matte products, I’ll sometimes do the opposite and pull that highlight region down slightly using a Multiply blend mode curve, dulling the reflectivity to match a flat finish.
I keep a set of Photoshop actions I’ve built for these adjustments. The one for gloss work is named “Chinatown” and the matte one is “Magnolia.” My filing system makes sense to me, which is all that matters.
One Mistake That Taught Me More Than Any Tutorial
Early in my retouching work, a mentor reviewed my portfolio and pointed at a beauty shot I was proud of. The eyeshadow was blended beautifully. The lip color was even and rich. And the blush looked completely disconnected from the skin, like a sticker placed on a face. I had retouched the blush on a layer above my frequency separation stack, which meant the texture running through the rest of the face stopped right at the edge of the blush. Technically it was on the right layer. Contextually it was isolated from everything around it.
That’s what I mean when I say makeup retouching is a texture problem. Color is the easy part. Texture continuity is what makes the edit invisible.
If I could leave you with only one thing: before you touch any makeup retouch, ask yourself which layer you’re working on and what that layer carries. Work on the wrong layer, and no amount of blending will save you.
Comments (2)
Applied this to my portfolio shots and the improvement is noticeable.
Finally someone explains this in a way that actually makes sense.
Leave a Comment