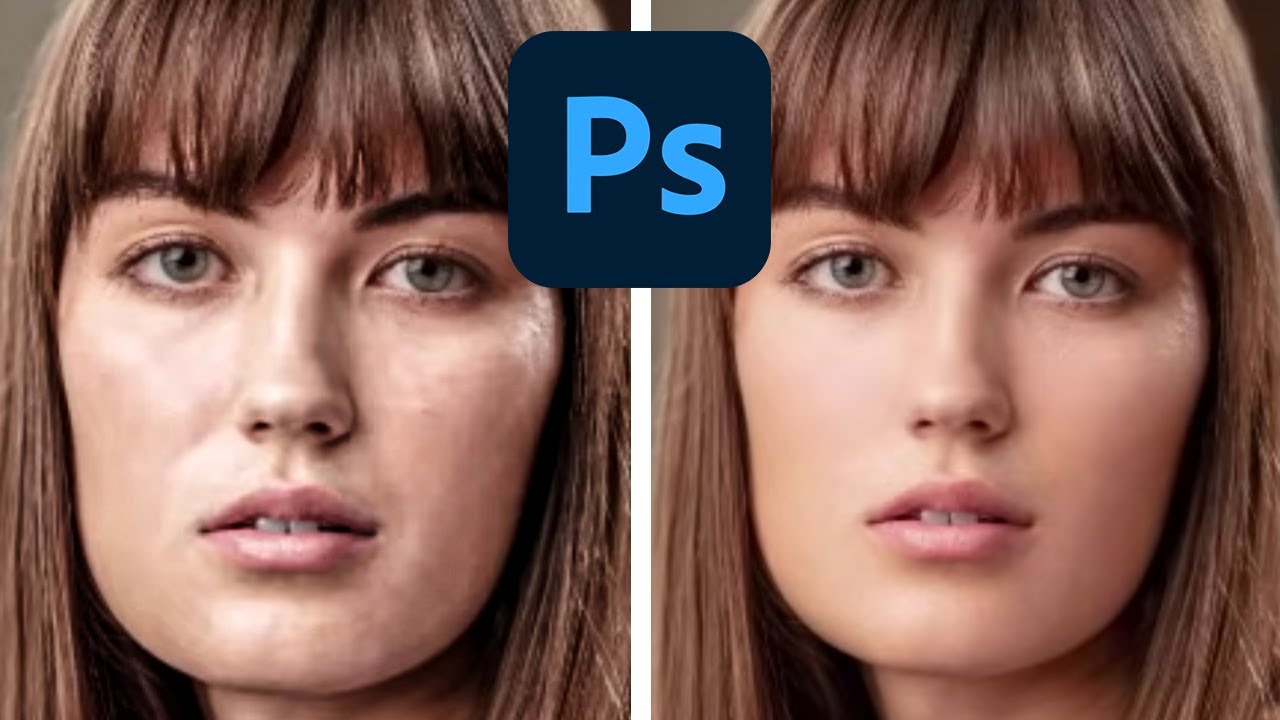
There is a specific kind of dread that comes from over-retouching skin. I know it well. Early in my retouching career, I handed a beauty client a set of images so smoothed-out that she emailed back asking if I had accidentally used a blur filter on her face. I had not. I had just been using the wrong tools with too much confidence. Frequency separation was the technique that eventually pulled me out of that hole, but for a long time I avoided it because every tutorial I found turned it into a 45-minute production involving terminology that felt designed to intimidate. Then I came across Joel Grimes’ approach, and something finally clicked.
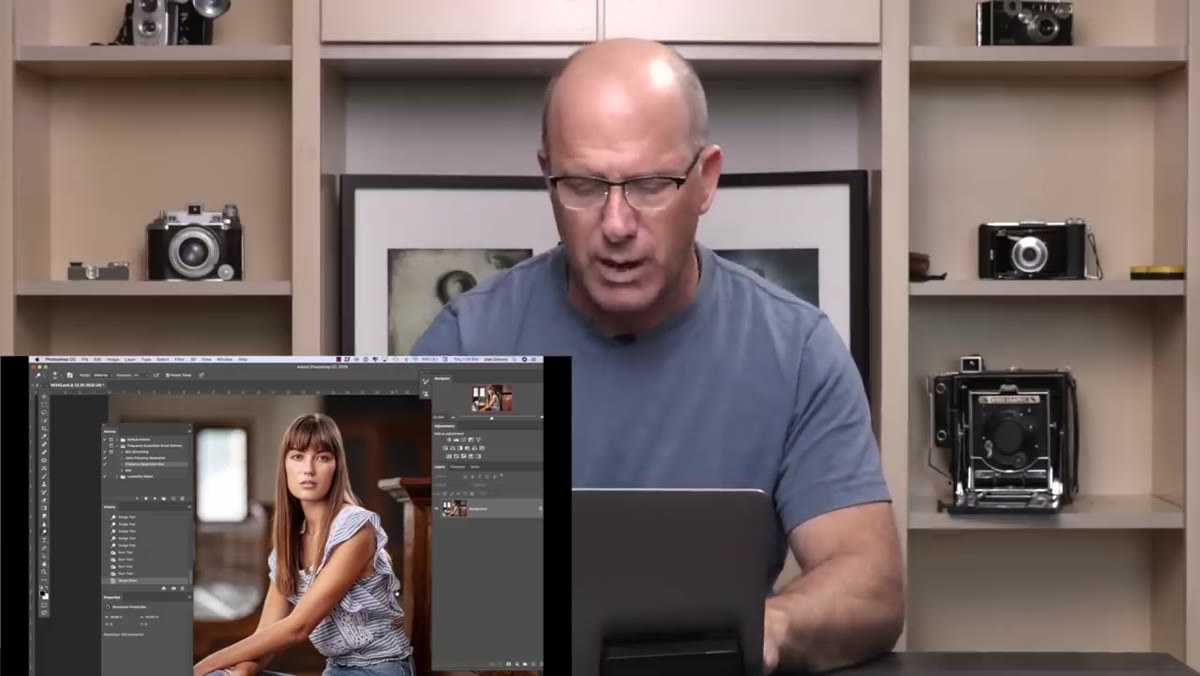
In this Joel Grimes tutorial, Watch the full tutorial on YouTube, he strips frequency separation down to its practical core. No lengthy theory sessions, no rabbit holes. Just a fast, repeatable workflow that protects skin texture while letting you clean up tone and blemishes without that dreaded plastic look. I’ve since built this method into my own retouching process and use a version of it on nearly every beauty job that crosses my desk. Here is a full breakdown of every step, with the settings you actually need.
Step 1: Duplicate Your Base Layer Twice
 Three duplicate layers visible in the Photoshop layers panel
Start with your portrait open in Photoshop. You need three total versions of your base image stacked in the layers panel. Hit Command+J (or Ctrl+J on Windows) twice in a row so you end up with your original background layer plus two duplicates sitting above it. Rename the middle layer “Low” and the top layer “High.” These names matter because the logic of the whole technique lives in those two words: one layer will carry the low-frequency information (color and tone), and the other will carry the high-frequency information (texture and fine detail).
Three duplicate layers visible in the Photoshop layers panel
Start with your portrait open in Photoshop. You need three total versions of your base image stacked in the layers panel. Hit Command+J (or Ctrl+J on Windows) twice in a row so you end up with your original background layer plus two duplicates sitting above it. Rename the middle layer “Low” and the top layer “High.” These names matter because the logic of the whole technique lives in those two words: one layer will carry the low-frequency information (color and tone), and the other will carry the high-frequency information (texture and fine detail).
Step 2: Apply Dust and Scratches to the Low Layer
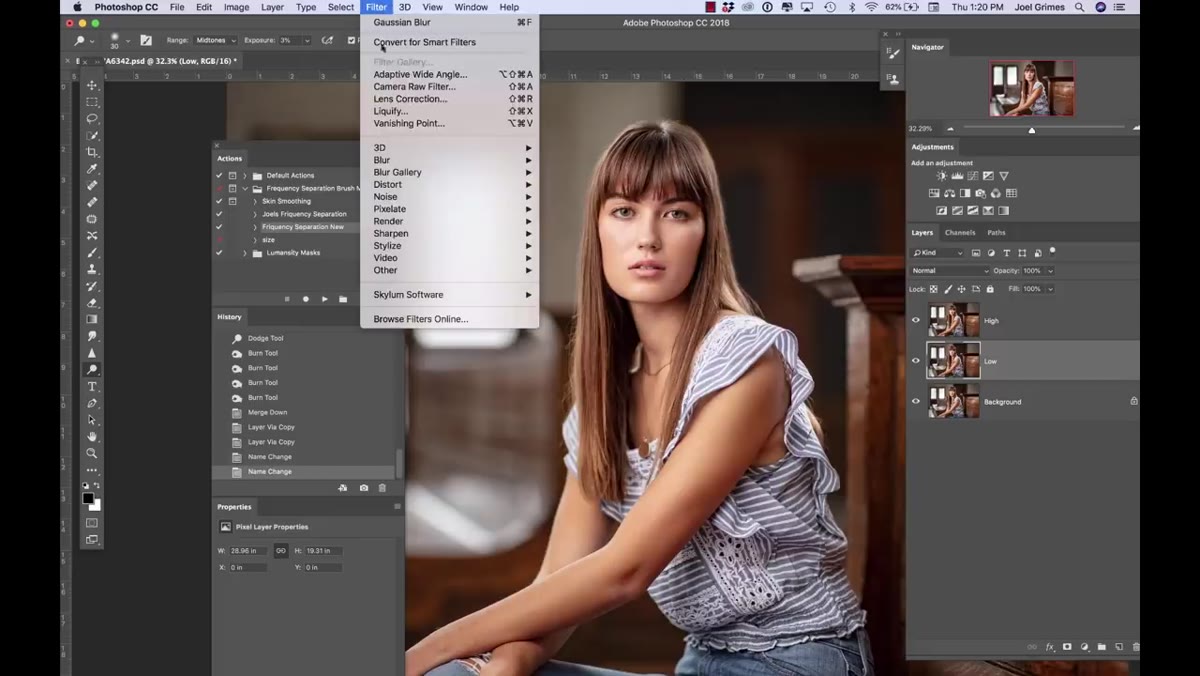 Filter menu open with Dust and Scratches dialog box visible
Click on your Low layer to make it active. Navigate to Filter, then Noise, then Dust and Scratches. This filter blurs the layer just enough to smooth out tone without destroying texture, which is exactly what you want from a low-frequency layer. Set the Radius to 15 pixels and leave the Threshold at zero. That radius value is not arbitrary. It has to match the value you’ll use in the next step, or the two layers won’t cancel each other out correctly. Hit OK and your Low layer should now look softly blurred, almost like a watercolor version of the original.
Filter menu open with Dust and Scratches dialog box visible
Click on your Low layer to make it active. Navigate to Filter, then Noise, then Dust and Scratches. This filter blurs the layer just enough to smooth out tone without destroying texture, which is exactly what you want from a low-frequency layer. Set the Radius to 15 pixels and leave the Threshold at zero. That radius value is not arbitrary. It has to match the value you’ll use in the next step, or the two layers won’t cancel each other out correctly. Hit OK and your Low layer should now look softly blurred, almost like a watercolor version of the original.
Step 3: Run Apply Image on the High Layer
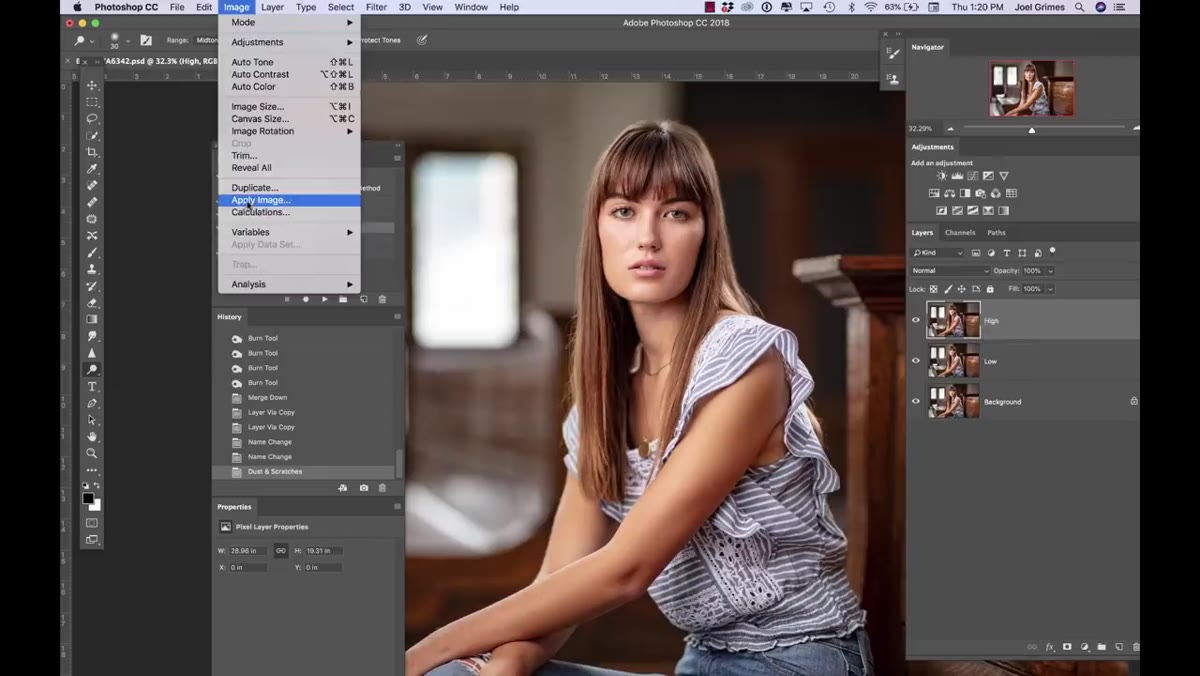 Apply Image dialog box open with Subtract blending mode selected
This is the step that trips most people up, so slow down here. Click on the High layer to activate it. Go to Image, then Apply Image. A dialog box will open with several settings. You need to change the Blending mode to Subtract. Set the Channel to RGB. Under Layer, select the Low layer (the blurred one you just created). Set Scale to 2 and Offset to 128. Make sure Invert is NOT checked. When you hit OK, your High layer will turn into a flat gray image that looks almost featureless. That is exactly right. What you are seeing is the isolated texture information, stripped of all color and tone. It will look strange on its own, but that is the point.
Apply Image dialog box open with Subtract blending mode selected
This is the step that trips most people up, so slow down here. Click on the High layer to activate it. Go to Image, then Apply Image. A dialog box will open with several settings. You need to change the Blending mode to Subtract. Set the Channel to RGB. Under Layer, select the Low layer (the blurred one you just created). Set Scale to 2 and Offset to 128. Make sure Invert is NOT checked. When you hit OK, your High layer will turn into a flat gray image that looks almost featureless. That is exactly right. What you are seeing is the isolated texture information, stripped of all color and tone. It will look strange on its own, but that is the point.
Step 4: Set the High Layer Blending Mode to Linear Light
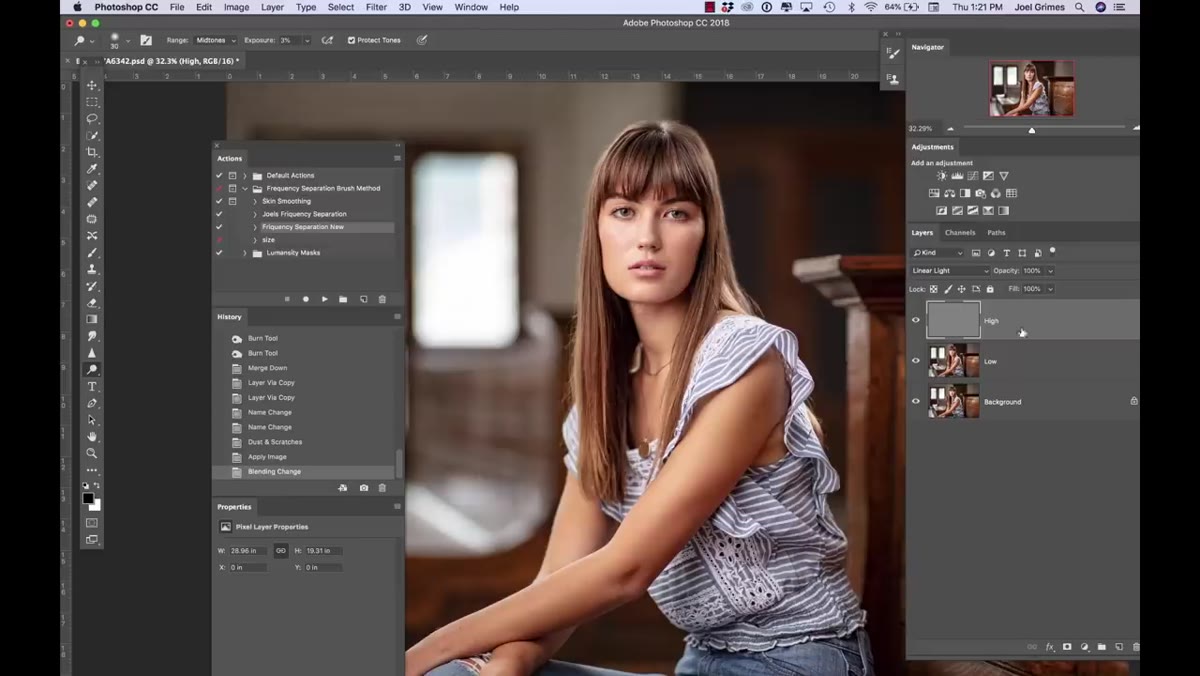 High layer blending mode set to Linear Light in layers panel
With the High layer still selected, go to the blending mode dropdown at the top of the layers panel (it probably says Normal) and change it to Linear Light. When you do this, the image should snap back to looking very close to your original photo. If it does, you’ve done everything correctly. The two layers are now mathematically canceling each other out, which means you can edit each one independently without affecting the other. Texture edits go on High. Tone and color edits go on Low. That separation is the entire point of the technique.
High layer blending mode set to Linear Light in layers panel
With the High layer still selected, go to the blending mode dropdown at the top of the layers panel (it probably says Normal) and change it to Linear Light. When you do this, the image should snap back to looking very close to your original photo. If it does, you’ve done everything correctly. The two layers are now mathematically canceling each other out, which means you can edit each one independently without affecting the other. Texture edits go on High. Tone and color edits go on Low. That separation is the entire point of the technique.
Step 5: Group the Two Layers and Add a Dodge and Burn Layer
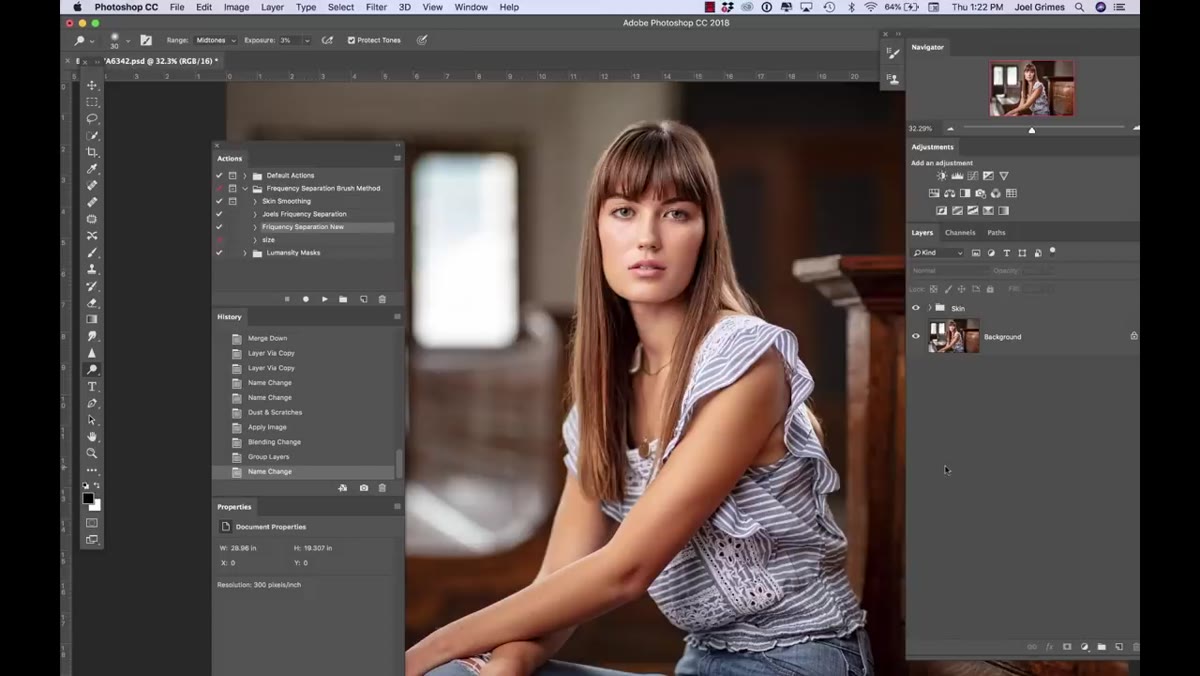 Skin group folder created with a filled gray layer above it
Select both the Low and High layers and press Command+G to group them. Name the group “Skin” to keep things organized. Joel’s method then calls for a dedicated dodge and burn layer sitting directly above the group. Create a new blank layer with Shift+Command+N, then fill it with 50% gray (Edit, Fill, 50% Gray). Set its blending mode to Overlay. In Overlay mode, pure gray is invisible, which means you can paint light and shadow onto this layer using a soft white or black brush at very low opacity without touching any pixel data underneath. This gives you clean, non-destructive control over contouring and any uneven tone that the frequency separation alone doesn’t fix.
Skin group folder created with a filled gray layer above it
Select both the Low and High layers and press Command+G to group them. Name the group “Skin” to keep things organized. Joel’s method then calls for a dedicated dodge and burn layer sitting directly above the group. Create a new blank layer with Shift+Command+N, then fill it with 50% gray (Edit, Fill, 50% Gray). Set its blending mode to Overlay. In Overlay mode, pure gray is invisible, which means you can paint light and shadow onto this layer using a soft white or black brush at very low opacity without touching any pixel data underneath. This gives you clean, non-destructive control over contouring and any uneven tone that the frequency separation alone doesn’t fix.
Step 6: Add a Black and White Adjustment Layer for Retouching Vision
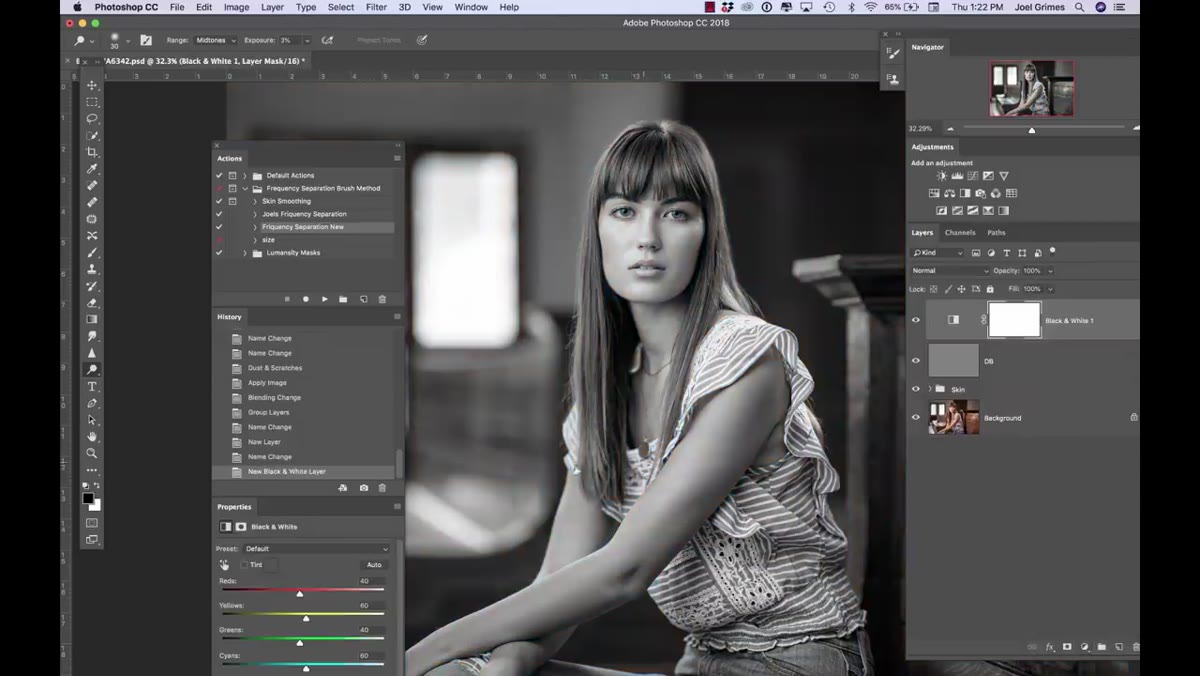 Black and white adjustment layer applied over the full layer stack
Add a Black and White adjustment layer at the very top of your stack. Do not merge it, and do not flatten anything. This layer exists purely as a retouching aid. Skin flaws, uneven patches, and texture irregularities are significantly easier to see in grayscale than in full color, where the warmth of skin tone can visually mask problems. When you are done retouching, simply turn this layer off or delete it before export. Think of it as turning on a diagnostic mode.
Black and white adjustment layer applied over the full layer stack
Add a Black and White adjustment layer at the very top of your stack. Do not merge it, and do not flatten anything. This layer exists purely as a retouching aid. Skin flaws, uneven patches, and texture irregularities are significantly easier to see in grayscale than in full color, where the warmth of skin tone can visually mask problems. When you are done retouching, simply turn this layer off or delete it before export. Think of it as turning on a diagnostic mode.
Step 7: Retouch Texture on the High Layer Using the Healing Brush
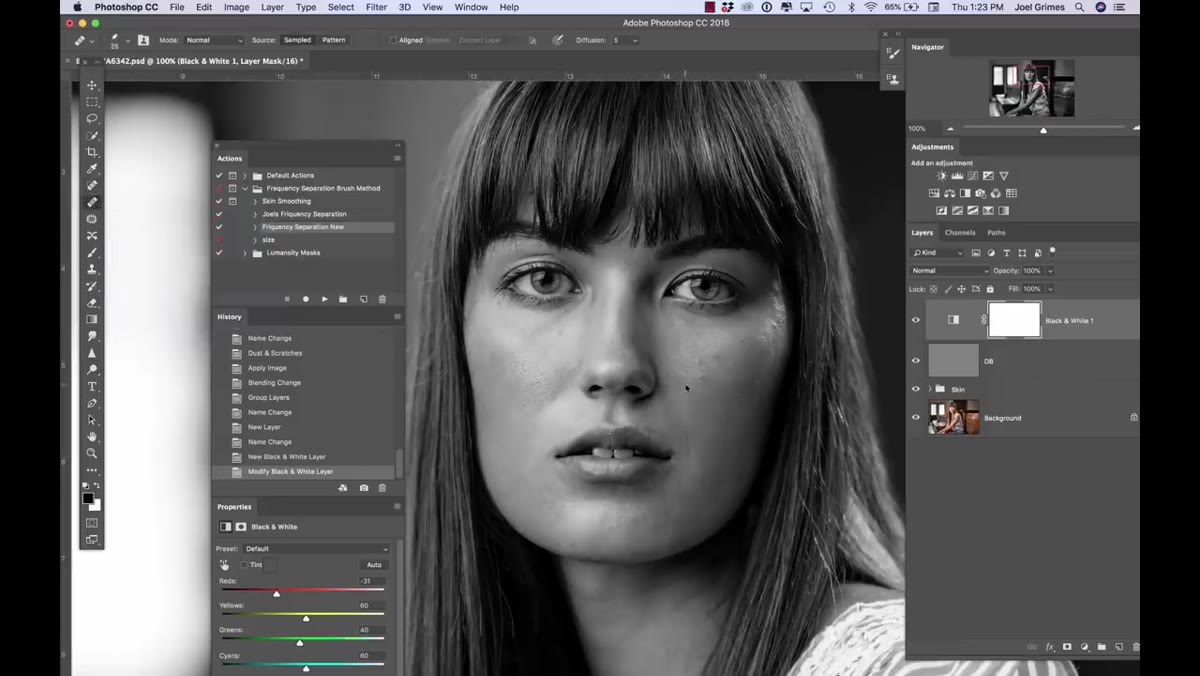 Healing Brush tool active with sample point set near a skin blemish
Open your Skin group and click on the High layer to make it active. Select the Healing Brush tool (not the Spot Healing Brush). Joel’s tip for keeping yourself on the right tool: set the Healing Brush to an elliptical shape, so you always know at a glance which one is active. Hold Option (Alt on Windows) and click near a blemish to set a clean sample point. Then paint directly over the flaw. Because you are working only on the texture layer, you are moving texture information without disturbing the skin tone underneath. The result is a correction that blends naturally, with none of that smeared, waxy look that comes from healing on a flattened or merged layer.
Healing Brush tool active with sample point set near a skin blemish
Open your Skin group and click on the High layer to make it active. Select the Healing Brush tool (not the Spot Healing Brush). Joel’s tip for keeping yourself on the right tool: set the Healing Brush to an elliptical shape, so you always know at a glance which one is active. Hold Option (Alt on Windows) and click near a blemish to set a clean sample point. Then paint directly over the flaw. Because you are working only on the texture layer, you are moving texture information without disturbing the skin tone underneath. The result is a correction that blends naturally, with none of that smeared, waxy look that comes from healing on a flattened or merged layer.
One Thing I’d Add From My Own Work
After running this workflow for a while, I started saving it as a Photoshop action. Joel mentions this in passing, and I cannot recommend it strongly enough. I named mine after the movie “The Natural” because, honestly, that is what good skin retouching should look like. One click and the entire layer stack, the Low layer with Dust and Scratches, the High layer with Apply Image, the Skin group, the Dodge and Burn layer, and the Black and White adjustment, all build themselves automatically. For anyone retouching more than a handful of images a week, the time savings add up fast. Build the action once, and you will never have to remember the Scale and Offset values again.
The single most important thing to take away from this technique is that frequency separation only works when the two layers are genuinely separated. If your Radius values do not match, or if the Apply Image settings are off by even one field, the layers will not cancel correctly and the whole system falls apart. Get those settings right once, save the action, and the rest of the workflow becomes almost automatic.
Watch the full tutorial on YouTube to see Joel walk through the technique on a real portrait, including how he handles the healing brush work up close. Watching the brush strokes in real time adds a lot of context that settings alone can’t fully communicate.
Comments (2)
Applied this to my portfolio shots and the improvement is noticeable.
Clear and practical. No fluff. Appreciate that.
Leave a Comment