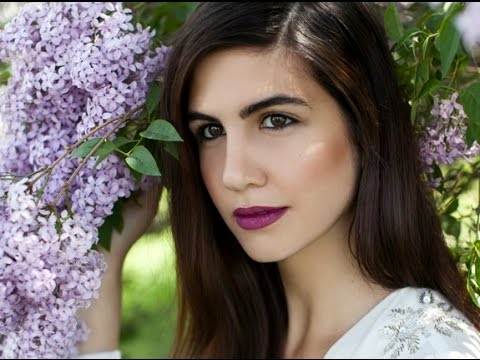
There’s a specific kind of dread that comes with opening a portrait file and seeing uneven, blotchy skin tone staring back at you. Not blemishes, not texture problems, just that muddy patchwork of reds and pinks and shadows that makes an otherwise beautiful shot look like it was lit by a convenience store. Early in my retouching career, I tried to fix this kind of thing with the Spot Healing Brush and a prayer. The results were exactly as bad as you’d expect. A client once told me my edits made her look “like a wax figure,” which is the kind of feedback that stays with you.
Frequency separation changed everything for me, and it remains the technique I reach for first on almost every beauty and portrait edit I take on. When I came across Watch the full tutorial on YouTube from photographer and retoucher Jessica Kobeissi, I was struck by how cleanly she breaks down a workflow that can feel intimidating when you first encounter it. This is Part 2 of her three-part portrait series, focused entirely on the retouching and editing phase. What follows is my step-by-step breakdown of her process, written so you can follow along in Photoshop without needing to pause and rewind every thirty seconds.
The core idea behind frequency separation is this: skin has two distinct visual components. There’s the color and tone (low frequency), and there’s the texture, pores, and fine detail (high frequency). When we separate those two things into their own layers, we can smooth out blotchy color without ever touching the texture. That’s how we avoid the dreaded plastic-skin look. It’s not magic, it’s just working smarter with what Photoshop already gives us.
Step 1: Make Subtle Raw Adjustments Before You Open the File
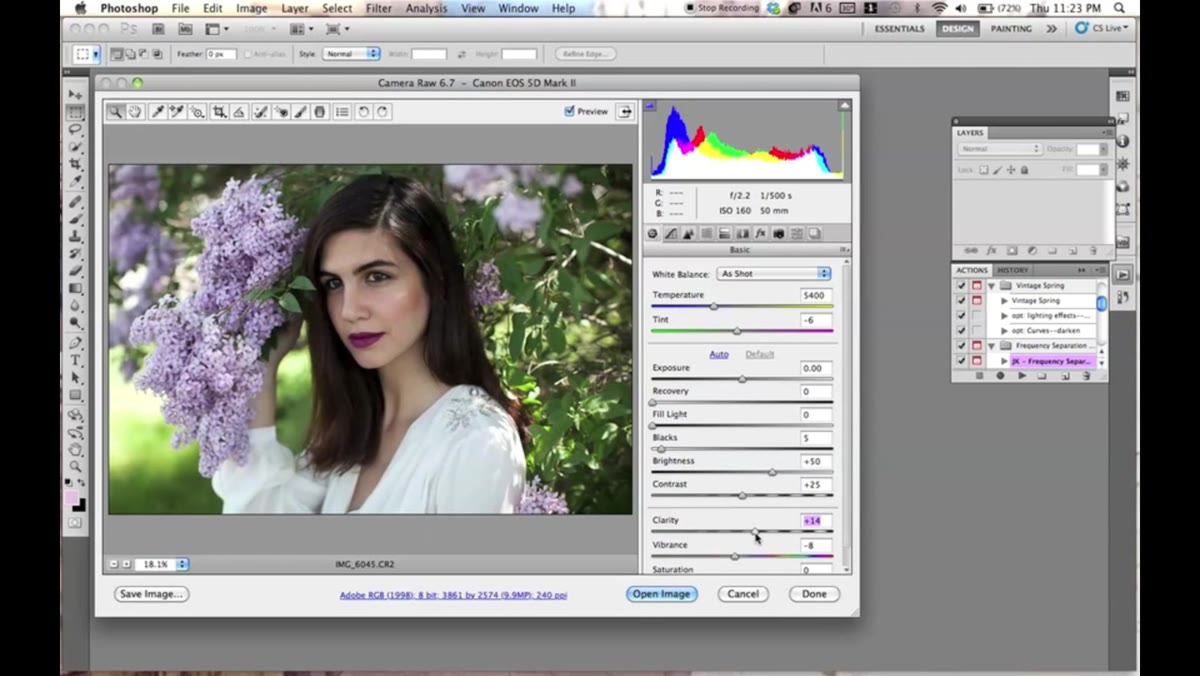 Raw file open with clarity and exposure sliders adjusted slightly
Before we touch any retouching tools, we open the image in the Raw editor. Jessica keeps this stage intentionally light. She nudges clarity and exposure just slightly, and doesn’t touch white balance at all, noting she prefers to correct color casts later using a Color Balance adjustment layer in Photoshop proper. This is a philosophy worth adopting. Over-correcting in Raw locks you into decisions before you’ve seen how the image behaves in your full editing environment. Keep Raw adjustments minimal and reversible.
Raw file open with clarity and exposure sliders adjusted slightly
Before we touch any retouching tools, we open the image in the Raw editor. Jessica keeps this stage intentionally light. She nudges clarity and exposure just slightly, and doesn’t touch white balance at all, noting she prefers to correct color casts later using a Color Balance adjustment layer in Photoshop proper. This is a philosophy worth adopting. Over-correcting in Raw locks you into decisions before you’ve seen how the image behaves in your full editing environment. Keep Raw adjustments minimal and reversible.
Step 2: Apply the Frequency Separation Action
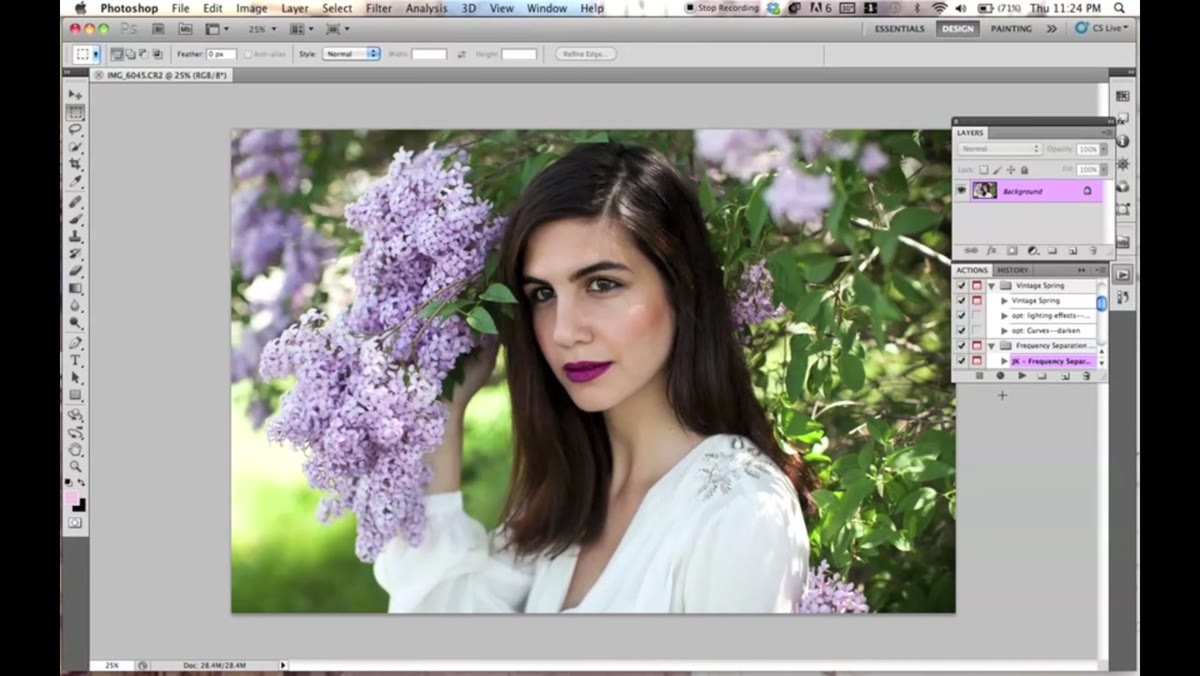 Frequency separation action running, layer panel showing two new layers
Jessica uses a pre-built Photoshop action created by retoucher Julia to apply frequency separation automatically. Rather than manually duplicating layers, applying the High Pass filter, and setting blend modes by hand, the action handles all of that in one click. She mentions it’s available as a free download and links it in her video description. If you don’t already have a frequency separation action saved, this is worth the five minutes it takes to install one. I have my own version saved in Photoshop (I named it after a movie, because that’s how I keep my actions panel from becoming a nightmare), but the underlying layer structure is identical: one layer for color/tone information, one for texture.
Frequency separation action running, layer panel showing two new layers
Jessica uses a pre-built Photoshop action created by retoucher Julia to apply frequency separation automatically. Rather than manually duplicating layers, applying the High Pass filter, and setting blend modes by hand, the action handles all of that in one click. She mentions it’s available as a free download and links it in her video description. If you don’t already have a frequency separation action saved, this is worth the five minutes it takes to install one. I have my own version saved in Photoshop (I named it after a movie, because that’s how I keep my actions panel from becoming a nightmare), but the underlying layer structure is identical: one layer for color/tone information, one for texture.
When the action runs, you’ll see at minimum two new layers in your panel. The low-frequency layer holds the blurred, tonal information. The high-frequency layer holds the fine detail. We work on each one separately and for very different purposes.
Step 3: Work the Low-Frequency Layer with the Healing Brush
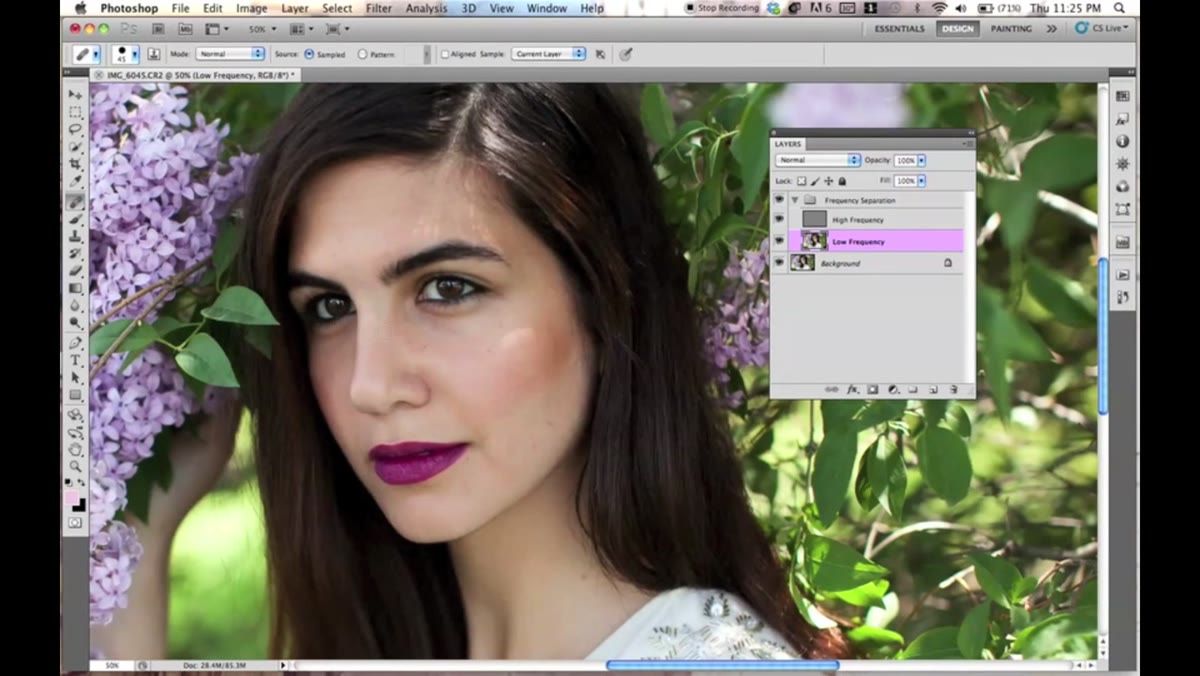 Healing brush sampling skin tone on the low frequency layer
This is where the actual skin evening happens. Select the low-frequency (color) layer, then pick the Healing Brush tool. Hold Alt (Option on Mac) to sample an area of clean, even skin tone, then paint over the blotchy or uneven areas nearby. You’re not healing texture here, only color. The brush essentially blends the color you sampled into the problem area, and because the texture layer sits above it untouched, the skin still looks like skin.
Healing brush sampling skin tone on the low frequency layer
This is where the actual skin evening happens. Select the low-frequency (color) layer, then pick the Healing Brush tool. Hold Alt (Option on Mac) to sample an area of clean, even skin tone, then paint over the blotchy or uneven areas nearby. You’re not healing texture here, only color. The brush essentially blends the color you sampled into the problem area, and because the texture layer sits above it untouched, the skin still looks like skin.
Jessica works methodically across the face, paying close attention to the cheek area, the nose, and around the eyes. She’s deliberate about the blush zone specifically, making sure transitions stay gradual rather than creating a hard line where color shifts. If you’re moving from a flushed cheek toward a more neutral forehead, you want to sample from the transitional area between them, not from either extreme. That’s how you keep it looking human.
Step 4: Avoid Over-Retouching the Under-Eye Area
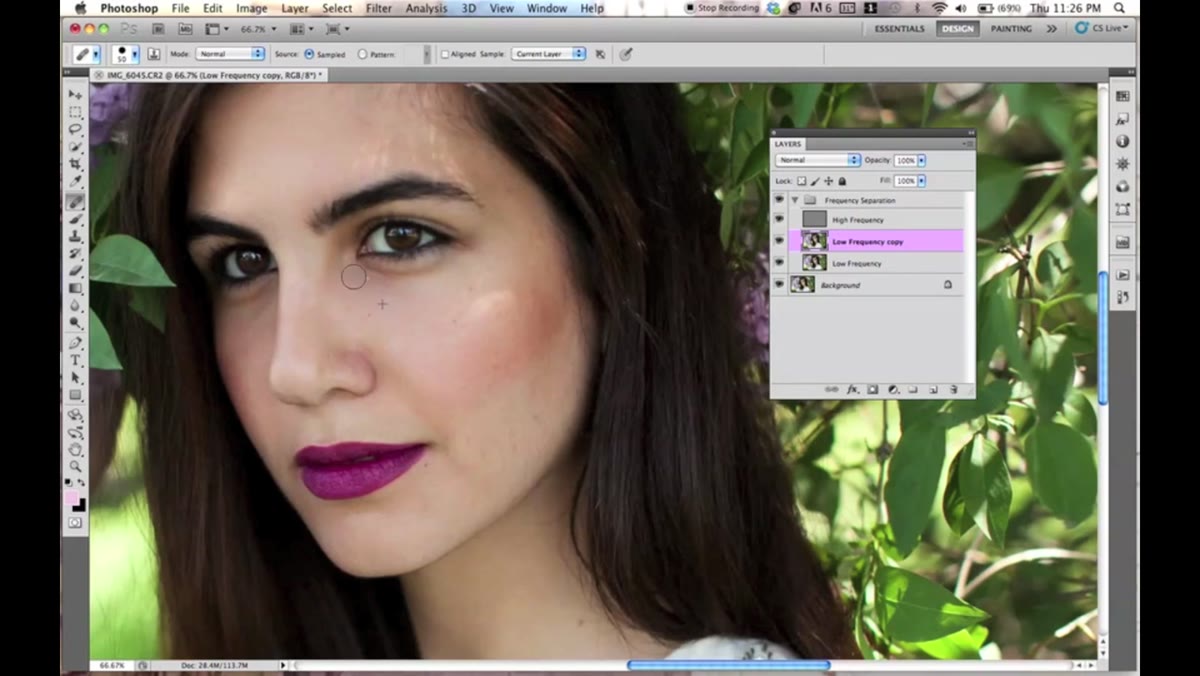 Healing brush working near under-eye, cautious strokes
Jessica flags this explicitly and I want to second it firmly: the under-eye area is a trap. It’s tempting to aggressively smooth out darkness or discoloration there, but the skin in that zone has natural translucency and fine movement lines that, if you erase them, immediately read as fake. She touches it only sparingly, and that restraint is part of what makes her results look natural rather than retouched-within-an-inch-of-their-life.
Healing brush working near under-eye, cautious strokes
Jessica flags this explicitly and I want to second it firmly: the under-eye area is a trap. It’s tempting to aggressively smooth out darkness or discoloration there, but the skin in that zone has natural translucency and fine movement lines that, if you erase them, immediately read as fake. She touches it only sparingly, and that restraint is part of what makes her results look natural rather than retouched-within-an-inch-of-their-life.
A useful rule of thumb is to ask yourself whether the area you’re healing would exist naturally on a well-rested person with good skin. If the answer is yes, leave it alone or barely touch it.
Step 5: Use a Graphics Tablet, Not a Mouse
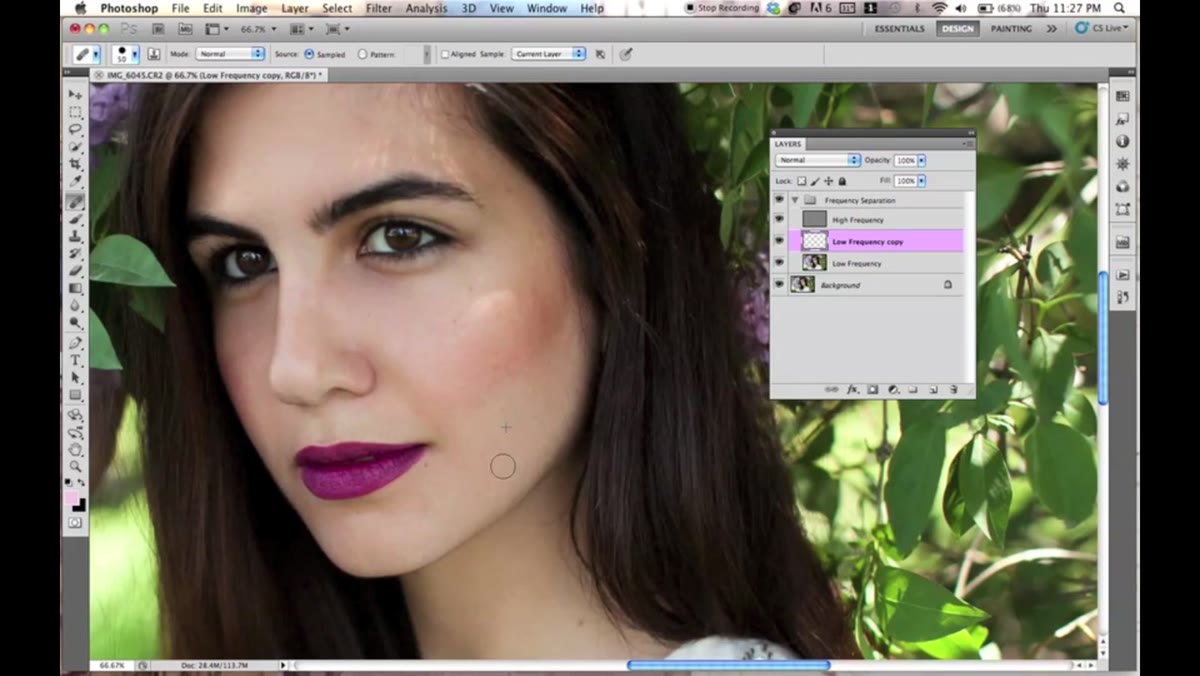 Wide shot of retouching in progress, tablet referenced in narration
Jessica recommends a graphics tablet for this kind of work, and she’s right. The pressure sensitivity and control you get from a stylus make the Healing Brush feel entirely different than it does with a mouse. She mentions picking up a Wacom Bamboo for around $60 to $100. Entry-level tablets have come down significantly in price since then, and even a basic one transforms the precision of your healing work. I resisted buying one for longer than I care to admit. Once I did, my retouching time dropped noticeably, mostly because I stopped having to undo wobbly strokes.
Wide shot of retouching in progress, tablet referenced in narration
Jessica recommends a graphics tablet for this kind of work, and she’s right. The pressure sensitivity and control you get from a stylus make the Healing Brush feel entirely different than it does with a mouse. She mentions picking up a Wacom Bamboo for around $60 to $100. Entry-level tablets have come down significantly in price since then, and even a basic one transforms the precision of your healing work. I resisted buying one for longer than I care to admit. Once I did, my retouching time dropped noticeably, mostly because I stopped having to undo wobbly strokes.
A Note from My Own Workflow: Don’t Skip the Before/After Check
One habit I’ve built in that Jessica demonstrates briefly but that deserves more emphasis: toggle your retouching layer visibility on and off regularly as you work. It’s easy to get tunnel-vision on a problem area and over-correct it without realizing. I do a before/after check every few minutes, sometimes more often when I’m working around eyes or lips. If the “before” and “after” look dramatically different in an obvious way, that’s usually a sign I’ve gone too far. Subtle is the goal. The viewer should feel like the subject just has great skin, not that the photo was processed.
This is especially worth building into your muscle memory if you’re newer to frequency separation. The technique is forgiving, but it’s also easy to lean on too heavily. Real skin has variation. Our job is to reduce the distracting variation, not eliminate all of it.
The single most important idea to take from this tutorial is the separation principle itself: fix color without touching texture, fix texture without muddying color. Keep those two jobs on separate layers, work each one with the appropriate tool and intention, and you will produce skin retouching that holds up at full resolution without looking processed.
Watch the full tutorial on YouTube to see Jessica’s complete workflow in real time, including the color editing she covers after the skin retouching phase.
Comments
Leave a Comment