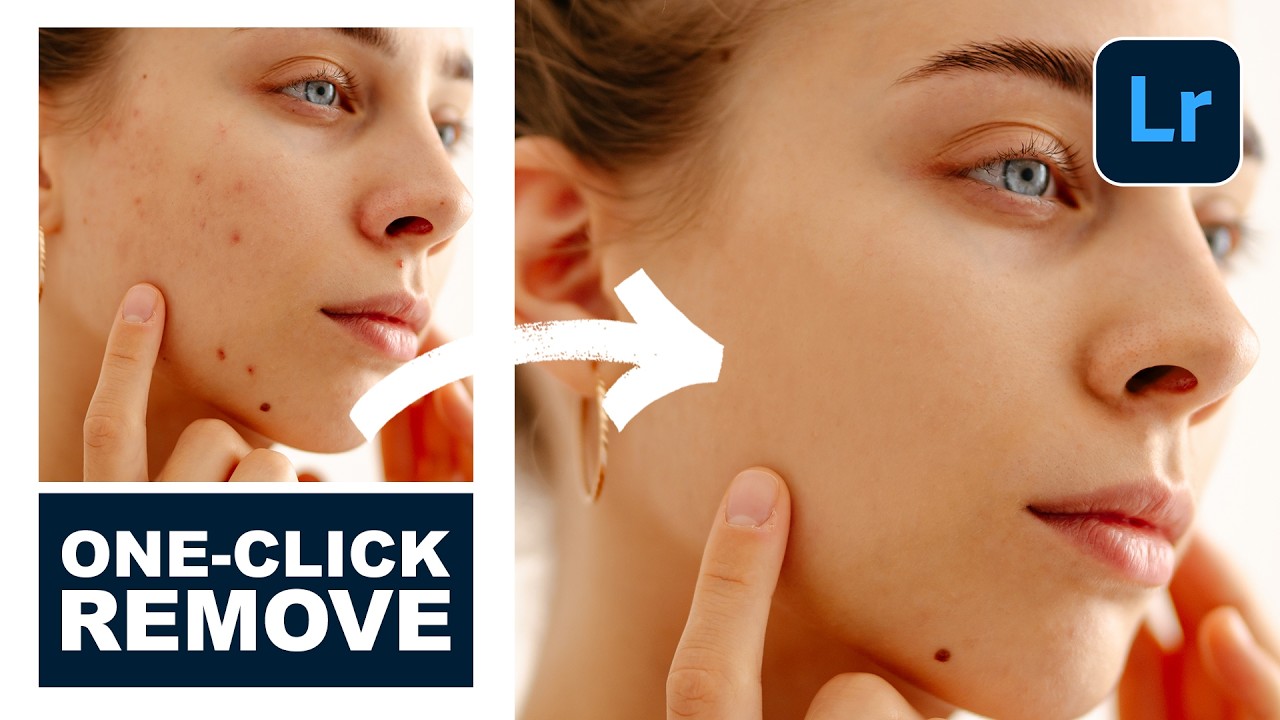
Retouching Techniques
Master Color Correction for Flawless Portrait Retouching
Master Color Correction for Flawless Portrait Retouching Color correction is where the magic happens in portrait retouching. I’ve found that even the most beautifully lit portrait can feel off if the color isn’t right. Whether you’re dealing with unflattering lighting conditions, mixed color temperatures, or just want to enhance skin tones, understanding color correction will transform your work. Let me walk you through the techniques I rely on every day.