Frequency Separation Without the Headache: A Step-by-Step Breakdown of Joel Grimes' Approach

Frequency Separation Without the Headache: A Step-by-Step Breakdown of Joel Grimes' Approach

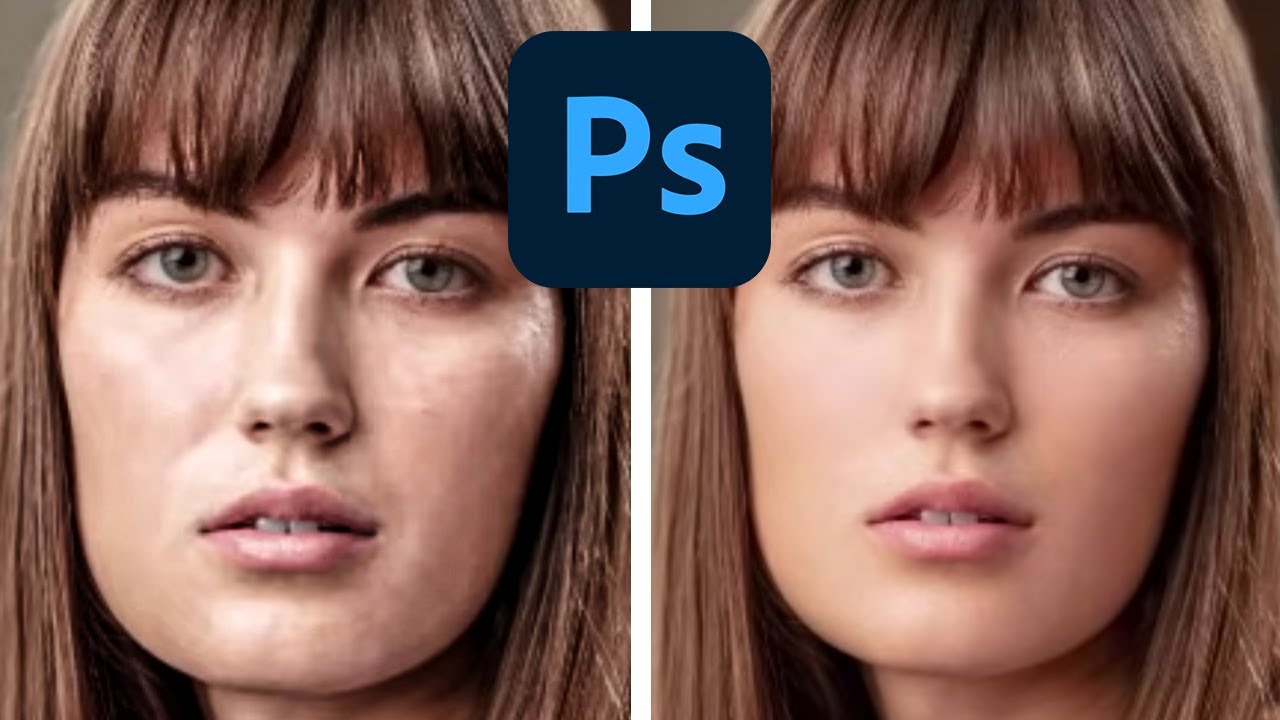
There is a specific kind of dread that comes from over-retouching skin. I know it well. Early in my retouching career, I handed a beauty client a set of images so smoothed-out that she emailed back asking if I had accidentally used a blur filter on her face. I had not. I had just been using the wrong tools with too much confidence. Frequency separation was the technique that eventually pulled me out of that hole, but for a long time I avoided it because every tutorial I found turned it into a 45-minute production involving terminology that felt designed to intimidate.


The 15-Minute Eye Enhancement Workflow That Stopped My Clients From Asking for 'More Pop'

The 15-Minute Eye Enhancement Workflow That Stopped My Clients From Asking for 'More Pop'

A few years into freelancing, I had a client send back a batch of beauty shots with one word in the subject line: “More.” She wanted more brightness, more color, more life in the eyes. I’d already dodged the irises, boosted the whites, and painted in a catch light. The eyes looked like something out of an animated film. I sat back from my (perpetually lowered) standing desk, made a fresh cup of green tea, and realized the problem wasn’t that I hadn’t done enough.

The 15-Minute Eye Enhancement Workflow That Stopped My Clients Saying Make Them Pop

The 15-Minute Eye Enhancement Workflow That Stopped My Clients Saying Make Them Pop

A few years back, a client sent me a revision note that read: “Can you make the eyes more… alive?” I had spent forty minutes on that image. The skin was clean, the color grade was warm and editorial, and the composition was genuinely lovely. But she was right. The eyes looked like they belonged to someone who had just heard mildly disappointing news. Everything else in the frame was doing its job, and the eyes were not.

Why Hair Retouching Falls Apart at the Edges (And How to Fix It Layer by Layer)

Why Hair Retouching Falls Apart at the Edges (And How to Fix It Layer by Layer)

Why Hair Retouching Falls Apart at the Edges (And How to Fix It Layer by Layer) By Maya Chen The file came in on a Tuesday morning: a beauty campaign shot, studio-lit, clean background, gorgeous subject. The hair was this wild, expressive curtain of coils that the photographer had clearly worked hard to capture well. My job was to clean it up without flattening it. Three hours later I had something that looked like a wig glued to a mannequin.

Lightroom's April 2026 Masking Updates Are Quietly a Big Deal for Beauty Retouchers

Lightroom's April 2026 Masking Updates Are Quietly a Big Deal for Beauty Retouchers

If you do any volume of beauty or portrait work, you already know that waiting on Lightroom is part of the job. Waiting for exports, waiting for AI masking, waiting for denoise to grind through a raw file while your cursor just sits there, taunting you. I’ve lost whole stretches of productive time staring at a progress bar when I could have been culling the next batch or answering emails. So when Adobe drops an update that actually addresses a real workflow bottleneck, I pay attention.

The Hidden Frequency Separation Secret That Saves Flat-Looking Skin

The Hidden Frequency Separation Secret That Saves Flat-Looking Skin

The Hidden Frequency Separation Secret That Saves Flat-Looking Skin I’ve noticed something fascinating happening in portrait retouching conversations lately. Editors everywhere are discovering that their beautifully smoothed skin often loses something critical the moment a client zooms out. The detailed, dimensional quality vanishes, leaving behind a plastic-looking result that feels disconnected from reality. Here’s what I’ve found: there’s a specific step within the frequency separation workflow that most of us gloss over—and it’s actually the key to maintaining that natural, three-dimensional quality we’re all chasing.

What a Mandalorian Scene Taught Me About Cinematic Light (And Why It Matters for Beauty Work)

What a Mandalorian Scene Taught Me About Cinematic Light (And Why It Matters for Beauty Work)

There’s a moment in almost every beauty retouching project where the background just isn’t working. The studio wall is too flat, the location shot has distracting elements, and stock photos feel like stock photos no matter how well you blend them. I spent a long time solving this problem with Photoshop alone, layering textures and painting light, and the results were fine. Fine is not what we’re going for. What I actually wanted were environments that felt cinematic, dimensional, and completely under my control.

The 20-Minute Eye Enhancement Workflow That Makes Portraits Feel Alive

The 20-Minute Eye Enhancement Workflow That Makes Portraits Feel Alive

A few years back, a client emailed me after receiving her finished gallery. She loved everything, she said, except one thing: her eyes looked “like a doll’s.” Not a compliment. I went back to the file and stared at what I’d done. The whites were blown out to pure paper, the irises had been saturated to an almost cartoon blue, and the catch lights had been cloned into perfect symmetrical circles.

The 20-Minute Eye Enhancement Workflow That Stopped Making My Portraits Look Fake

The 20-Minute Eye Enhancement Workflow That Stopped Making My Portraits Look Fake

A few years into freelancing, I had a client sit across from me at a coffee shop, laptop open, and say the words every retoucher dreads: “She looks like a doll. Not in a good way.” The portrait was technically clean. Skin was smooth, the background was polished, the color grade was consistent. But the eyes, which I had spent probably forty minutes on, looked like they’d been swapped in from a video game character.

Frequency Separation: The Game-Changing Technique for Flawless Skin

Frequency Separation: The Game-Changing Technique for Flawless Skin

Frequency Separation: The Game-Changing Technique for Flawless Skin When I first discovered frequency separation, it transformed how I approach portrait retouching. This technique gives us something that traditional healing brushes simply can’t: the ability to edit skin texture and color independently. If you’ve ever struggled to smooth skin without making it look plastic, or found yourself fighting with color corrections that affect sharpness, this method is about to become your best friend.

The Art of Eye Enhancement: Techniques That Bring Portraits to Life

The Art of Eye Enhancement: Techniques That Bring Portraits to Life

The Art of Eye Enhancement: Techniques That Bring Eyes to Life When I’m editing a portrait, I always start by looking into the eyes. They’re the first thing viewers connect with, and they’re often the difference between a good portrait and one that truly captivates. Whether you’re working with professional headshots or fashion editorials, enhancing the eyes properly can transform your entire image. Let me walk you through the approach I’ve developed over years of retouching—one that respects the natural beauty of the subject while making their eyes unforgettable.

The Art of Color Correction in Portrait Retouching: A Step-by-Step Guide

The Art of Color Correction in Portrait Retouching: A Step-by-Step Guide

The Art of Color Correction in Portrait Retouching: A Step-by-Step Guide I’ve spent years perfecting the subtle art of color correction, and I can tell you that it’s one of the most transformative skills we can develop as portrait retouchers. It’s the difference between a photo that looks okay and one that looks absolutely radiant. Whether you’re editing headshots, bridal portraits, or beauty photography, understanding how to correct and enhance color will elevate your work immediately.