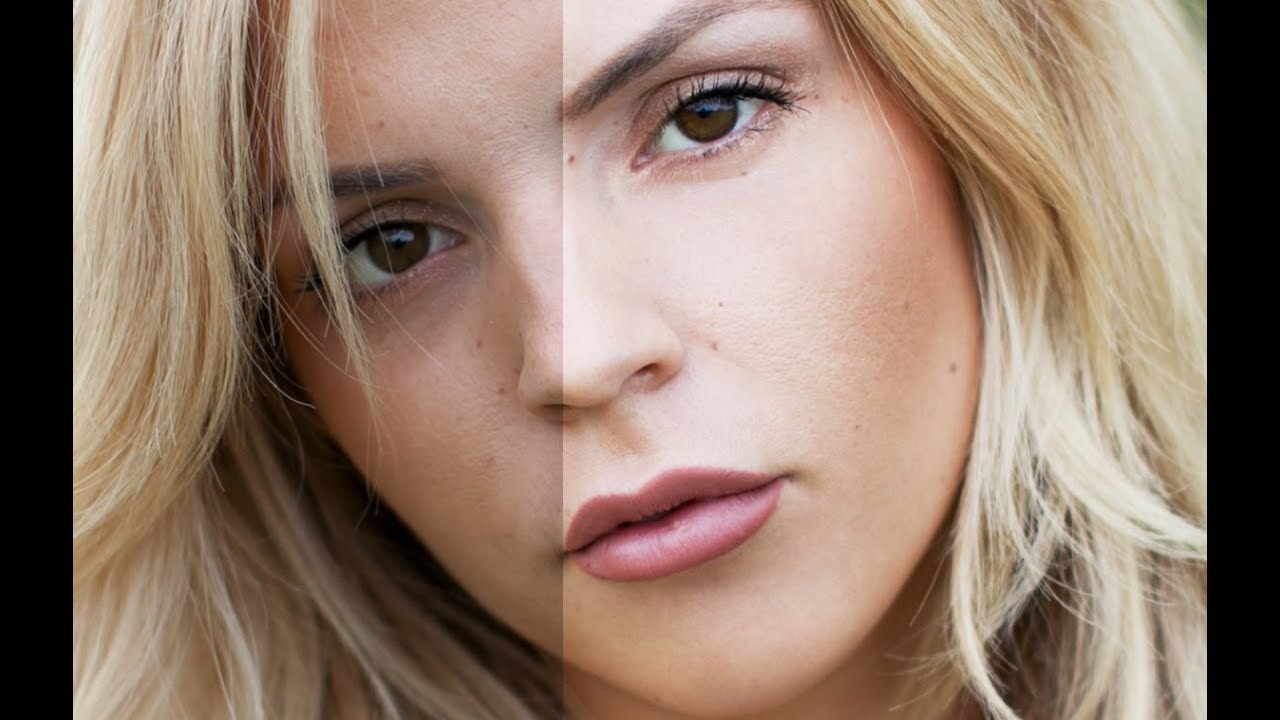
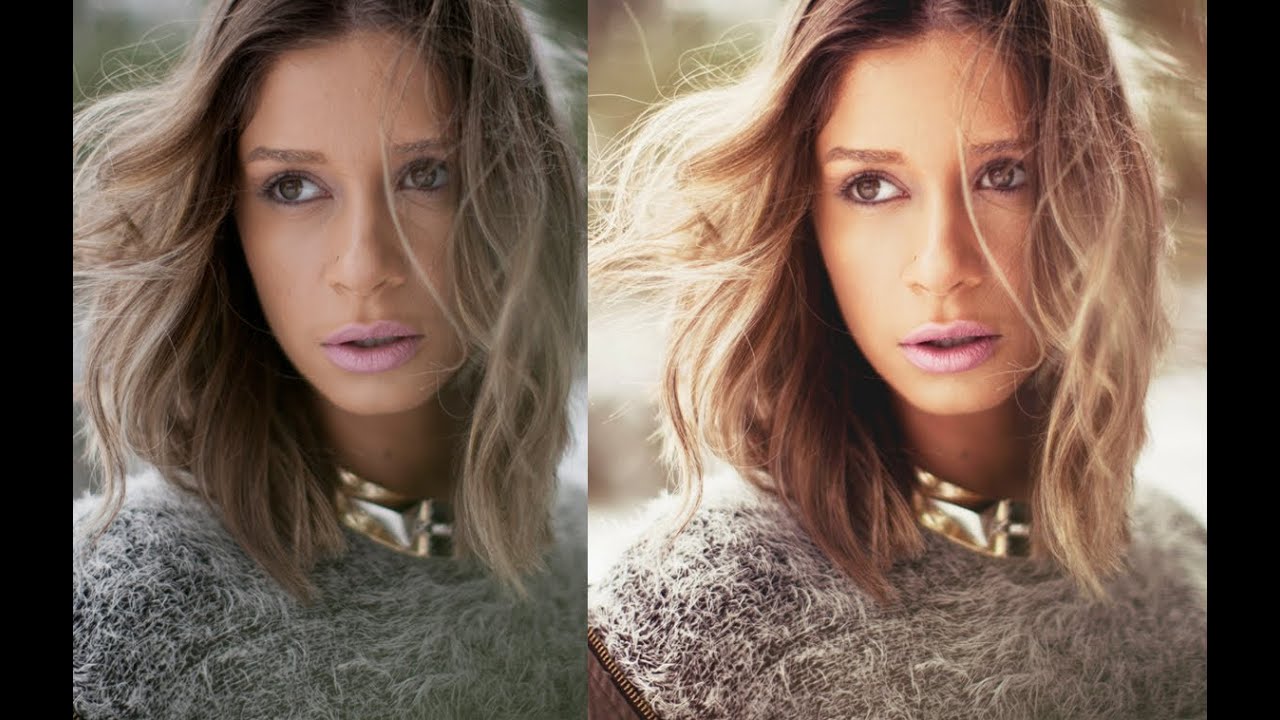
Using Architecture as a Natural Frame: What Serge Ramelli's Paris Shoot Taught Me About Stronger Compositions

Using Architecture as a Natural Frame: What Serge Ramelli's Paris Shoot Taught Me About Stronger Compositions

I had a client last month send back a batch of portraits with a note that said, simply, “they feel flat.” The lighting was clean, the retouching was solid, the color grade was consistent. But she was right. Every image looked like a person standing in front of a thing, rather than a person existing inside a place. That’s a composition problem, and no amount of frequency separation fixes it upstream.

The Paris Frame-Within-a-Frame Technique That Changed How I Think About Composition

The Paris Frame-Within-a-Frame Technique That Changed How I Think About Composition

Last month I was editing a beauty campaign shot in an urban environment, brick archways and iron railings everywhere, and I kept cropping my way into corners trying to make the images feel intentional rather than accidental. The architecture was beautiful but it was competing with my subject instead of working for her. I knew something was off and I kept adding clarity, adjusting color, reaching for every retouching tool I had, when the actual problem was upstream of all of that.

Photoshop's Bidirectional Gradient Masks Finally Make Skin Blending Feel Natural

Photoshop's Bidirectional Gradient Masks Finally Make Skin Blending Feel Natural

I was mid-project last month, working on a set of beauty shots for a skincare client, and I ran into that same old frustration. You know the one. You’ve done your frequency separation, your dodge and burn looks clean, and then you need to blend two adjustments together across a transition zone on the face. You reach for the gradient mask tool and immediately realize the gradient is going to blow out one end or the other.

Lightroom's April 2026 Masking Updates Are Quietly a Big Deal for Beauty Retouchers

Lightroom's April 2026 Masking Updates Are Quietly a Big Deal for Beauty Retouchers

Last month I was working on a campaign shoot for a skincare client, and I kept running into the same wall I always hit in Lightroom: I needed to make a targeted adjustment to the skin tones without pulling the warm highlights in the background along for the ride. I know the masking tools well enough, but something about the workflow felt clunkier than it should. I found myself bouncing into Photoshop earlier than necessary, which always costs time I don’t have.

Photoshop's April 2026 Updates Are Actually Worth Your Time — Here's What Changed

Photoshop's April 2026 Updates Are Actually Worth Your Time — Here's What Changed

I had a deadline last week. Campaign shoot, eight portraits, client wanted finals by Thursday morning. Somewhere around image four, I hit that familiar wall where Photoshop’s masking behavior was doing something slightly unpredictable around fine hair strands, and I found myself rebuilding a selection from scratch that I had already built twice. Not a catastrophe, just the low-grade friction that compounds across a long edit day and eventually makes you question your tool choices.

Lightroom's New Duplicate Finder Is the Catalog Cleanup Tool I've Been Waiting Years For

Lightroom's New Duplicate Finder Is the Catalog Cleanup Tool I've Been Waiting Years For

Last month I sat down to pull selects from a beauty shoot I’d done for a skincare client, and what should have been a 20-minute cull turned into an hour-long archaeological dig. Somehow I had imported the same card twice, and I was staring at hundreds of near-identical RAW files with no fast way to know which ones I’d already flagged. It wasn’t the first time this had happened. Between overlapping shoots, client re-sends, and the occasional “just in case” backup import, my Lightroom catalog had quietly become a mess.

How to Use Luminosity Masking to Add Real Depth to Flat Photos

How to Use Luminosity Masking to Add Real Depth to Flat Photos

Last month I delivered a set of beauty shots to a skincare client and got back a response I hadn’t heard in a while: “They look a little flat.” Not “plastic” (I fixed that problem years ago, painfully), but flat. Dimensionless. Like the light had been ironed out of the image rather than sculpted into it. I knew what they meant the second I looked at the files again. I’d been so focused on skin work that I’d completely neglected tonal depth.

What Photoshop's April 2026 Update Actually Changes for Beauty Retouchers

What Photoshop's April 2026 Update Actually Changes for Beauty Retouchers

Last month I was mid-project on a skincare campaign, three layers deep into a mask stack that was held together with what I can only describe as optimism and expired coffee, when my usual workflow just stopped feeling efficient. Not broken, exactly. Just slow. Creaky. The kind of slow that makes you wonder whether you’ve been doing something the hard way for years without realizing it. That’s the headspace I was in when I sat down with Matt Kloskowski’s April 2026 Photoshop update breakdown, and I’m glad I did.

What a Mandalorian Scene Taught Me About Cinematic Light (And Why It Applies to Beauty Work)

What a Mandalorian Scene Taught Me About Cinematic Light (And Why It Applies to Beauty Work)

A client came to me last spring asking for something I’d never delivered before. She wanted composite backgrounds for a skincare campaign, something that felt filmic and atmospheric rather than the usual clean-studio look. I’d been hearing about Unreal Engine for a while, mostly from video game artists and cinematographers, but I’d written it off as overkill for beauty work. Then I sat down with this Serge Ramelli tutorial and realized I’d been sleeping on one of the most useful lighting sandboxes available to creatives right now.

Why I Stopped Duplicating Layers for Every Edit (And What I Do Now)

Why I Stopped Duplicating Layers for Every Edit (And What I Do Now)

Last week I was halfway through a skin retouching job for a cosmetics client, staring at a layer stack that looked like a accordion file folder someone had dropped down a staircase. Seventeen duplicate layers. Each one named something only slightly more useful than “Layer 3 copy copy.” I had to flatten and start over, which cost me about an hour I did not have. That moment made me go looking for a better system, and I landed on this tutorial from Matt Kloskowski that genuinely changed how I think about building a retouching file.

How Sean Tucker's Lightroom Portrait Workflow Finally Got My Skin Tones Right

How Sean Tucker's Lightroom Portrait Workflow Finally Got My Skin Tones Right

Last month I delivered a batch of beauty campaign edits and the creative director flagged something I hadn’t noticed myself: the model’s skin had a faint magenta cast in the shadows that made her look slightly unwell in certain crops. Not dramatic, not “plastic-looking,” just subtly off. The kind of thing a client catches and you can’t unsee afterward. I went back through my workflow looking for where it crept in, and that hunt is what landed me on this Sean Tucker tutorial the same evening.

Shooting Through: How Serge Ramelli's Paris Frame-Within-a-Frame Technique Changed How I Scout Locations

Shooting Through: How Serge Ramelli's Paris Frame-Within-a-Frame Technique Changed How I Scout Locations

Last month I was shooting a beauty campaign in downtown Portland, and the client wanted “something architectural but not cold.” I kept setting up against clean brick walls and getting exactly that: clean, cold, technically correct, completely lifeless. I knew the problem. I was thinking in single planes. The shot needed depth, a sense of place that didn’t swallow the subject. I’d been sitting on this Serge Ramelli tutorial for weeks and finally watched it the night before our second shoot day.