Camera Raw to Photoshop: How Jessica Kobeissi Builds a Portrait Retouch from Scratch

Camera Raw to Photoshop: How Jessica Kobeissi Builds a Portrait Retouch from Scratch

There’s a specific kind of client email that used to send me into a spiral. It would arrive two days after delivery, and it would say something like: “These look great, but can you make the skin look a little more… natural?” I knew exactly what it meant. I had over-processed again. My highlights were blown, my skin tones were plastic, and somewhere between Camera Raw and my seventeenth Photoshop layer, I had lost the person entirely.

Why Hair Retouching Falls Apart at the Edges (And How to Fix It)

Why Hair Retouching Falls Apart at the Edges (And How to Fix It)

Hair retouching has a way of exposing every shortcut you’ve ever taken. A few years into my freelance work, I got a job retouching a campaign for a Portland-based hair care brand. Eight models, studio lighting, and hair that had been styled within an inch of its life. I thought it would be straightforward. I was wrong. By image three, I had smoothed so aggressively that the hair looked like a molded plastic helmet.

How to Color Hair Realistically in Photoshop Using Quick Mask and Curves

How to Color Hair Realistically in Photoshop Using Quick Mask and Curves

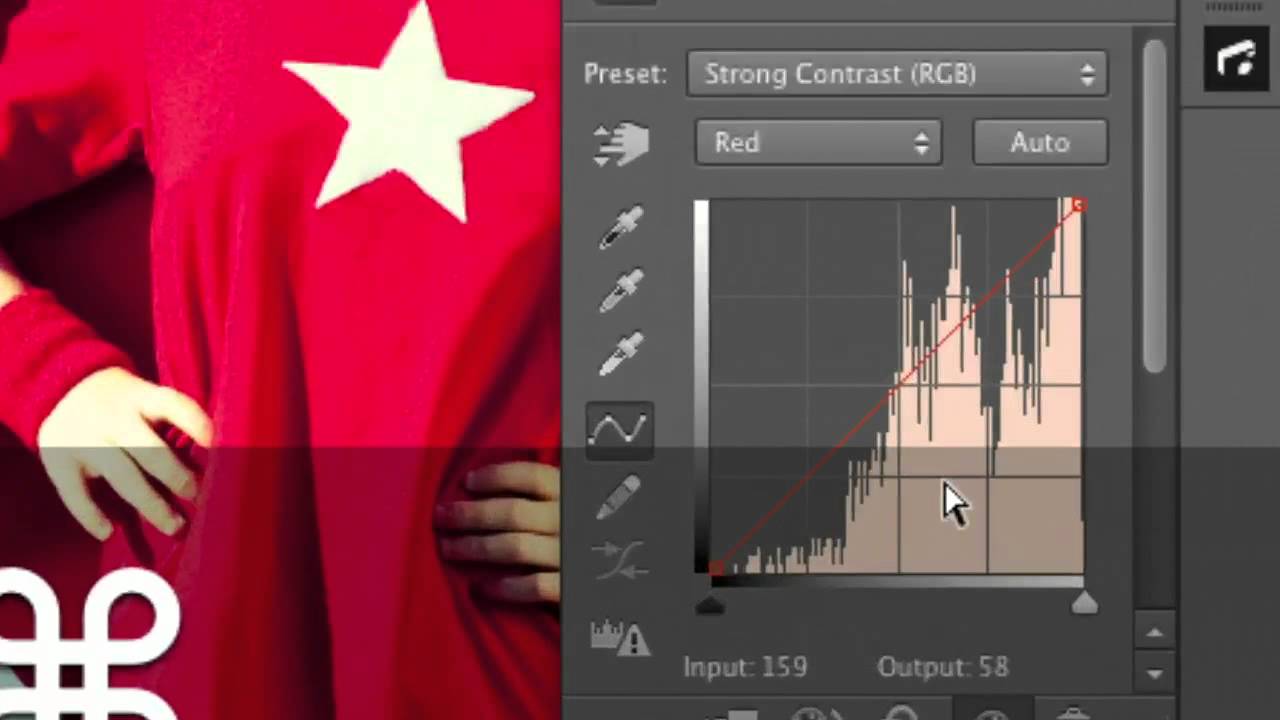
One of the trickiest requests I get from beauty clients is changing or enhancing hair color without it looking like someone ran a filter over a stock photo. For a long time, my go-to was Hue/Saturation on a clipped layer, and it worked fine, until a client pointed out that the color looked “painted on.” That one comment sent me deep into researching better workflows, and I’ve never fully recovered. What I’ve landed on is a combination of Quick Mask selection, Curves for contrast and base color, and a clipped Hue/Saturation layer on top.

Clean, Polished Hair in Photoshop: A Retoucher's Breakdown of Aaron Nace's Three-Tool Method

Clean, Polished Hair in Photoshop: A Retoucher's Breakdown of Aaron Nace's Three-Tool Method

Hair is the thing that will make or break a beauty retouch. I learned this the hard way early in my retouching career, when a client sent back a set of edits with a note that the skin looked “plastic.” I had spent all my time on the face and basically ignored the flyaways and ragged edges around the hair. The result was this uncanny valley effect: impossibly smooth skin surrounded by chaotic, untouched hair.

Why Your Portrait Colors Look Wrong (And the Correction Order That Actually Fixes It)

Why Your Portrait Colors Look Wrong (And the Correction Order That Actually Fixes It)

The Edit That Made a Client Say “She Looks Sick” I sent off a gallery to a beauty client a few years back, feeling genuinely proud of the work. Clean skin, lifted shadows, the whole thing. Her response was three words: “She looks sick.” I zoomed in on the hero shot and finally saw what she meant. The model’s skin had this greenish, underwater cast that I had completely stopped seeing after two hours staring at the same image.

Aperture, Dodge & Burn, and the Lighting Truth Every Portrait Retoucher Needs to Hear

Aperture, Dodge & Burn, and the Lighting Truth Every Portrait Retoucher Needs to Hear

There’s a specific kind of frustration that comes from receiving a portrait file where the photographer made choices you now have to work around in post. Muddy backgrounds competing with the subject. A face that’s half-lit because the aperture was set too wide on a two-person shot. Or skin tones so blown out from compensating for a dark environment that no amount of careful retouching will save the highlight detail. I’ve been on the receiving end of all of these, and after years of freelancing for beauty brands, I can tell you that understanding the relationship between aperture, light, and skin texture is just as important for retouchers as it is for photographers.

Dodge & Burn Without Destroying Your Image: A Non-Destructive Photoshop Walkthrough

Dodge & Burn Without Destroying Your Image: A Non-Destructive Photoshop Walkthrough

There’s a version of my early retouching work that I keep buried in a hard drive somewhere as a reminder. Flat skin, blown-out highlights, shadows crushed into muddy gray. I thought I was fixing photos. I was actually just smashing the light out of them. The turning point wasn’t one big revelation - it was learning that dodging and burning didn’t have to be permanent, and that you could teach Photoshop to apply tonal changes only where they actually made sense.

Portrait Retouching & Color Editing: A Step-by-Step Breakdown of Jessica Kobeissi's Workflow

Portrait Retouching & Color Editing: A Step-by-Step Breakdown of Jessica Kobeissi's Workflow

There’s a particular kind of client feedback that stays with you. Mine came early in my retouching career, when someone looked at a set of beauty portraits I’d delivered and described the skin as “plastic-looking.” She wasn’t wrong. I’d been over-smoothing, obliterating texture, and chasing a version of perfection that looked nothing like a real human face. That comment sent me down a long road of studying how working professionals actually approach skin and color, and it’s why I keep coming back to tutorials from photographers who shoot beauty and fashion at a high level.

High-Pass Dodge and Burn: The Photoshop Shortcut That Changed How I Work

High-Pass Dodge and Burn: The Photoshop Shortcut That Changed How I Work

Dodge and burn is one of those techniques that separates a flat edit from a photograph that actually breathes. I came to it the long way, spending months painting on Curves adjustment layers with a soft brush, trying to coax dimension out of skin that just looked… dull. It worked, eventually, but it was slow, fiddly, and not something I could realistically fit into a commercial retouching workflow where a client is waiting on 40 beauty shots.

Canon vs Sony Skin Tones: What the Difference Actually Looks Like (And How to Fix It)

Canon vs Sony Skin Tones: What the Difference Actually Looks Like (And How to Fix It)

Every few months I get a file from a photographer who has just switched camera systems, and they cannot figure out why their skin tones look off. The exposure is fine, the white balance reads correct, but something about the color just feels wrong. Before I learned to diagnose this properly, I would chase it around in the HSL panel for twenty minutes and usually make things worse. What I needed was a clear, side-by-side explanation of what these sensors are actually doing to color, not just vague reassurances that “every camera renders differently.

How to Retouch a Levitation Photo in Photoshop: A Layer Masking Walkthrough

How to Retouch a Levitation Photo in Photoshop: A Layer Masking Walkthrough

Every once in a while a technique lands in your lap that solves a problem you didn’t even know you’d been working around. For me, levitation compositing was one of those. I’d seen floating-subject shots all over editorial mood boards and assumed they required either a very brave model or very expensive rigging. Turns out, the magic happens almost entirely in post - and the approach is more methodical than mysterious.

Stop Guessing at Skin Tones: A Photoshop Selective Color Walkthrough That Actually Works

Stop Guessing at Skin Tones: A Photoshop Selective Color Walkthrough That Actually Works

Skin color correction is one of those things that looks simple until you’re forty minutes into a job, your client is waiting, and the model’s complexion has somehow turned the color of old guacamole. I spent the first two years of my retouching career relying on intuition and a lot of undoing, nudging curves until something felt right. It worked, sort of, but it was slow and inconsistent. The technique I’m walking through today changed that completely.